I had the great pleasure earlier this month to be interviewed by Marjorie Alexander for the incredible A Sustainable Mind podcast. Marjorie highlights people who are doing some truly inspiring work around issues of ecology, food waste, reusable energy, sustainable living and a myriad of other matters that all relate very closely to the issues that are close to my heart. I feel honored to be included amongst these folks who are contributing in a much more direct way to facing and resolving what is one of the great crises of our times.
It is my firm belief that living more simply and in greater harmony with nature is one of the most important and personal steps we can take in life. I urge you to think about the sustainability of your actions every time you collect wild food, to understand and acknowledge the relationships of the plants and wildlife around you and make decisions based on the needs of the community at large. Remember you are part of a much larger whole.
Too often in foraging literature, the focus is on what you can eat. I would like to encourage you to think more deeply about what you should eat.
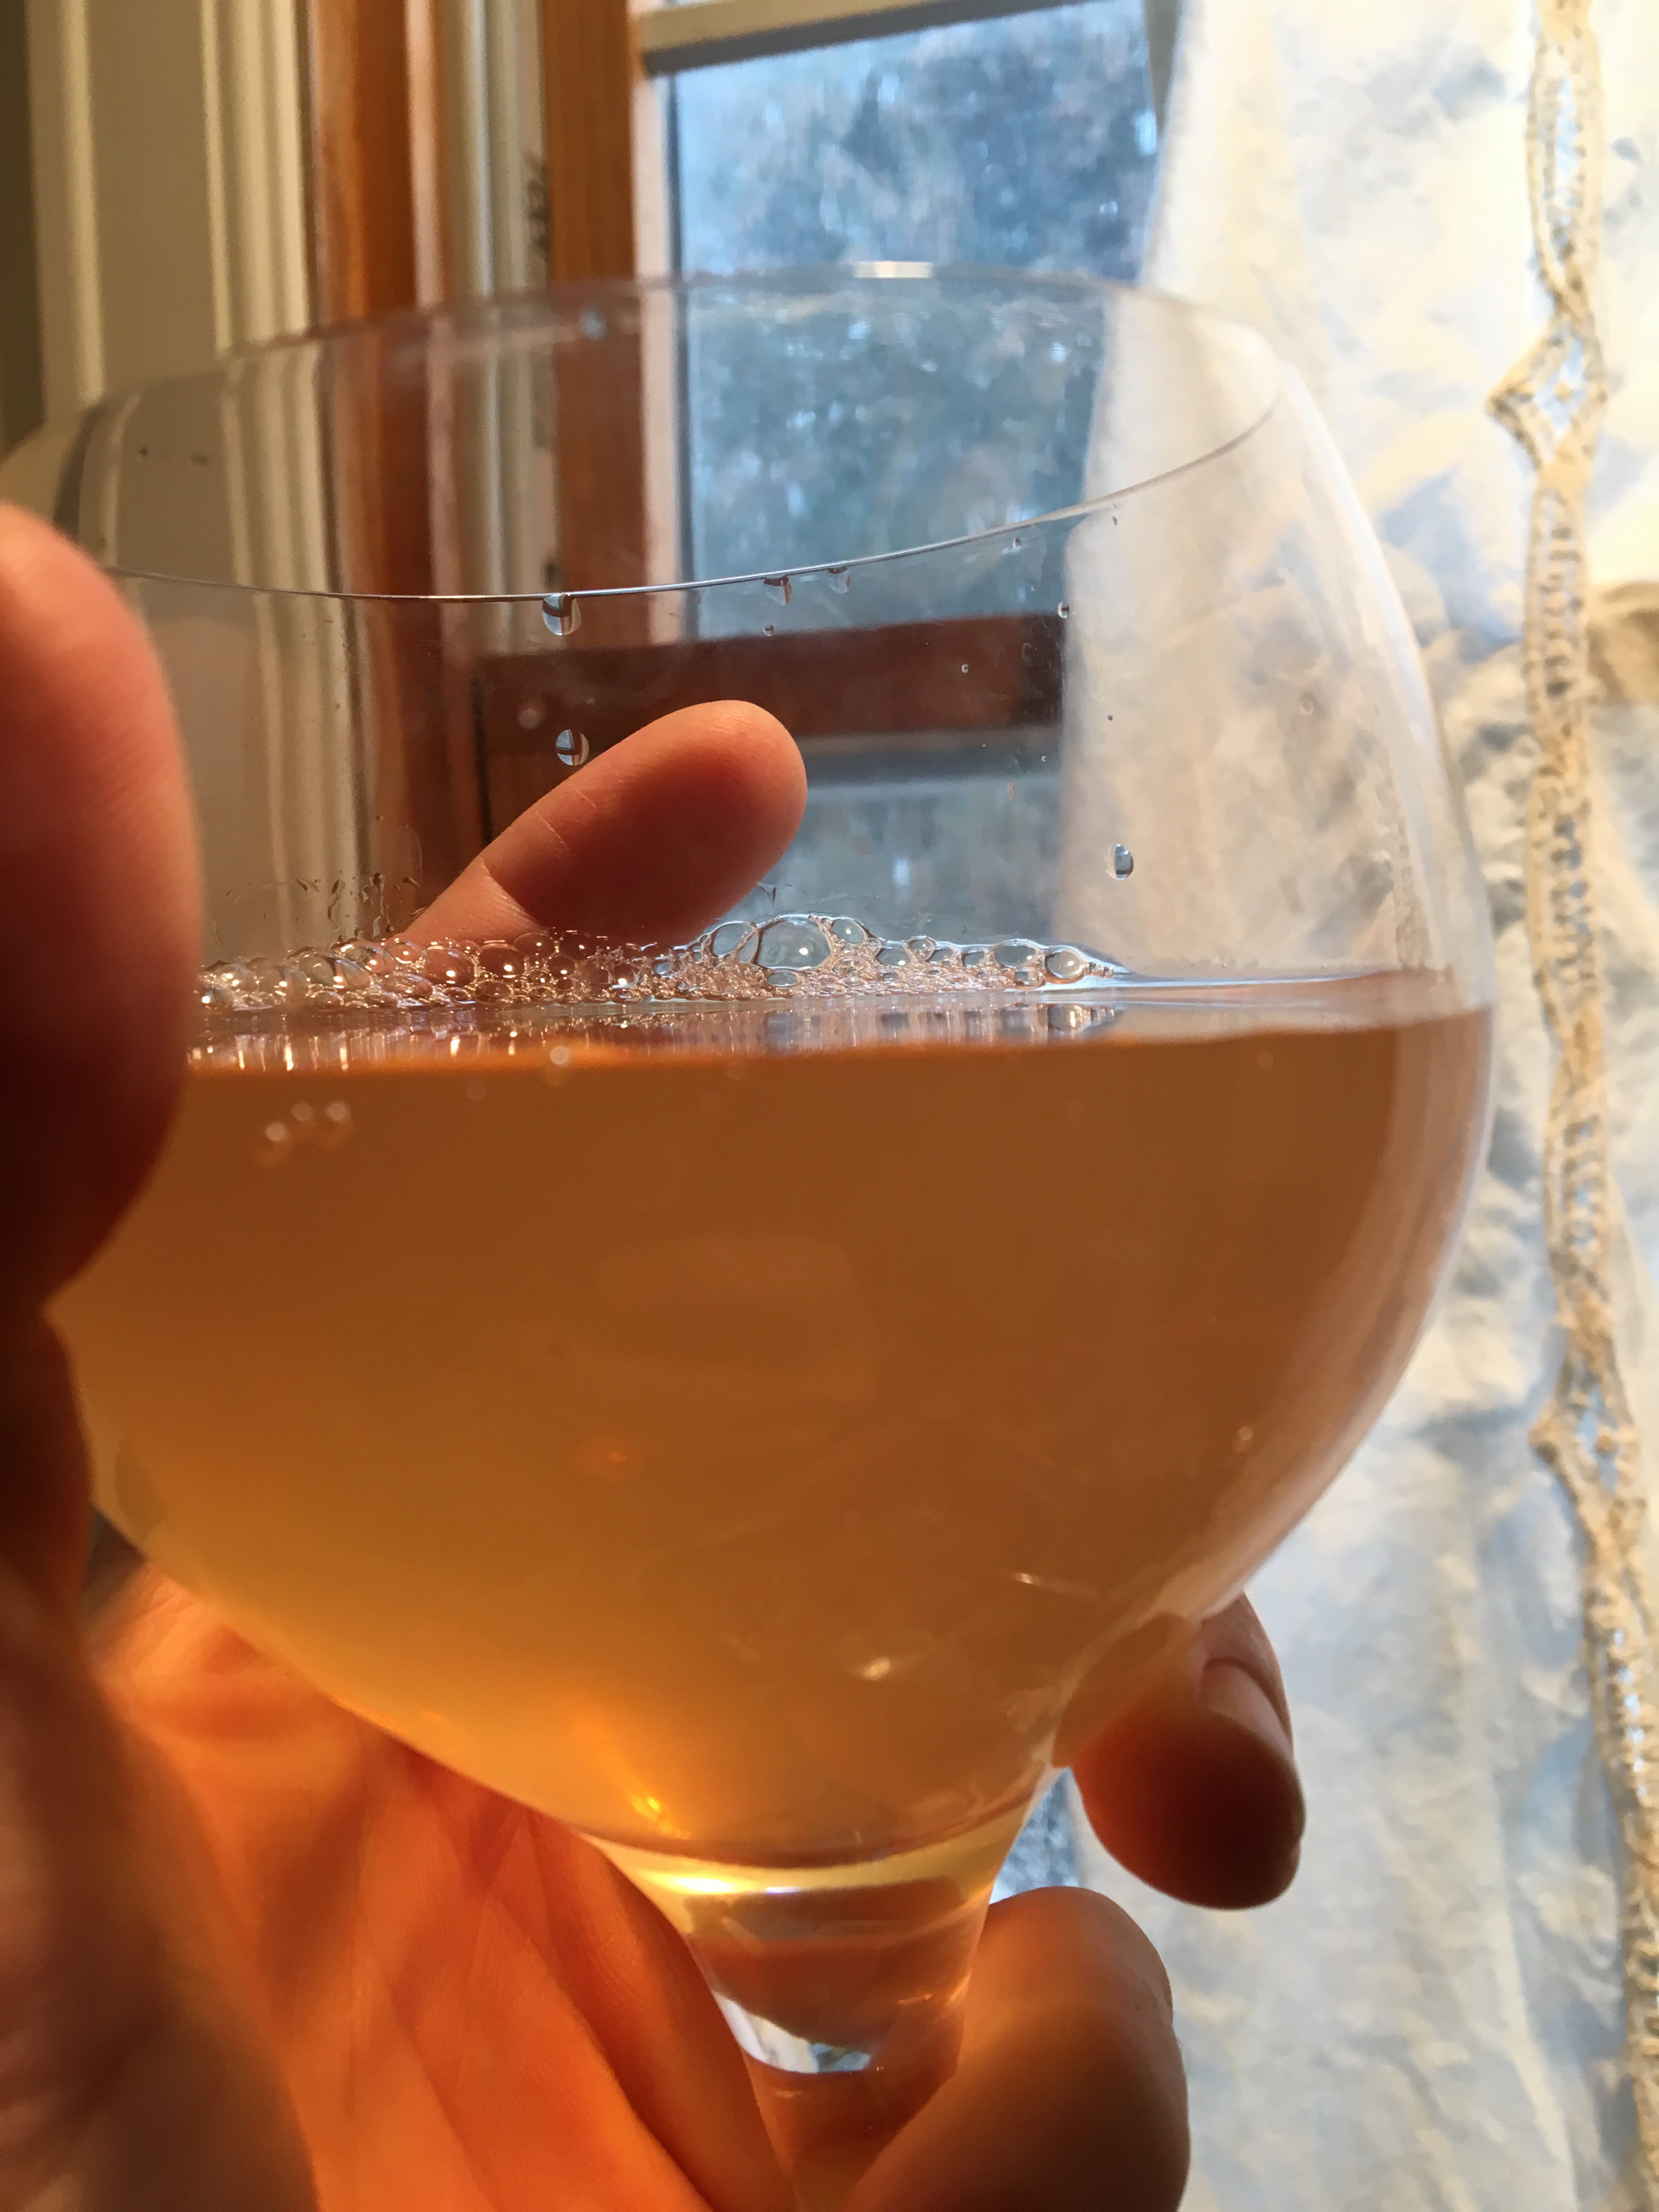
My apologies for the pun, but this is seriously the best way to make a Pine Needle tea, or for that matter a tea from any member of the Pine Family. After many long and frustratingly-erratic results making a pine tea on the stovetop, I began to use my slow-cooker to optimize results. This recipe relies on a larger quantity of needles that usually called for in pine tea recipes, which means you needn’t spend a lot of time cutting them into tiny pieces.
I STRONGLY recommend you use a crock pot or slow-cooker for this, if you have one. It more or less eliminates the chance of human error and more importantly it ensures you don’t lose an ounce of Vitamin C from the preparation. The flavor is deep, strong, and naturally sweet and can be not only drunk as a tea but used in secondary ferments of kombucha, turned into a syrup or sorbetto, or made into a brine in which to ferment vegetables. Since first using the slow-cooker for pine needle tea I now use it exclusively.
Place in slow cooker or stock pot :
200 g or 6 oz pine needles or fir or spruce or hemlock (Tsuga) branches (a small basketful)
3 L or 12 cups water
Set heat to High if using slow cooker. Bring to just short of a boil if using a stock pot. DO NOT BOIL.
Cover and maintain over as high a heat as possible without boiling for 4-8 hours in a slow cooker, 1-2 hours on stovetop. Shut off the slow cooker or remove the pot from the heat and allow the needles to rest in the tea for several hours or overnight. Strain the tea through a cheesecloth.
You may notice that if the mixture has rested overnight there is some small level of fermentation activity. This is ideal if adding the mixture to a kombucha secondary ferment, using as a pickling medium, or turning it into wine. Simply refrigerate the tea in order to keep fermentation from proceeding any further.
To make a pickling brine from this tea, simply add salt in a ratio of 50 g / Liter of finished tea, bring the mixture to a low heat and stir the salt until dissolved. To make a syrup, do the same but using a ratio of either 1:1 or 1/2:1 sugar to tea.
Hickory syrup is golden, smoky, beautiful and has legs for days…
The Hickory is a characteristically American tree, an irreplaceable member of the great deciduous forests of our continent. It is most known to those with only a casual interest in native trees as the genus which contains the Pecan (Carya illinoinensis), but there are a number of species of Hickory tree which are found, not commonly, but regularly in the woodlands of the Eastern half of the US. The mature stage of eastern hardwood forests is commonly referred to as the “oak-hickory forest,” underscoring the importance of this native tree.
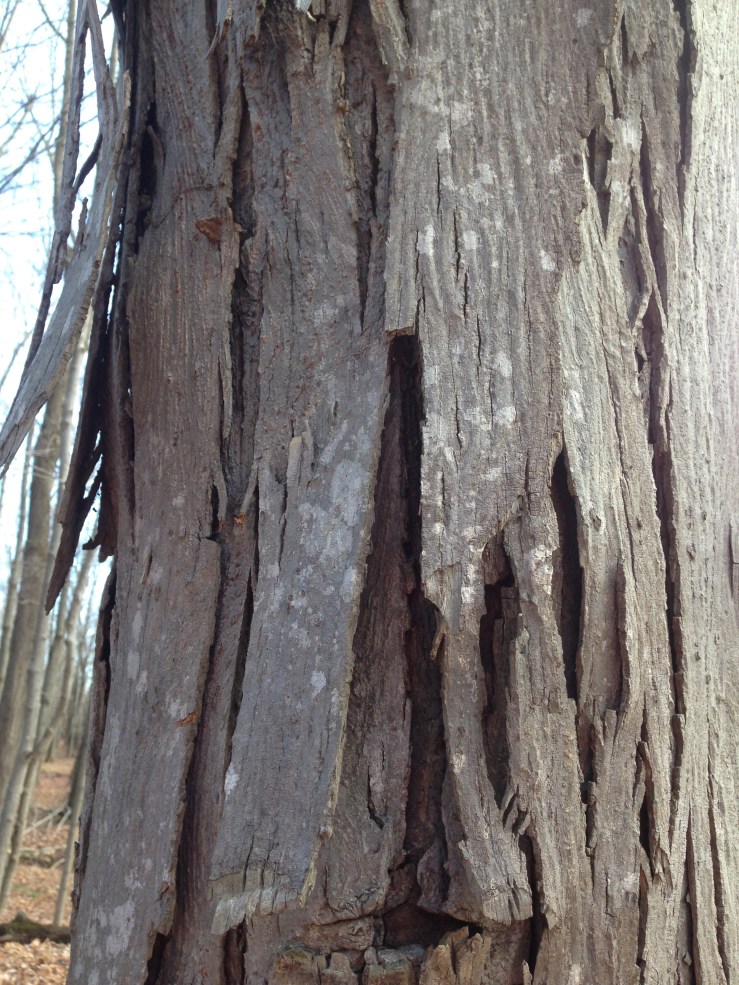
Wild food gatherers will of course be familiar with the Hickory in the form of its edible nutmeats, gathered in the autumn as the nuts drop in their (usually) smooth green and segmented outer shells. While all hickory nuts are technically edible, not all species conform to what we would consider palatable. Within that window of taste, there are also variances from tree to tree. One of the most widely distributed and appreciated for both beauty and flavor is the Shagbark Hickory, Carya ovata.
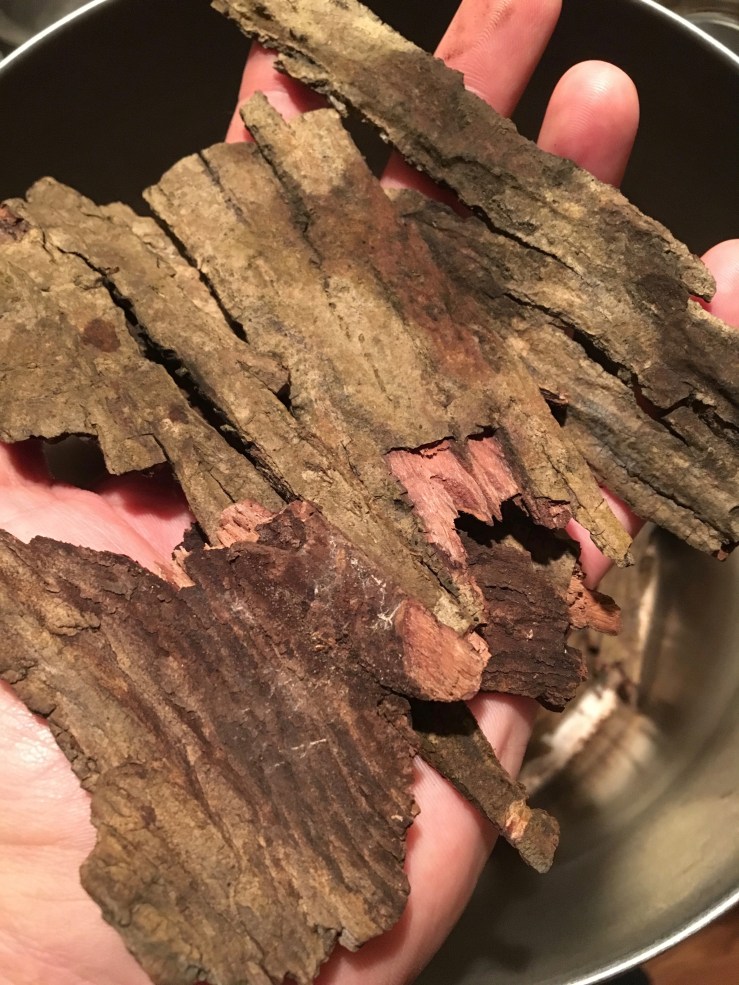
Mature shagbark hickory with its characteristic “shaggy” strips of exfoliated bark.
In addition to providing delicious nuts, the shagbark hickory has a bark which can be used to add flavor to smoked or grilled foods, in the fashion of other hardwoods such as apple, cherry and mesquite. Excitingly for our purposes here, it can also be used more directly, in the form of a tea which can be turned into a sugar syrup. This product of the hickory is often likened to maple syrup, but it is different in some fundamental ways. First of all, maple syrup is a natural product which is extracted from the natural sap of trees by a somewhat laborious process. Second of all, maple syrup tastes quite different from hickory syrup. So perhaps not such a great comparison. In terms of use, however, there is a certain similarity – hickory syrup can be substituted for maple syrup in both direct use and in recipes, with of course the knowledge that the flavor will be that of hickory, not maple.
I quite like maple syrup. I don’t wish to demean it in any way. But, to me, hickory syrup tastes better, and is far more interesting culinarily. Those who find maple syrup good but somewhat cloying may agree with me. Hickory syrup has an incomparable smoky, woodsy flavor that is a more complex than maple syrup, something which to my tastes makes it more useful for both sweet and savory recipes. Maple syrup is delicious, but hickory syrup is adventurous. The only flaw that I see is that the manufacture of hickory syrup relies on an outside product to sweeten it, in most cases cane sugar, which is of course an industrialized, tropical plant and carries with it a cost in terms of ecological impact. In its defense I will say that making hickory syrup is one of the best ways to use sugar, a product I generally avoid. And while the amount required is no more or less than one would use to make a simple syrup, the product is one that carries a huge amount of flavor in even small doses, especially when used in cooking and baked goods. Maple syrup is also quite expensive in terms of money if one buys it, and time if one makes it. Making hickory syrup is quick, simple and costs nothing more than the price of whatever amount of sugar one uses.
To produce hickory syrup, one first needs to locate a shagbark hickory tree. The shagbark is quite distinctive, having naturally exfoliated bark which hangs “shaggily” off the tree in large, easy to remove pieces (pictured above). This bark can be collected in any season, but I usually gather it in winter when other wild food options are reduced. First, I scout around the base of the trees I find to see if any strips have fallen to the ground. There is no direct harm done to the tree by removing its bark, but one does run the risk of exposing the inner bark to attack from insects (another reason to collect in winter). It also reduces the natural beauty of the tree, so I try always to take only a few strips from each tree and minimize the impact both ecologically and visually. It does not require a great quantity of bark to make a rich syrup, so I would recommend starting with just a few ounces and seeing how well you like it.
Toasted shagbark hickory bark, ready to be made into a syrup.
To prepare the syrup, you will want first to toast the bark in a low oven. This works on the same principle as dry-roasting spices before using them in a curry. The heat brings out flavors and aromas in the bark which would be less intense if the bark were not treated in this way. I have made hickory syrup without toasting it first, and it is perfectly serviceable, but not as deep in flavor. To toast the bark, place on a baking sheet in a low (under 200°) oven for 1-2 hours or a slightly hotter one (325°) for a half-hour or so. When I use the higher heat method I turn the bark halfway through. I’m not entirely sure that this is necessary, I am likely just being fussy.
Once the bark is toasted, allow it to cool and then prepare a tea from it. I generally use a ratio of 4-5 ounces of dry bark to 6 cups of water. Bring close to a boil, then cut the heat and allow the bark and water to simmer until the amount of water (now dark and flavorful) has been reduced to a third of its original amount. The amount of time this takes will vary greatly, so the best way to proceed is simply by measuring, reducing, and measuring again until one gets the liquid down to a third. I have prepared this tea with amounts as small as 2 oz of bark and as high as 1.5 lbs and found the general ratios to be effective in both small and large recipes. To make a practical, easily bottle-able amount the most usual proportion that I prepare is 8-10 oz. of bark to 12 cups of water, reduced down to 4 cups of tea. Avoid boiling, which will result in bitterness. It is perfectly acceptable (and perhaps beneficial) to allow the mixture to sit until cool, for several hours, or even overnight before straining the bark. When done, do not discard the strained bark. Instead, save it and use for additional flavor when grilling or smoking foods with hardwoods.
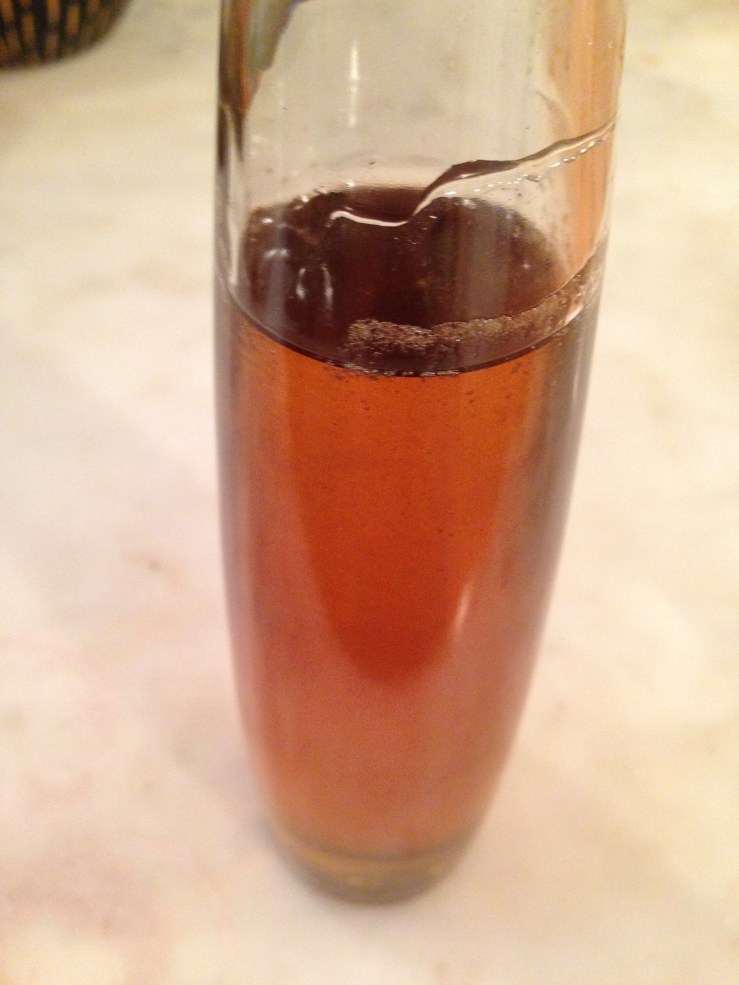
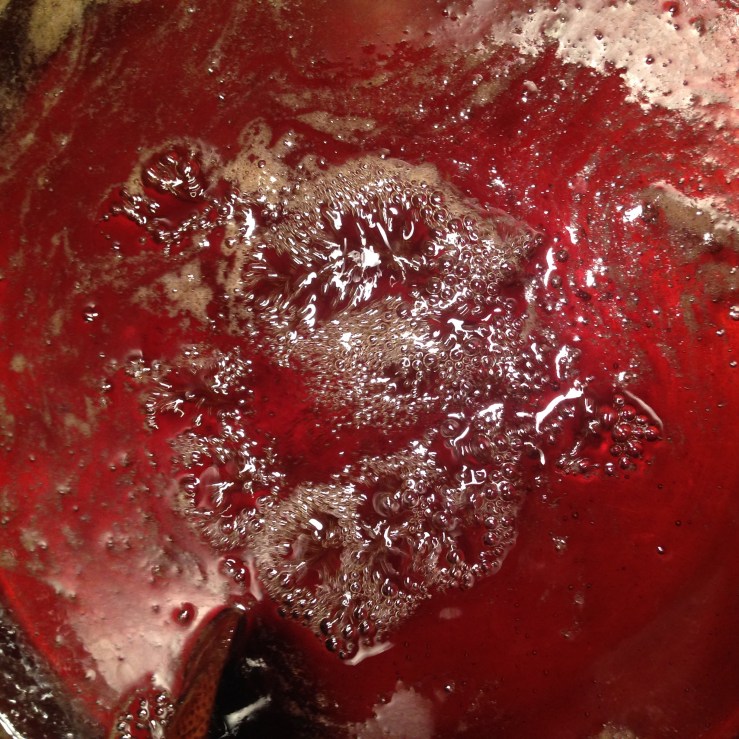
Hickory syrup being reduced. The color will vary from pale gold to reddish amber.
Next, you will want to add sugar. I prefer to use a proportion of 1 : 1 to make the basic hickory syrup, and then reduce it if I want a more concentrated and thick product (I usually refer to this as hickory glaze).
To make a hickory simple syrup, rather than a glaze, all one has to do is combine the sugar and tea over a low heat until the sugar dissolves. It is best to avoid stirring this mixture as it begins to get warm, as this will cause crystallization. This syrup will not be as thick as maple syrup, but is perfectly fine for most applications and is actually much better if you are going to add hickory syrup to drinks or use it in a recipe that will be cooked for any length of time.
Reducing the syrup to a glaze is more useful if it will be used to make salad dressings, added to dishes as a finishing touch, or poured over pancakes like maple syrup. I tend to reduce the syrup by anywhere from a quarter to a third, so going from a cup of hickory syrup to 2/3-3/4 cup of hickory glaze. I have found that reducing it much further results in a product that solidifies at room temperature. There is nothing much wrong with this thick syrup, it just requires heating in a water bath to become fluid again.
As to the uses of either hickory syrup or glaze, the only limit is one’s imagination. Of course it works wonderfully as a substitute for maple syrup, but don’t let your experimentation end there. Hickory syrup makes an amazing addition to various mixed drinks and cocktails, alcoholic or not, and is an ideal sweetener for lemonade or sumac-ade, adding its characteristic smoky flavor to the mix. It’s fantastic when substituted for honey or maple syrup in baked goods, makes a great base for vinaigrettes and yogurt dressings, and is inspiring drizzled on homemade ice creams and frozen yogurts. The combination of smokiness and sweetness means it pairs excellently with meats, especially pork sausages, bacon, and fried chicken. My favorite way to use it may be as a finishing touch to bitter greens, of which I eat quite a lot. And it almost goes without saying that it is an awesome pancake syrup.
It’s extraordinarily easy to identify shagbark hickory and make this syrup – there is an added bonus to collecting this bark in the winter, as well. Identifying hickory trees now means one can be there in the fall, when their nuts are available, for the shagbark hickory is one of the consummate wild foods, under appreciated in our area where they are so naturally abundant.
Earlier this autumn, I wrote a few posts on Instagram (@mallorylodonnell) about processing acorns using the hot-water leaching method. I felt they were worth repeating on here, especially as a mild season has meant there are still viable acorns out there to collect. In any case, here is my hot-water method for leaching acorns of their tannins.
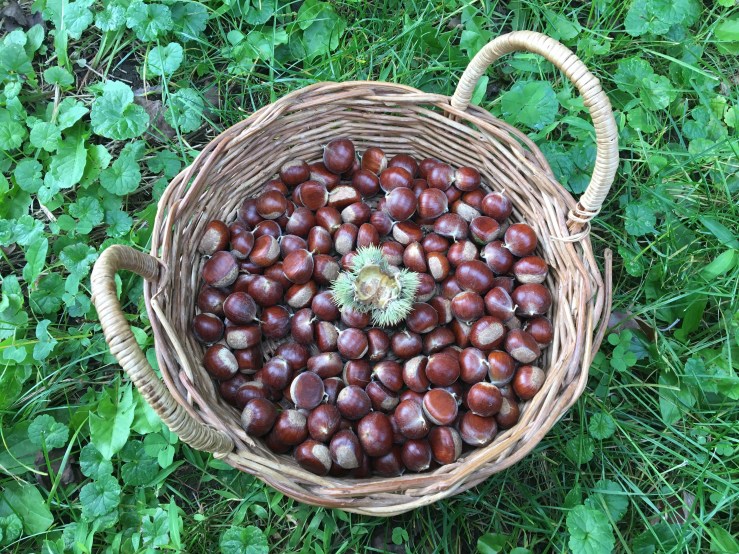
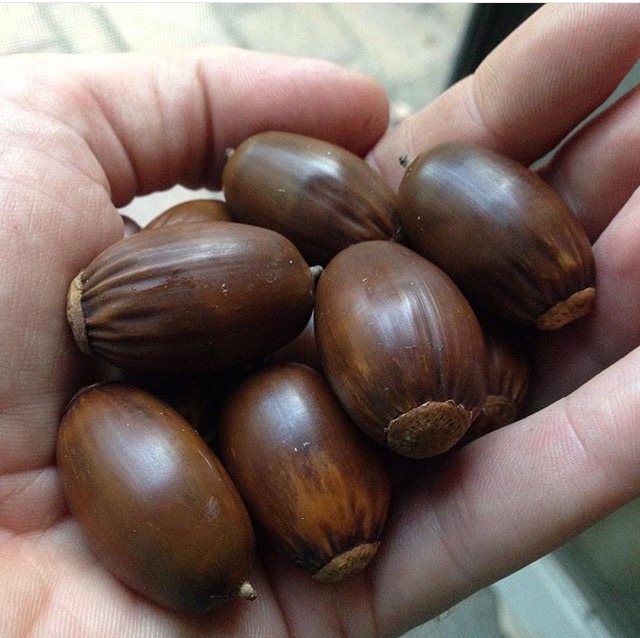
First, you must collect your acorns. Choose freshly-dropped acorns that look clean and feel firm and heavy for their size. Avoid acorns with one or more of the following characteristics : a white patina, green or yellow coloring, caps still attached, holes (caused by the exit, not entrance, of a grub), or excessive dark or bright coloration. Sprouted acorns are perfectly acceptable. While there is a definite variance in bitterness between white oak group and red oak group acorns, the most important concern for collecting acorns is their freshness and quality. Size matters too – bigger acorns mean less work. For to be sure, there is much work ahead. First wash the acorns, then cover them with water – those that float are to be discarded.
The second step is shelling the acorns. I am completely convinced I have the best method for doing this. I heat up a cast iron pan with one layer of acorns until they are fairly warm and starting to discolor (from brown to an orange-brown). Then I remove the pan from the heat and crush each acorn the way I would a fat clove of garlic, with the base of my hand pushing down on the base of my knife pushing down on an acorn. The acorn will split naturally in two, and if you’ve steamed it enough in the cast iron pan the dark brown film (like the skin of an almond) around the acorn will come off with the shell. Discard or cut the bad bits off of any imperfect acorns such as those with small holes or black spots. Acorns can also be shelled after being briefly blanched in boiling water or even without any preparation, but I find mine to be the easiest and fastest method.
The third step is leaching the acorns. This is necessary to remove tannins from the acorns for both health and flavor considerations. There are hot and cold methods, we will cover the hot one here.
Fill your largest pot with water and bring to a boil. At the same time bring a smaller pot to a boil. I usually fill the second pot about halfway. Add your viable, peeled acorns (steps 1 and 2) to the second pot and boil until the water becomes quite dark (Euell Gibbons says “tea-colored” but think black tea). Drain the acorns. Do not wash the acorns or clean them with cold water, but you can let them sit between rounds of boiling. Put the drained acorns in the now empty second pot and add some boiling water from the large first pot. I try not to use a huge quantity of water for each round of this, maybe twice as much as the amount of acorns. Repeat this process until the acorns are a chocolate brown and have no bitterness in their taste. I usually find this takes around 3-5 changes of water for sweeter acorns and usually a few more for the bitterest ones. Generally speaking white oaks and live oaks are sweeter, red and black oaks more bitter.
Once the acorns are leached, you may chop or use whole in any way you would use nuts. Bear in mind, they contain less oil than tree nuts, so they will be somewhat drier and crumblier. You can also grind them to a meal (or flour, if you will) and mix with other meals or flours in baked goods (remembering that acorn meal will have no gluten). The whole or chopped nuts or flour can also be roasted or sun dried, the acorns will turn nearly black if one does this.
I encourage everyone who is interested in wild food to prepare acorns. It is hard work but absolutely worth it. While preparing them you may wish to consider the many generations of humanity for whom this was a necessary activity – acorns were a staple food long before cultivated rice and wheat. But most of all they taste great and have a flavor which has no real substitute.
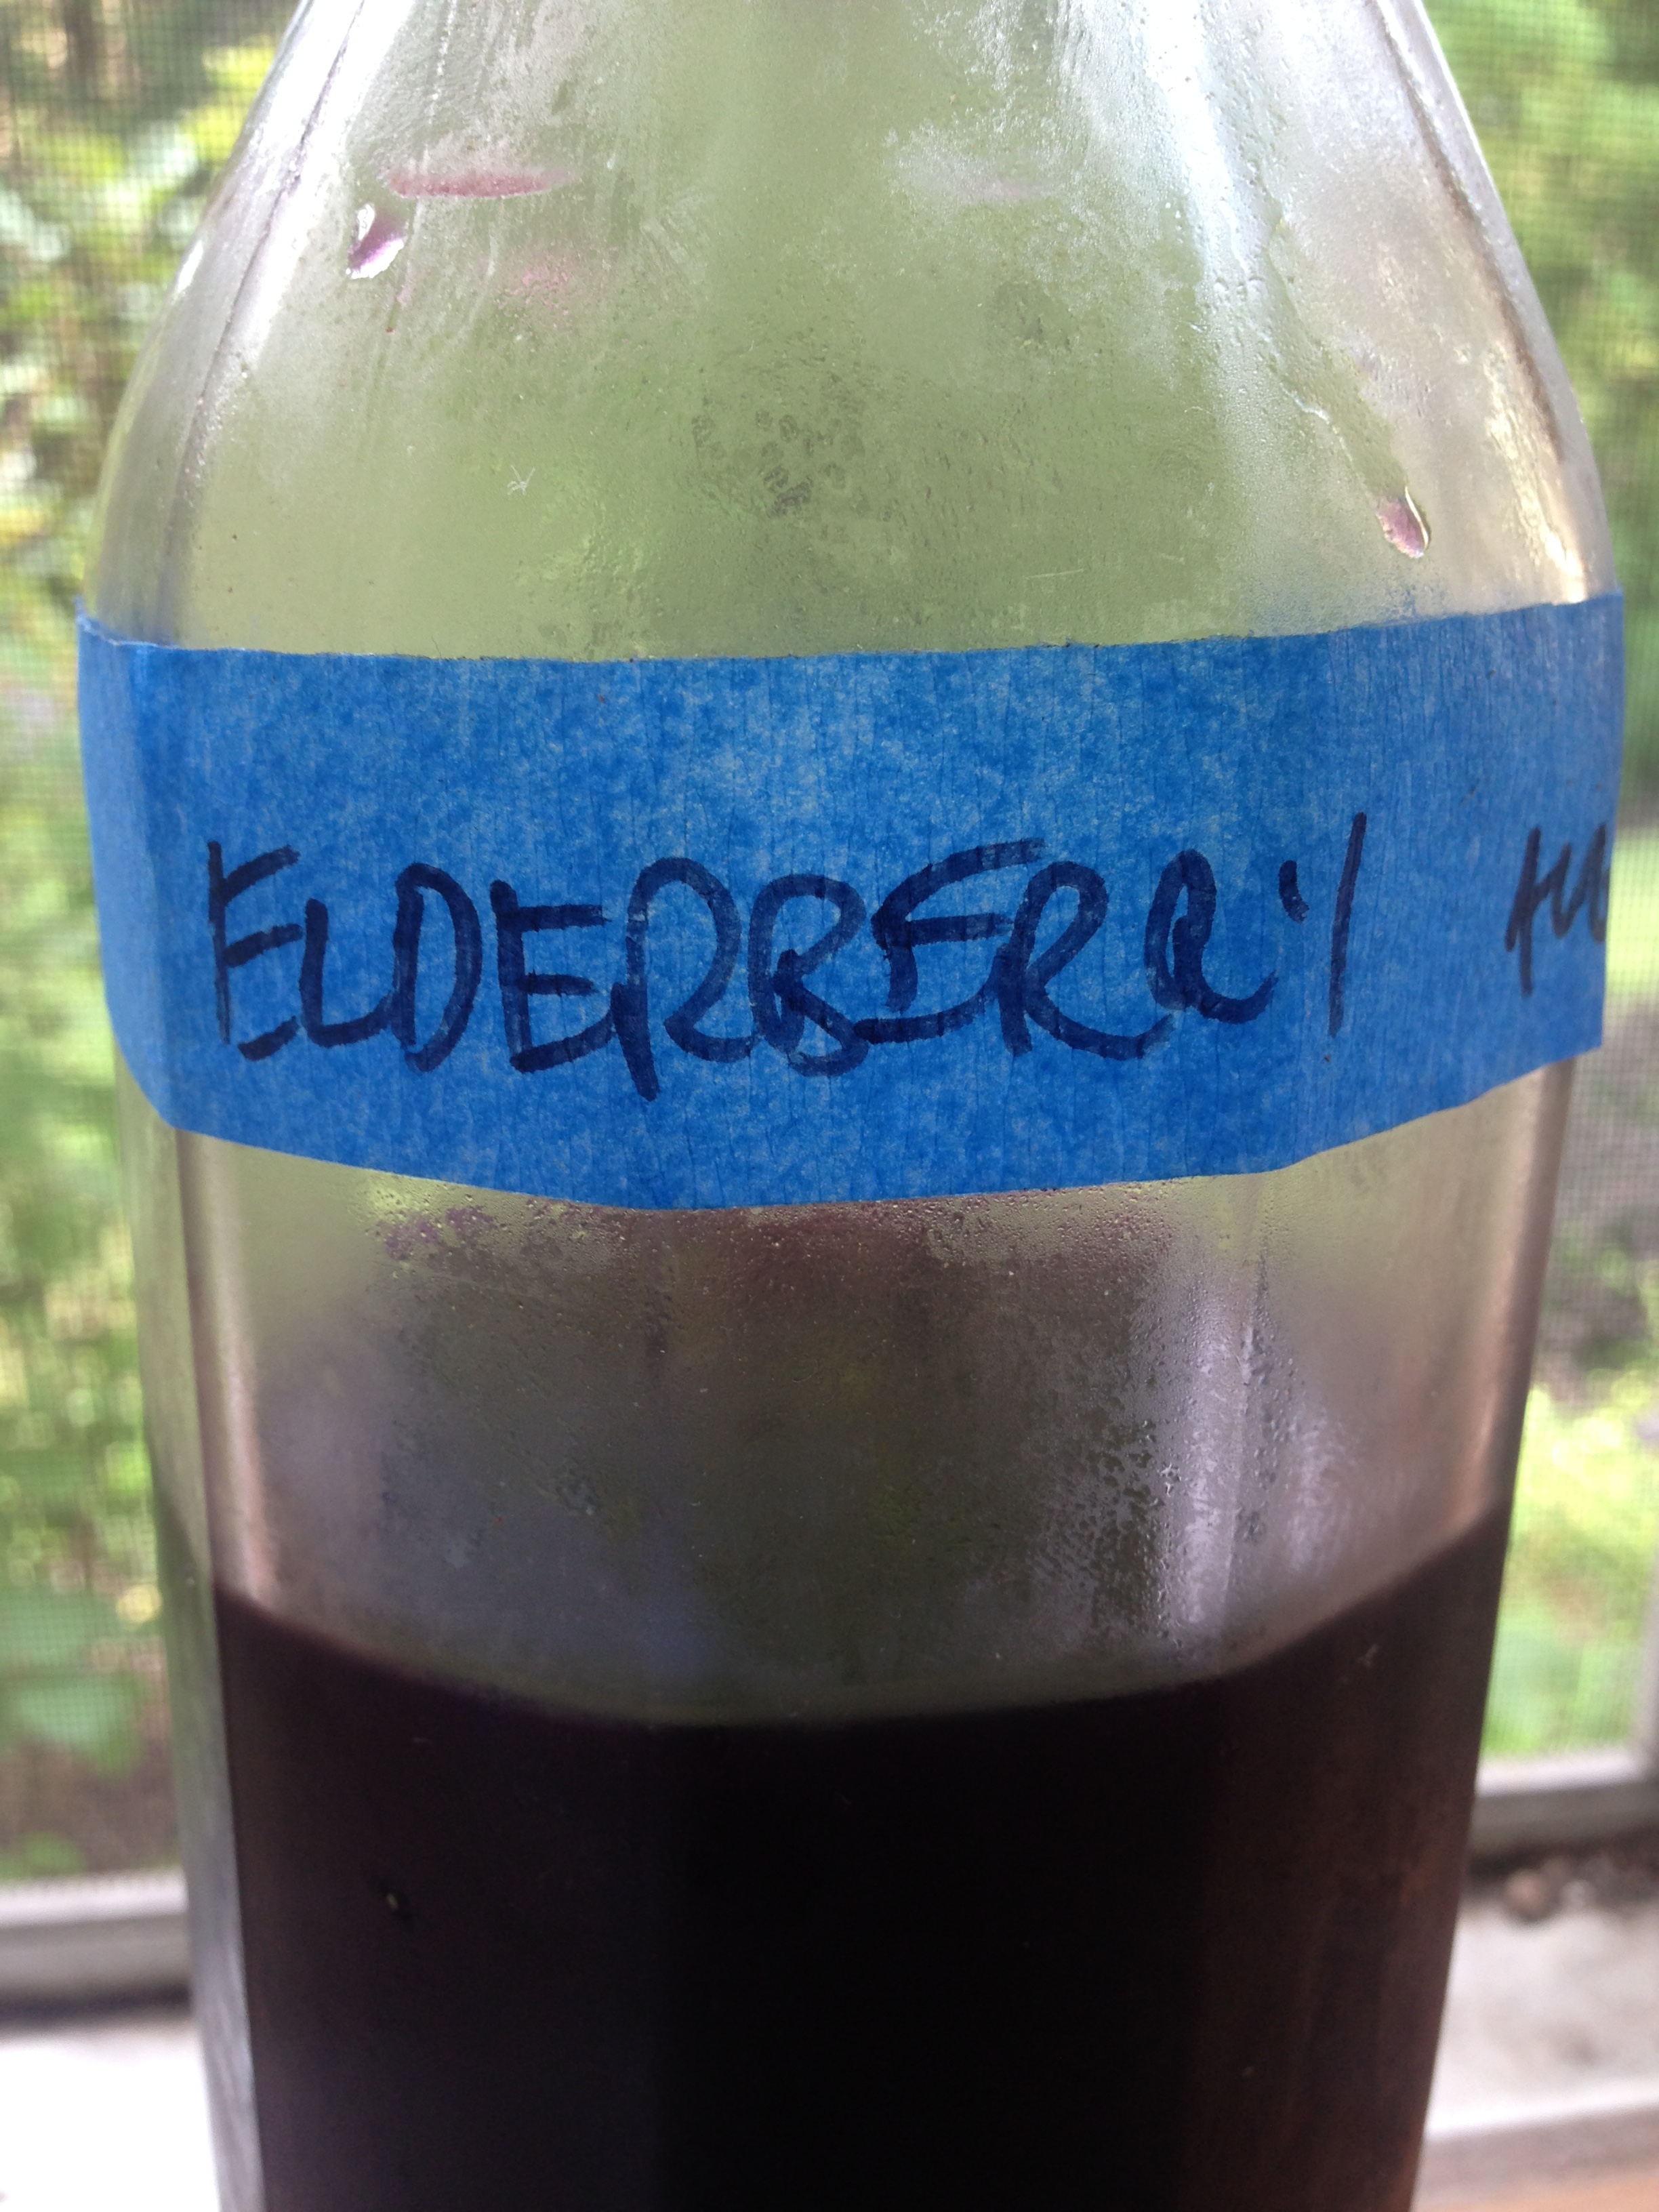
1/2 lb. elderberries (washed, still attached to stalks)
1/2 cup sugar
1 cup water
Bring to a boil, crushing berries and sugar together. When the berries are smashed and the liquid begins to boil, cut heat, removing from burner if necessary.
Add :
2 1/2 cups sugar
4 cups water
Bring to a boil, then cut to a simmer.
Simmer for a half hour, then remove from heat, cover, and allow to sit for eight hours or overnight.
Crush again and strain all liquids through a cheesecloth into a syrup bottle.
Keep refrigerated.
Use as a base for sodas, dessert sauces, granitas, etc. Excellent combined in preparations with strong spices and herbs such as spicebush, black cardamom, ginger, wild ginger, shiso, monarda, cinnamon, star anise. Extremely refreshing on its own, with an almost perfect balance of sweet and tart.
1/2 oz turmeric root, peeled and sliced into a few long strips (optional, can use turmeric powder instead)
1 tsp whole black peppercorns
1 tsp whole yellow or black mustard seed
1/2 tsp whole pieces of vietnamese cinnamon
1 star anise, broken up
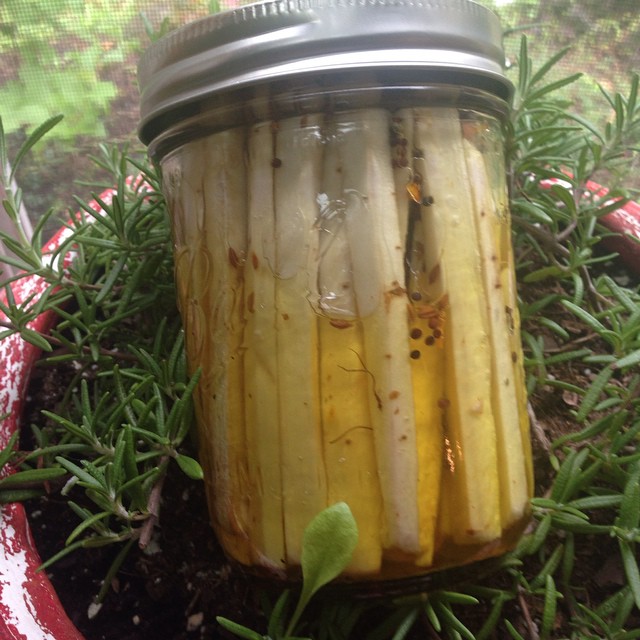
Fill with peeled burdock batons : cut batons to the height of the jar (allowing room for the spices and headspace) and about half as thick around as a pencil. Pack batons into jar until you cannot fit any more. Keep all the batons vertical. Trim any that stick out too far. This should require around 3/4 of a pound to a pound of burdock root.
Heat in a small saucepan until the sugar and salt are dissolved :
1/2 cup seasoned rice vinegar
2 tsp sugar
1 tsp salt
When dissolved and the vinegar is still hot, pour into the filled jar. Allow to cool, then cover and refrigerate. Add more seasoned rice vinegar as needed to cover the batons.
This will be ready to eat when cool, but tastiest after at least 24 hours. It should last several weeks.
This can be made with either wild burdock root or the cultivated kind sometimes found in asian markets.
When it comes to enjoyment or dislike of various flavors, no two people will ever completely resonate. For each of us, the answer to whether a particular food (wild or domesticated) is edible, palatable or actively distasteful is always going to be different.
Wild plants place us in a particularly easy to resolve area of this conversation. If something is technically edible but we don’t enjoy it, we leave it uncollected for those who do. For example, I actively dislike the berries of the wildly invasive Japanese barberry. I sincerely doubt that a time will come in my life when I will need this overwintering berry to survive. But if I ever did, you can bet that I would regard them as palatable. And then their sheer abundance would then be a blessing rather than a curse.
So by “palatable” in a wild plants context we are usually indicating a plant we aren’t interested in collecting. The distinction is an important one to bear in mind when studying and learning new plants and mushrooms because it often keeps us from over-harvesting or attempting crazy, time-intensive kitchen preparations trying to properly cook something we’ve learned is “edible.” It’s another reason why multiple sourcing any wild plant or mushroom is so very critical. In general, one will begin to get a sense of the limitations of using or preparing one’s catch by the widespread consensus on whether something is edible or merely palatable.
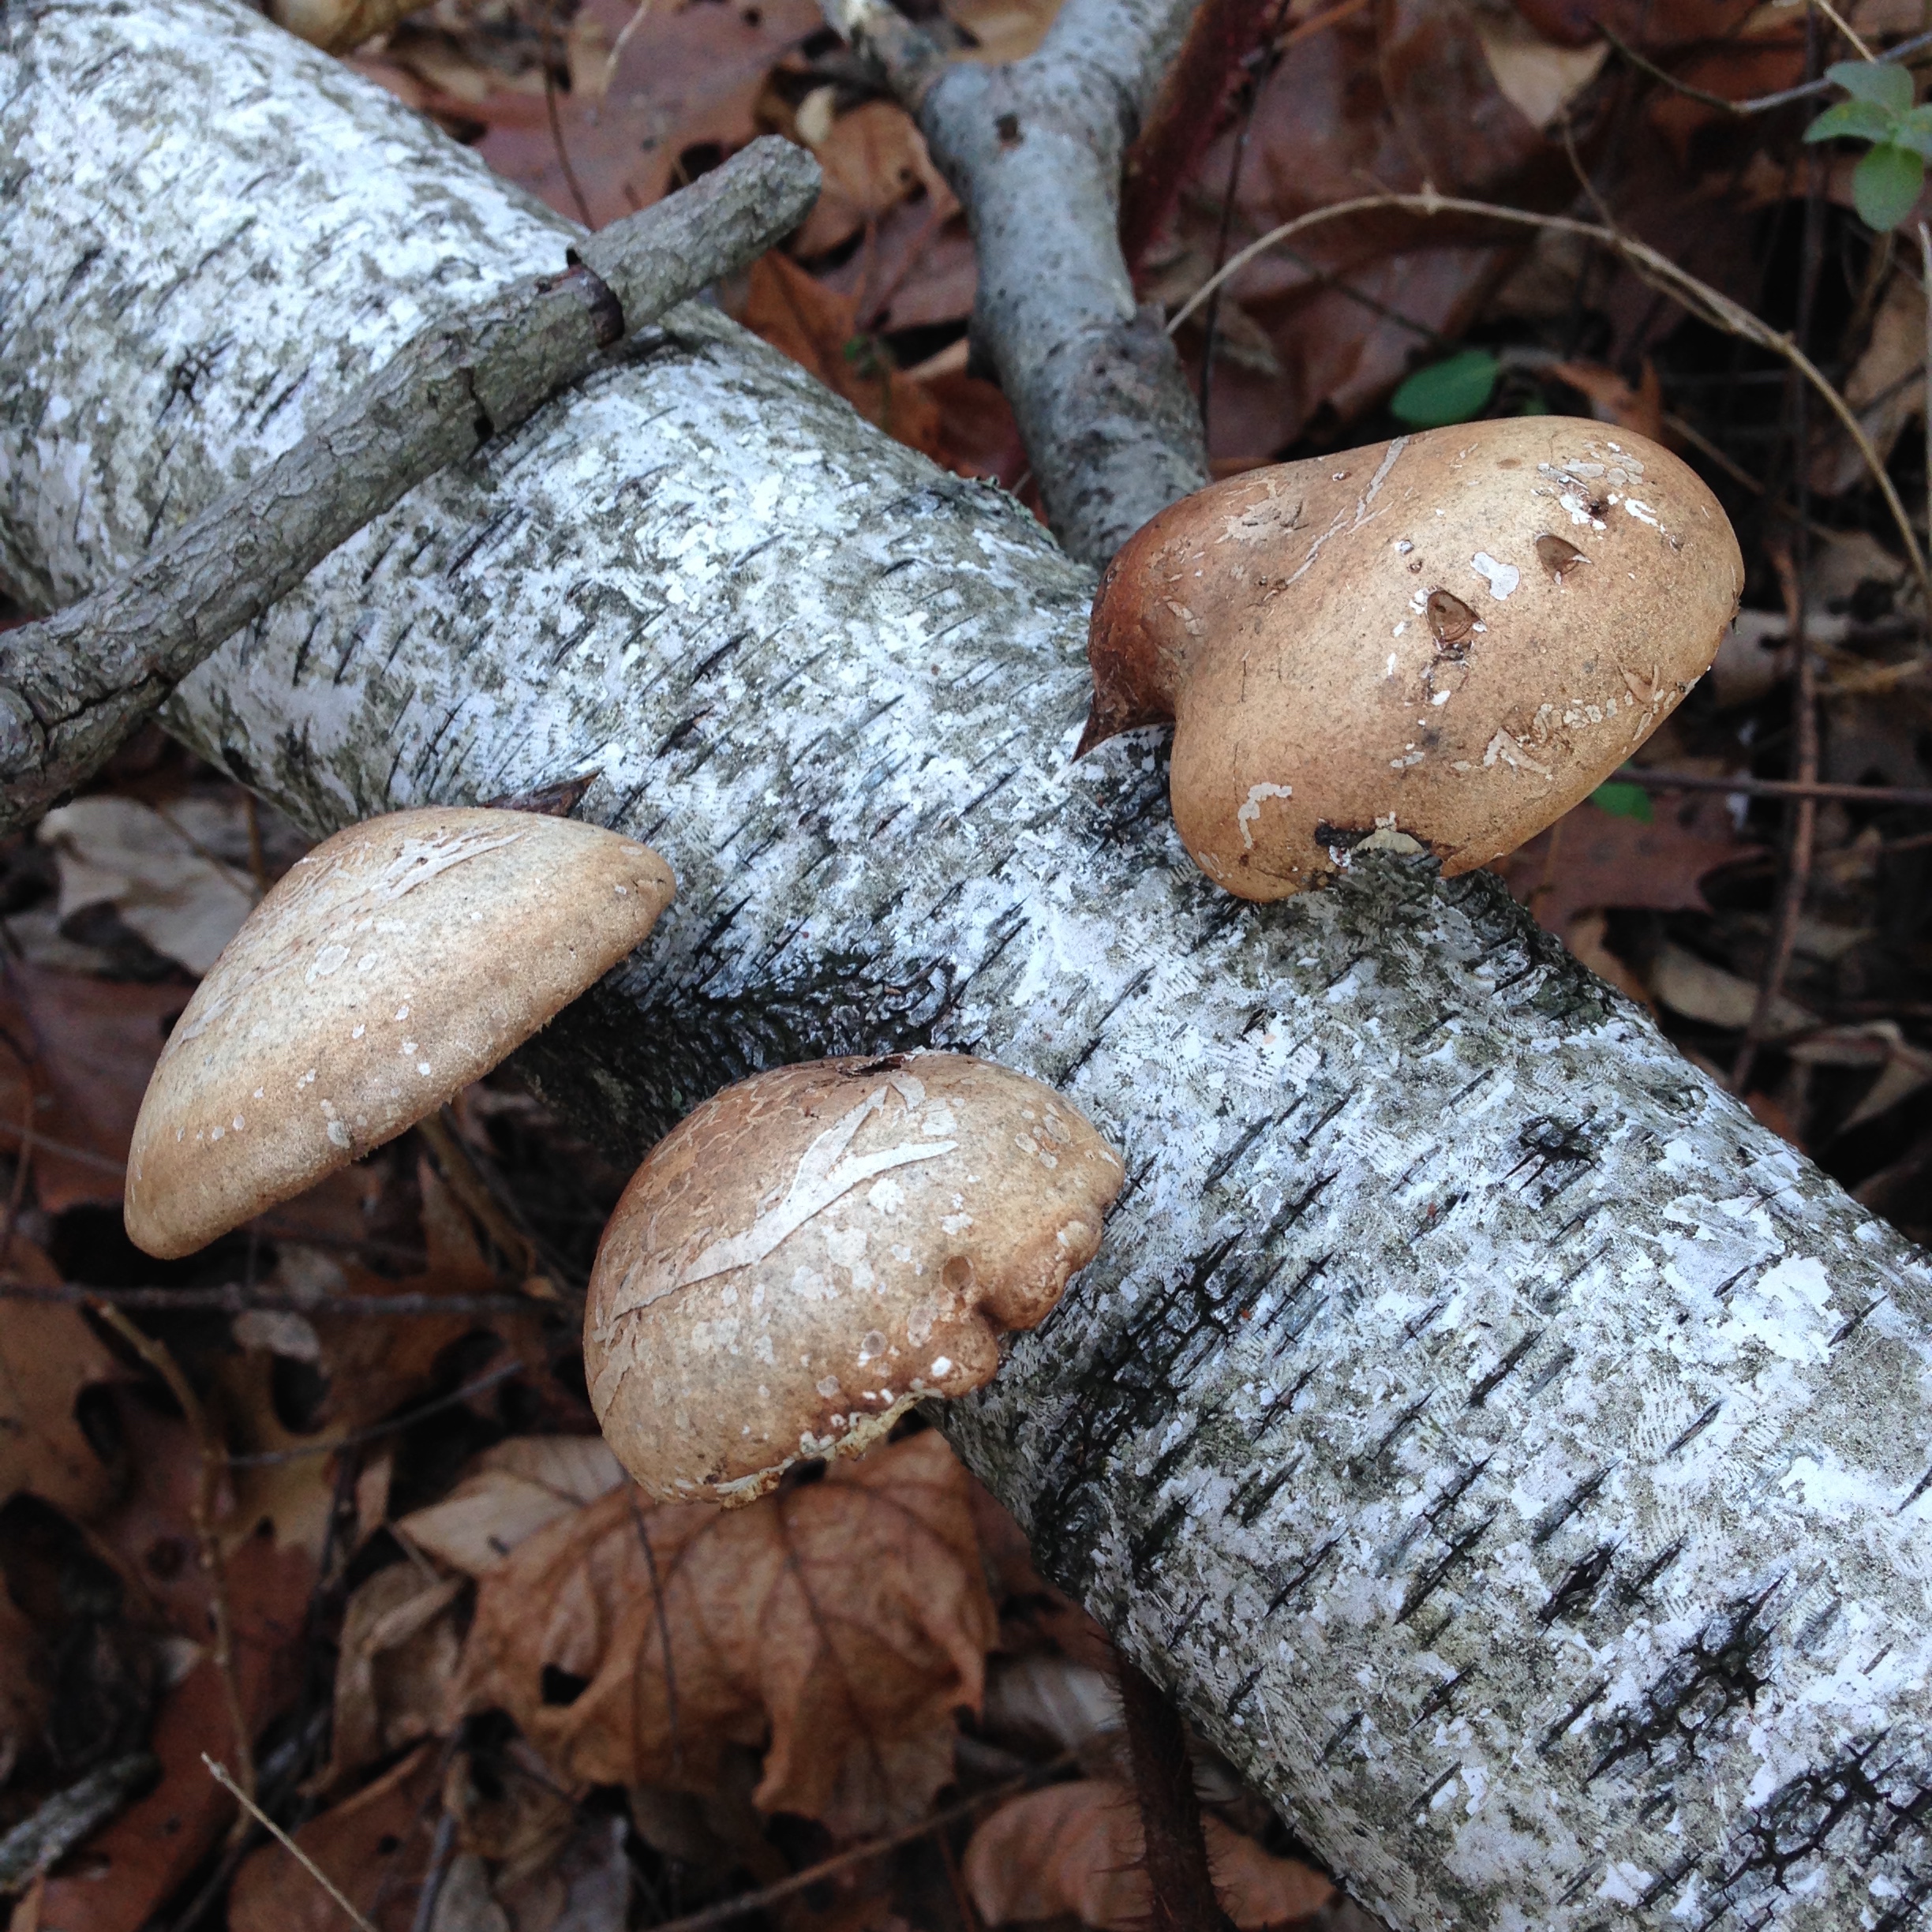
Into the latter category one will often find mushrooms and plants whose use is classified as “technically edible” or “medicinal.” The birch polypore mushroom (Piptoporus betulinus, pictured above) could be considered both. It’s an abundant late fall to winter mushroom in our area and can be used to make a tea for drinking or a broth for cooking. Technically, I could probably figure out a way to reduce its spongy, dense body into something that could pass through my body. But it would require such an expenditure of energy that it’s unlikely I’ll ever conduct the experiment. I’m content with steeping and infusing it, where it’s neither palatable nor distasteful but nicely bitter and useful for cooking and health.
When does an otherwise excellent edible become merely palatable? Beyond matters of taste, all foods require proper preparation to be delicious rather than simply digestible. I’m pretty sure we’ve all had (and made) a tasteless potato at some point in our lives, but then we discover how to cook them. The same is true of wild plants–each new ingredient must be learned on its’ own. It is at this point that comparisons to domesticated plants and cooking directions such as “prepare like asparagus” become ineffectual. One must learn to prepare nettles like nettles, not like spinach. Needless to say, the proper preparation is especially important to bear in mind when elements of toxicity are involved, as with milkweed or pokeweed. More often than not though, it is the difference between something one enjoys eating and something one merely gets through.
As a child I used to gobble the “wild strawberries” that, then as now, popped up in our lawn and mulched beds alike. Sure, they didn’t taste like much but they were a pleasant nibble. Perhaps more caution was in order, but the darned things are so inoffensive looking that it would be difficult to suspect them of being hazardous. Older and slightly wiser, nowadays I don’t tend to eat anything without being quite careful about it. In the grocery store, one examines a package. In the wild or the backyard, one makes sure to clearly identify a plant before consuming it.
These wild “strawberries” were of course not true wild strawberries (which are far from flavorless) but the invasive, pernicious ground cover known as Potentilla indica or Duchesnea indica. The confusion over classification is a recent one and Duchesnea is still mainly used. Potentilla seems to be the more accurate fit (though I am hardly a botanist), since that genus contains the cinquefoils whose leaves are used in very much the same way as those of mock strawberry.
Leaves? That’s right. For years and years I have eaten the charmingly inoffensive fruit of the mock strawberry without realizing that the far more interesting and useful part of the plant was staring me in the face. The leaves are an excellent food and tea, tasting faintly of cucumber (with a hint of sage) and widely available for almost the entire year. For years I have let this plant grow wild in my yard and planted beds for the simple fact that it is harmless and excludes other, non-useful weeds. Now? I will definitely encourage its’ growth and use it whenever necessary. Which, honestly could be often–the only plant that grows more prolifically in my yard in the off-season is ground ivy, equally edible but quite bitter once springtime has ended.
So what about those fruits? Many find them banal or insipid, but I consider that a judgement based more on its flavor in comparison with other wild berries or with commercially cultivated fruit. Another common observation is that they taste like watermelon bitten very close to the rind. That rings true to me, and also implies the thing I do really like about mock strawberry, which is its’ pleasing texture. Too often we are disdainful of things which have mild or inoffensive tastes. I have a feeling we would be less disdainful if we did not have such a surplus of food. Then we might be quite pleased to have a plant which is edible in the Northeast in one form or another for almost the entire year.
When we forage we learn a lot of lessons about plants and our relationship with them. Mock strawberry is a good example : as much as we might despise this little scrubby ground cover, we can potentially (no pun intended) learn from it and its’ ways. Sometimes the best and most useful plants are those which we most ignore. I have always tolerated and sometimes enjoyed mock strawberry as an invasive plant which excluded far more annoying weeds. Now I just might let it run riot, and delight in the free surplus of winter greens and summer berries. Insipid? Maybe. But when you’re starving don’t come over and scoop up my “mock” strawberries. I’ll still be enjoying them, tasteless or not.