Boullion of the Woods

IMG_5339.JPG
BOTW before grinding.

If you’re a mushroom forager, Chicken of the Woods (Laetiporus spp.) aren’t really the first fungi that spring to mind when thinking about drying the harvest. Indeed, the appearance of a slightly-too-far-gone specimen is something of a wild food cliché, sometimes accompanied by gags of the “no spring chicken” variety. Hilarious.

When they are fresh, it is their tenderness, as well as their flavor that encourages comparisons with poultry. Newly-emerged Laetiporus can be stir- or deep-fried to resemble chicken breast meat to a very credible degree. When they are still fresh but not quite as soft, I can still deep-fry them or use them in a slow-cooked dish with great results. They can also be used at this point, and perhaps a little further along, to make a great mushroom and herb powder that substitutes quite handily for powdered or cubed chicken bouillon.

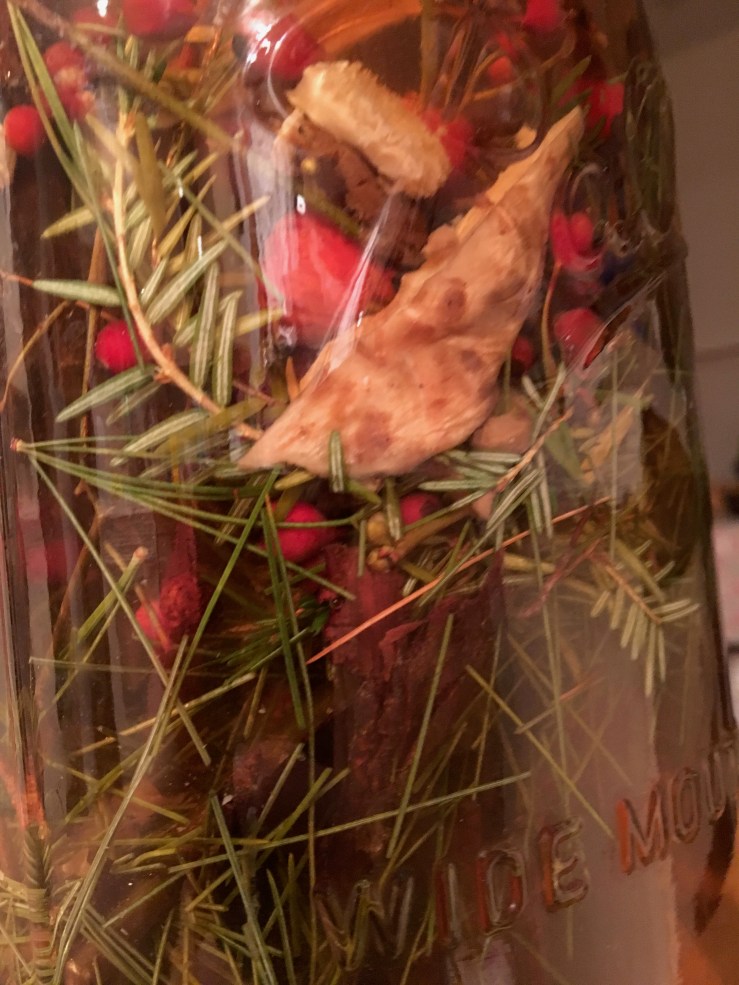
First, the mushrooms should be dried in a dehydrator or by placing on wire racks in a place with a great deal of air movement and not much humidity. Once they are dried quite thoroughly they can be made into the BOTW or left in glass or plastic jars bags until ready to be ground. You will get the most optimal results by using the freshest mushrooms. If the fungus is really quite dry when you encounter it, it may already have lost too much of its flavor to be saved. If you prepare this, also try the test mentioned below and see if the flavor is adequate.

Combine in a food processor :

4 oz. dried chicken of the woods mushrooms (Laetiporus spp.)

2 tbs good-quality sea salt

1/4 cup dried wild bergamot (Monarda fistulosa) leaf

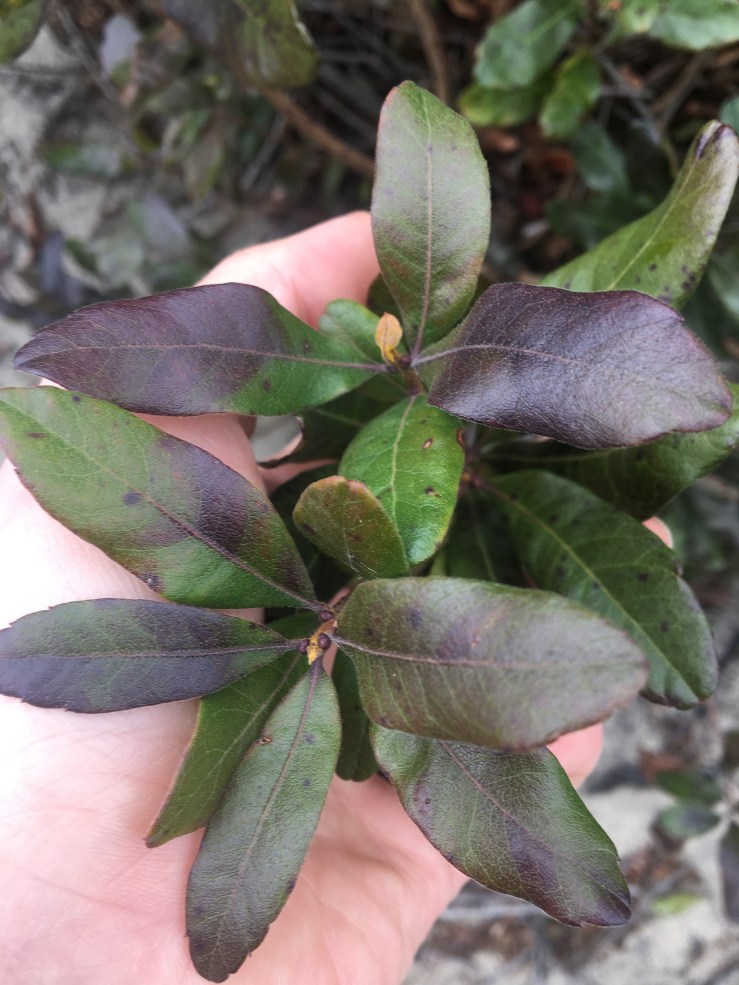
2 tbs dried sweetfern (Comptonia peregrina) leaf

Pulse and then process until the product resembles semolina or corn meal.

IMG_5336.JPG
Ground BOTW.

To test the flavor, dissolve a small amount in a coffee mug full of hot water. If the flavor resembles chicken broth, you’re good to go.

As far as substitutions, you can use oregano in lieu of wild bergamot, and perhaps thyme or bay leaf in half the quantity listed to substitute for sweetfern. The flavor won’t be exactly the same, but should still serve amiably.  You may wish to add more salt to more closely approximate dried chicken bouillon (which is extremely salty), but I usually find it more helpful to add salt to the dish directly, leaving this powder with just enough salt content to use as a broth base without making it too salty to add to dishes with abandon.

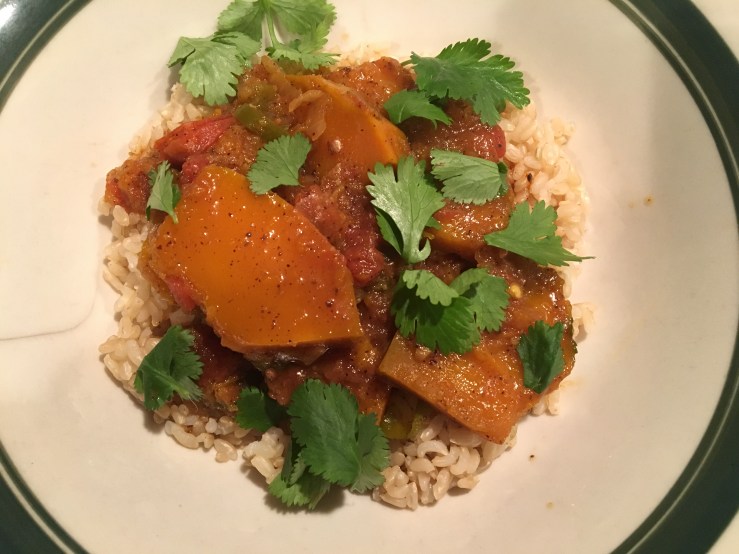
Texture of the ground powder is a consideration. I like to leave it a bit coarse, even allowing for the occasional lentil-sized nugget of Laetiporus to go unground. These larger bits can always be strained out of a broth later if I am looking for consommé-like refinement. More often I am using BOTW to add to meatballs or stews, or as a base for a ramen bowl. In these cases, small chunks of mushroom are a bonus rather than a hindrance. If you prefer it finer, simply grind until it is as fine as white flour.

IMG_5342.JPG
Ramen made with BOTW, shredded parsley root, cooked leeks and parsley root leaf.

To use as a soup base (it makes a lovely ramen powder), use 1 tbs to 2 cups of water. You can also use it to enhance a tired or weak broth by adding in the same ratio or slightly less. Be careful when adding to quickly-boiling water or broth, as the BOTW will make the hot liquid tend to foam vigorously if the heat is too high. The coarser the grind, the more likely you are to use it as a substitute for breadcrumbs in dishes with good success. In a heavily-breaded dish I may add a couple of tablespoons of BOTW for every cup of panko or breadcrumbs.

There are a myriad of other uses for BOTW, from adding to soups or stews to savory bread and pancake mixes, or adding to liquid sauces which will be strained in lieu of broth. The powder is relatively low in salt, so can be used as a lower-salt substitute or liason for dishes in which savory flavor is called for but salt must be kept to a minimum. BOTW can also substitute in any recipe that calls for ground dried mushrooms or mushroom powder. Bear in mind its’ salt content while using, and increase or decrease the salt content in the initial grind accordingly.

As I post more recipes using this handy kitchen helper I will post them here, for now :

Oyster Mushroom “Meatballs”


Forest Vinegar

IMG_9408.jpg
A late October scene in the Oak-Hickory Forest

Even for those of us who visit the woods nearly every day, there is something undeniably enchanting about a forest on a warm, clear day in autumn. I notice too, when I am in state and national parks that other people feel the same way. At no other time of the year are the woods so crowded. The aroma of the forest at this time of year is something truly special, the scent of fallen leaves and fungi, of pine needles and juniper branches filtering the autumn winds.

There are a number of excellent ways to capture this flavor, from pine family teas to juniper berry-laden pickles, bark and twig beers and wild sodas, and jams and sauces made from late-season fruit. The autumn is prime harvest time, with drying racks laid on every surface to preserve mushrooms and herbs, fruits and nuts. One of the best ways to incorporate this pantry of wild foods into everyday-use items is to make an infused vinegar. Single-ingredient vinegars are of course a perfectly fine way to experiment with flavors, but to me nothing beats an complex medley of seasonal flavors infused into a good cider, apple scrap or wine vinegar. At its’ best a forest vinegar is nuanced and sophisticated, and can lend a unique flavor and touch of personality to foods as diverse as your everyday salad, a jar of pickles, a marinade, or a finishing sauce.

I am going to present this recipe in two ways, first as an example of one of the forest vinegars I have made, second as a simple list of seasonal ingredients to experiment with, with a number of suggestions as to bases. You should feel free to experiment pretty widely with infused vinegars, just remember a few basic rules :

1. Sterilize your infusing vessel, and keep everything submerged while the flavors are infusing.

2. You may find a mother forming on the vinegar, like a kombucha SCOBY. This is natural and even desirable. You may also notice fermentation activity if you use ingredients that have wild yeast, such as juniper berries. This is fine, and generally dies off after a bit. I would suggest not overloading a vinegar with too many yeast-bearing ingredients to avoid an excess of activity.

3. Don’t overload the infusion with ingredients, allow for some space for the liquid to circulate and the flavors to mix thoroughly. I have tried using large quantities and shorter infusing times and the flavors come out strong but less-integrated. The longer these very disparate materials spend in each others company, the more they will rub off on each other and create a complex harmony of flavor.

4. Know when to strain. Strain when your tastebuds tell you to strain. Don’t hold out for the promise of more flavor, especially if you have a concentration of bitter ingredients. Bitterness develops over time–a good example would be the chinese bitter orange (Poincirus trifoliata), which makes an excellent vinegar but will turn quite bitter if the oranges are left in for more than a few days. If you find the infusion beginning to taste too bitter for you, strain it immediately. Better to have a weak forest vinegar than one that is unusable.

5. Know the flavors of what you are using – don’t just chuck something in because it is cool and you know it to be edible. This is especially true of ingredients with strong or bitter flavors–a heavy concentration of things like turkey tails or juniper berries may overpower a subtle blend of other less assertive flavors.

The following recipe makes a great batch of vinegar, and is a good starting point to experiment with. If you’re a total novice but can assemble the ingredients, it’s a safe and stable recipe to use as is. As you become more familiar with ingredients, and fine the ones that grow locally to you, it’s a good basis from which to add or remove ingredients as whim and season dictate. Because I am posting this in Winter, I’ve chosen a recipe which uses only ingredients which are still fairly available or were dried in late autumn (the mushrooms). The oyster mushrooms can be store-bought or you could even use conventional mushrooms, they are present mainly to round out the flavor of the stronger turkeys tail.

IMG_0997.jpg

Forest Vinegar #3

Combine in a large jar :

2 oz toasted hickory bark, broken into pieces

1 oz pine needles, cut into pieces

1 oz spicebush twig, broken into pieces

1 oz hemlock branches, cut into pieces

1/2 oz dried oyster mushrooms

1 oz dried turkey tail or dryads saddle mushrooms

1 1/2 oz rosehips from Rosa multiflora or cultivated rose

6 cups apple cider or apple scraps vinegar, homemade or good quality (look for brands with “the mother” like Bragg’s)

Cover and keep ingredients submerged, shake or stir regularly and allow to infuse until the flavor is to your liking. I usually allow at least three weeks to infuse this combination, you may also find that it infuses faster or slower depending on ambient temperature.

There is really no limit to what can be added to these vinegars, and below I’ve included two lists of seasonal ingredients that are often available in my location (Northeast US). Obviously some of these may not persist in winter in some locations, but in general even faded or dormant edible plants can provide useful flavors. A handful of worn and weathered mugwort flowerheads in December or some brick cap mushrooms past their prime can often bring a subtle flavor to infusions that might be overwhelming were the parts used when in the full bloom of their season. The key here is to work with small amounts of various ingredients to create subtle effects, never allowing one flavor to dominate the proceedings. Remember that strong-flavored ingredients create strong-flavored results. This list is by no means exhaustive, just a jumping-off point really.

IMG_1002.jpg
Another late-autumn Forest Vinegar, with bayberry leaf, juniper cone, sweet birch twig, sassafras root and birch polypore fungus with other aromatics.

Winter ingredients for Forest Vinegar

Roots (sassafras, wild carrot and parsnip, burdock, pushki, smilax)

Needles & Branches (pine, spruce, fir, hemlock, arbor vitae)

Twigs (sassafras, spicebush, sweet birch)

Fungi (turkey tail, birch polypore, oyster mushroom, wood ear, brick cap, velvet foot, chaga)

Fruits (LInden viburnum, blackhaws, juniper, crabapples, persimmons, cranberries, Highbush cranberries)

Leaves (wild chervil, garlic mustard, northern bayberry, deadnettle, ground ivy, bittercress, wintergreen)

Persistent dried tops of autumn-flowering aromatic plants (mugwort, wild carrot, goldenrod)

Autumn ingredients for Forest Vinegar

Including most of the above, plus :

Fallen Leaves (beech, maple, mulberry, oak, black walnut)

Fungi (too many and varied to list, but boletes, oysters, dryads saddle, and resinous polypore are all good for flavoring vinegars)

Fruits (apples, pears, silverberries, paw paw, persimmon, bitter orange, quince, spicebush)

Leaves (wild bergamot, northern bayberry, mugwort, wild carrot, pushki, dandelion, asiatic dayflower, quickweed)

Flowers (goldenrod, evening primrose, chicory, wild mustards, new england aster)

Seeds (pushki, wild carrot, nettle, evening primrose, wild mustards)

Pumpkin Wild Curry

IMG_3867.jpg

An easy and delicious curry perfect for my nearly-wild curry mix, or any good homemade mix from wild or cultivated spices. I like to use this recipe to test out different combinations or variations on my wild or cultivated curry mixes, since it has a very simple set of ingredients that I almost always have on hand in the fall and winter. It’s the perfect test recipe to use for your own variations and experiments – the tartness of the tomatoes is softened by the sweetness of pumpkin (calabaza squash works great too), creating a perfect canvas for your spice combination!

This recipe works great on the stovetop, but can also be made in a slow-cooker. When I cook stews like this in a slow-cooker, I don’t simply add everything at once, but follow the basic procedure for stovetop cooking, adding the ingredients in stages to the slow-cooker set on high.

Combine in a pan or slow-cooker

2 tbs neutral vegetable oil

2 tbs ground curry powder, masala mix, or near-wild curry mix

4 oz onion, minced  (grated if using slow-cooker)

2 cloves garlic, crushed and minced

3/4 cup chopped canned tomatoes, strained of juice

Cook until onions are softened (10 minutes stovetop, 1 hour slow-cooker), then add:

1 lb. pumpkin or calabaza squash, cut into chunks

3/4 cup tomato juice or stock or nettle tea or water

1 1/2 cups vegetable stock or water

Cover and cook until pumpkin is softened and liquid is somewhat reduced (45 minutes stovetop, 3-4 hours slow cooker)

This is excellent served over brown rice or lentil dal. I like to add a little chopped fresh cilantro, wild chervil, pushkin or other aromatic herb leaf. I also recommend combining with tart fermented vegetables or torn bitter leaves of wild or cultivated greens, such as dames rocket, dandelion, or escarole. To tart things up a bit, dried coconut flakes (unsweetened), crushed cashews, fermented chile sauces, grated lemon zest, and thinly sliced thai basil leaves are all good options. But the beauty of this recipe is it is so simple it can be accompanied with whatever is handy.

Bayberry Salt

Flavored salts are an excellent way to make use of some of the wild spices that are available to intrepid gatherers. Various fruits, cones, nuts, mushrooms and leaves can be used, anything that can be dehydrated and combined with salt. This often helps preserve more unstable wild spices, and prolongs the life of their flavor beyond the season of their emergence. A good example of this would be hemlock salt, in which the green cones of Eastern Hemlock are combined with salt to preserve the unique, robust, citrus-y flavor they possess in their green state.

Bayberry leaves are available almost year-round, so preserving them isn’t at a premium. The leaves do tend to grow dark and unappealing in winter, although they may linger on late in warm winters or coastal locations (see photo below). The leaves of Myrica pensylvanica and other Myrica species are often mentioned in field guides and foraging books as a substitute for bay leaves (i.e. the Laurel Bay, Laurus nobilis). While this is certainly an option, I’m not a huge fan of “substitution” as a principle for utilizing wild food. I would prefer to exploit the flavors of the ingredient itself and craft recipes that reflect that flavor.

To my taste buds, Myrica leaves have a more complex and “bright” flavor than Laurel bay, with a less pronounced potency. In other words, if you’re substituting for Laurel leaf in a recipe, double up the amount of Myrica leaves used. If you are just enjoying them on their own merits, the following seasoning salt is a far more effective method. This is one of my go-to salts, perhaps the go-to salt, although juniper, black trumpet, roasted tomato and hemlock salts all get an enthusiastic nod for adding to dishes in lieu of ordinary sea or kosher salt. But bayberry leaf salt seems to be the crown prince of them all, serving as a final sprinkle to dishes instead of salt and pepper, but also being used in recipes themselves. In spring I roast whole chickens sprinkled with bayberry salt, after slipping pushki leaves under the skin. In the fall, grilled mushrooms and onions explode with flavor given a simple dusting of the stuff. You get the picture.

Grind together in a food processor :

6 cups bayberry leaves, dried

1 cup salt, preferably sea salt

Store in a well-sealed glass jar at room temperature. Lasts at least one year.

IMG_2978.jpg
Some Northern Bayberry still clinging on in a coastal location in January.