Salt-Cured Cherry (and Other) Blossoms

blossoms1.jpg
Blossoms in the time of corona.

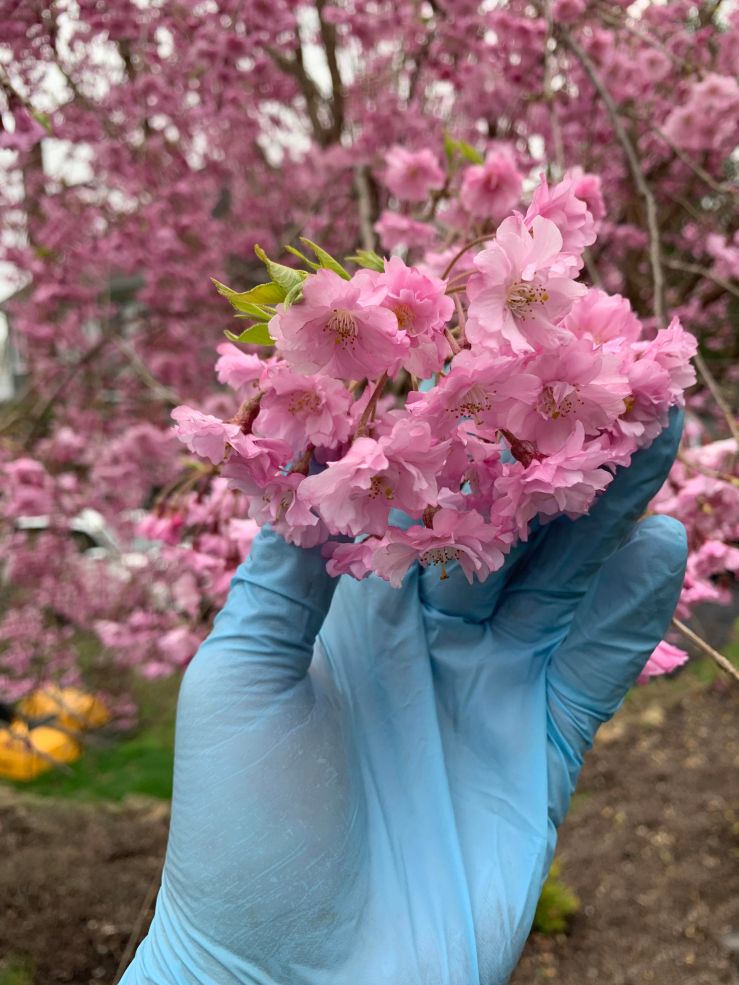
The fleeting time of the cherry blossom is as brief as it is beautiful. To wit, tragically. 

Thankfully, their incredible aroma and flavor can be preserved in various ways. Less so, their visual beauty. Photographs and memories are about the best we can do. But culinarily, vinegar, honey and salt all play their part. Today we will focus on the salt, based on a traditional Japanese technique.

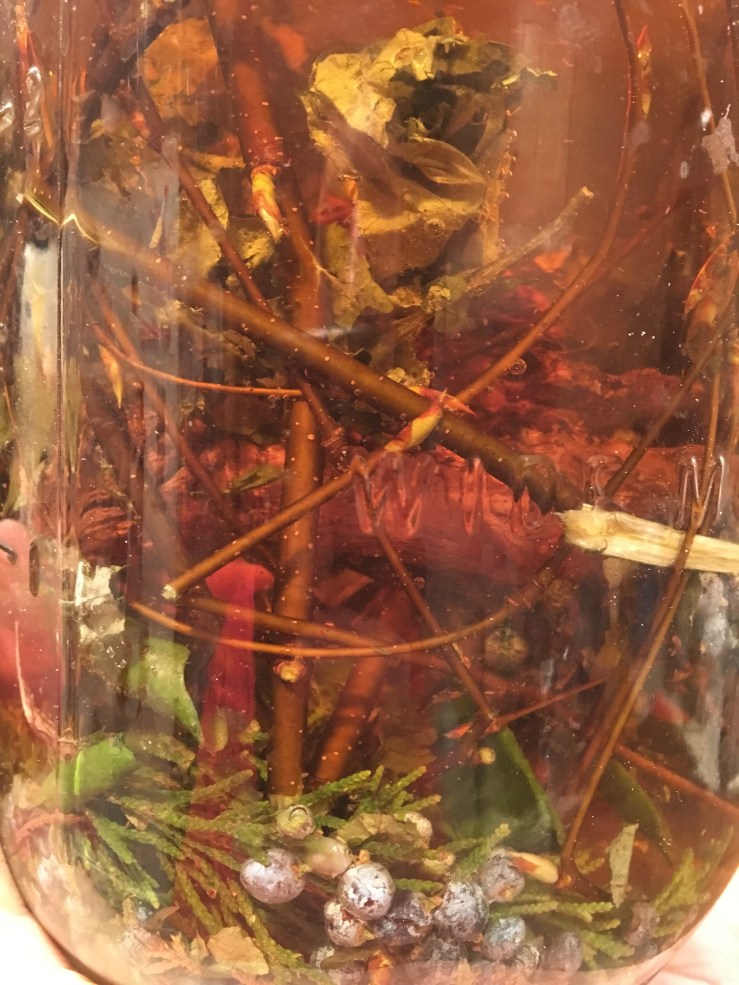
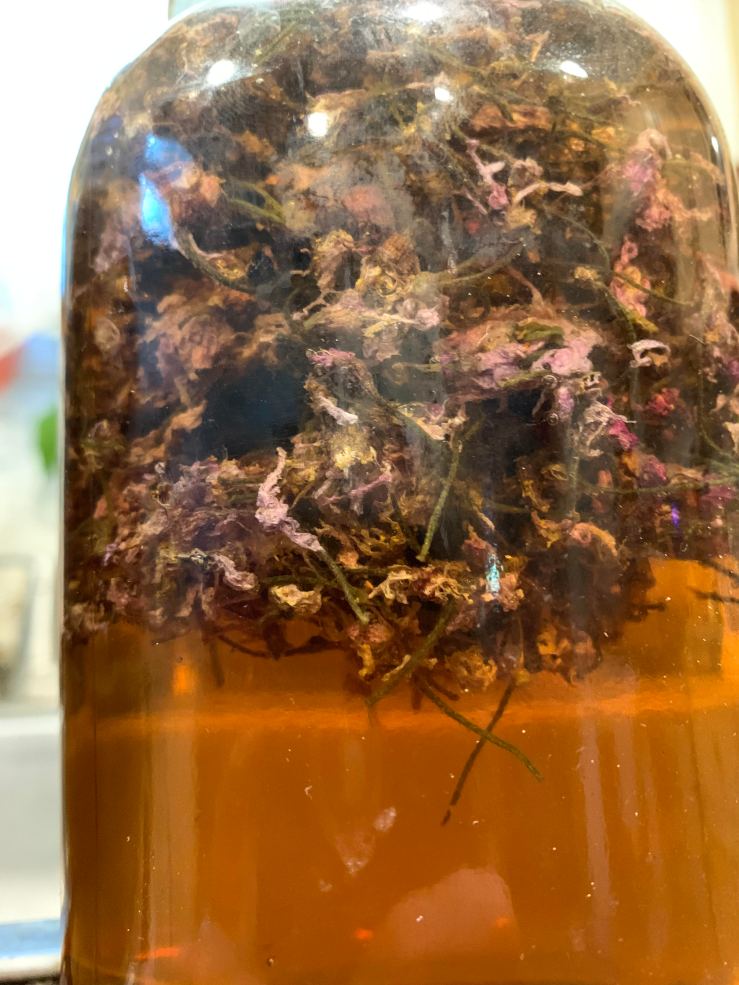
Salt-curing cherry blossoms relies on using a method involving two different processes–saturating the blossoms in salt for several days, then rinsing and soaking in vinegar. After this point, the flowers can be dried and stored indefinitely. Some of them will improve with age, while some of them will degrade over time. Every species of cherry and indeed every tree is somewhat unique and different. But, it is not just cherry blossoms that can be preserved in this way. So many flowers can be salt-cured that it seems almost ridiculous to list them. For the most part, I have experimented with tree flowers because they tend to be a bit more durable and they are quite easy to collect (Imagine collecting 5 cups of ground ivy flowers).

I have salt-cured with success :

Various Cherry Blossoms

Apple Blossom and Leaf

Peach

Ornamental Plum

Ornamental Quince

Magnolia (x soulangeana, stellata, etc)

Wisteria

Black Locust

Redbud

For the last three (and, presumably, any member of the Fabaceae) I recommend aging in the last stage. These flowers tasted of very little for their first six months or more in a jar. As the time progressed, their flavor suddenly re-emerged, like a lover hidden behind a fan.

blossoms.jpg
A variety of preserved blossoms.

Any of the flowers listed above (and many more I am sure) can be preserved using this method. Every type of cherry blossom is different, so expect variance in the flavors produced. In addition, I recommend collecting the flowers at the peak of their season, once they have emerged and been on the tree long enough for aroma and flavor to accumulate, but before they begin to fade in pungency. It is also best to collect the flowers on a clear, dry day and not immediately after rainfall. You want them to be at their maximum potency, otherwise what is the point of preserving them? The flavors of these flowers are fleeting, so only process at their peak!

As far as the other ingredients, I use finely ground Himalayan pink salt (this is a rock salt, gathered in the highlands, and will be free of micro-plastics, which can no longer be said of sea salt) and a relatively neutral vinegar like rice, cider or Korean brewing vinegar. 

Process

• For every 1 cup of loosely-packed blossoms, use 3 tbs of finely ground salt.

• Combine blossoms and salt, applying light pressure to work the salt into the flowers.

• Place in a non-reactive (glass or plastic or ceramic) container, cover and apply light pressure.

• Uncover and toss/stir the blooms once a day, then cover and weigh again.

• After three days uncover and rinse the blossoms of as much salt as possible.

• Air dry the blossoms or dehydrate at a low temperature (80° F) for a few hours.

• Place in a clean glass jar and cover with vinegar. I generally use at least 1/2 cup vinegar : 1 cup flowers.

• Allow to sit in the vinegar for at least one-two weeks.

• Remove the flowers from the brine and dehydrate at a higher temperature (100° +) until fully dry.

• Store flowers in a clean glass jar at room temperature.

• Reserve brine for use in dressings, marinades and pickles.

blossoms3.jpg
Weeping cherry blossoms soaking in cider vinegar.

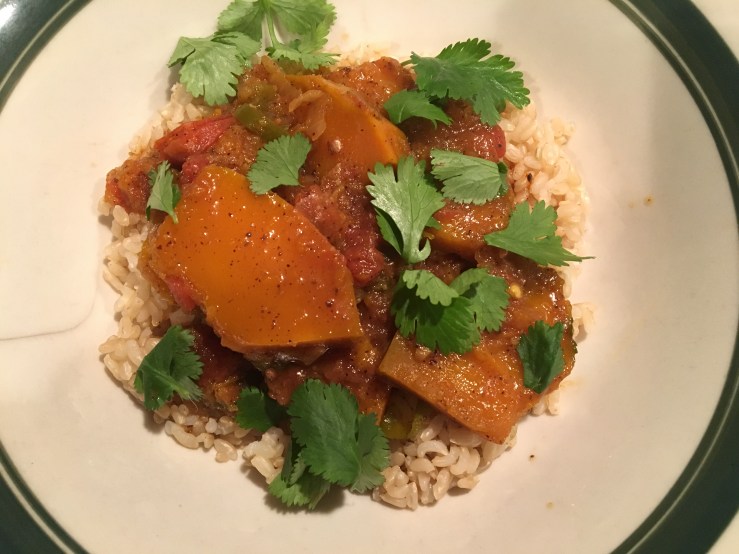
The flowers and the brine can both be used for many different dishes, the only limit is your culinary creativity. The flowers are intriguing as a garnish, an ingredient in spice and salt mixes, as a unique tea (the traditional use), and even in a sweet and salty ice cream! The brine is a perfect base for a marinade or a dressing, and is essentially a pre-made and flavored pickling medium. Always taste before using, as each flower will create a different set of flavors. As long as the flower is safe for eating, I see no reason why this wouldn’t work with a great many blossoms.

How to Cook a Weed

unnamed.jpg
invasive, feral watercress (Nasturtium officinale)

We exist at a turning point. Our world has changed dramatically since the last millennium, but no century has been so dauntingly transformative as the last. Not only is our climate changing rapidly, not only is a great extinction underway (perhaps the greatest, perhaps the last), but we have finally become aware of the endpoint of our resources, and the limit of our invention. It is not enough anymore to keep the machine in motion. We need to apply some brakes. We need to remember how we got here. It is not enough to stop using straws, or bring canvas bags to the supermarket. We need a massive rethink in terms of how we interact with our environment, and food is at the forefront of that interaction.

I am intending to present not a manual for that rethink but a simple volley in the effort, a salvo lobbed at the ceaseless farce of endless growth. There is no permanent economic growth that will not reduce this planet to a sobbing, shrieking wretch. And not for the benefit of the faceless masses, but for the gain of a very few at the expense of the very many.

Most corrupted and most casually ignored are our food systems (clothing also comes into this, but the stakes are higher economically and that is not the subject of this volume). We are not the architects of this, but the unwilling participants–20th century consumption made us acclimated to food in plastic wrap, ingredients as commodities, food severed precisely and sharply from its source. Meat isn’t animals, it is flesh drained of blood and wrapped in styrofoam packages. Vegetables aren’t plants they are Californian-grown produce, shipped across the country in massive Diesel vehicles. Plants come in cans, in plastic freezer bags, in joyless shrink and sleeves. We have lost the thread connecting us to our food.

Just a few generations ago, most of our grandparents and great-grandparents existed in a transitional world. Industrial growth and technology impacted their lives massively, but attached to that incredible change was a sense of connection with another world. The world of self-sustenance, of the working and (dare I say it) peasant classes which revealed to them a set of knowledge and tools which connected them much more tangibly to their food sources. Of course, this is a generalization, and largely a class based one. After all, landowners in the Middle Ages were just as severed from the source of their heavily-laden feast tables as modern oligarchs. The difference is that now this disassociation effects almost everyone in the developed world.

My grandmother raised four children by herself, and supplemented their diet with wild foods. But this connection to the folkways of wild food did not descend directly to me. Although my mother did show me that the invasive wineberry was edible, and I happily munched on honeysuckles as a child, this knowledge was not inherited. I became interested in wild food as an outgrowth of cooking, and an interest in ecology and sustainable lifestyles. Most of what I have come by has been self-taught, aided by print and internet resources, as well as experimentation (within the margins of safety of course). I say this mainly to demonstrate that no matter how far you might be disconnected from the world of the food knowledge and skills of your ancestors, it is a connection you can re-establish. It doesn’t take a lifetime, either–just an interest and the right resources. I aim for this site to be one of those resources, and to guide you to many others.

Along the way I also want to change the way you think about food sources, the environment, cooking and life. My goal is not to provide you with an encyclopedic overview of every wild food but some of the most essential, most common, and most widespread across the temperate parts of the world. The cooking techniques and recipes included in this site are fundamentals, simple presentations, what is known in Italian as cucina povera, the cooking of the poor. A few things may seem complex or challenging at first, but I promise that with practice many of the more involved or unfamiliar processes (like fermentation) will become second nature. All of these techniques formed part of the daily cuisine of the nonnas and farmhouse wives that nourished many generations of our ancestors. And I promise you that, whether your tradition is European, or Indian, or Japanese, or anything else, these women incorporated wild foods into their cooking. Mainly out of necessity, but also out of knowledge of their nutritional aspects, medicinal benefits, and flavor.

As our world transforms dramatically, it might be some small comfort to realize that we can rediscover this knowledge, and explore new ways of sustaining ourselves that are less impactful and far more healthy than the supermarket cooking we have all become used to. One advantage of how aggressively our agriculture and industry have transformed the landscape is that it creates the perfect environment for adaptive, vigorous, invasive plants which are the fundament of wild cuisine. These are the so-called weeds, neglected and often despised. If we can learn to honor and celebrate them, if we can learn how to cook a weed and cherish the food we can make from them, we will not only reconnect with our not-so-distant past but create a path which can help minimize the damage we do to this planet every day with our current foodways.

I hope you will join me in discovering how exciting, delicious, and mindful this food can be.

Wild Bark Teas

In the throes of winter, gathering wild food often takes a backseat to using up what we have dried, fermented, frozen, or preserved. On the other hand, for those who hunt, the season has the added dynamic of being far more active. Shellfish, too, are at their prime. For freaks like me there is always the lure of ingredients transformed by the extremes of the season–conifer needles seem especially aromatic. The residual fruits that linger have been bletted to the point that deep, resonant flavors emerge.

But no matter what your winter kicks are, there are still a number of ingredients that have particular resonance in the fourth season. Prime among these are the sapling twigs of various edible / useful trees, which have a haunting aroma and deep flavor, and can be used not just as hot cuppa refreshers, but also as brines and pickling mediums, or infused into stored up goodies like honey, alcohol, wine, salt or sugar.

In winter, the energy of most herbaceous plants is tied up in their roots. But saplings and trees focus on creating buds and new growth, in order to prepare for spring. This makes for a period in which whole new categories of identifying and appreciating the trees of your area become available. It also means that some of these bits are full of flavor and aroma, especially amongst the thickets of saplings one finds with certain native trees, as well as those that are setting buds to flower in early spring, such as spicebush.

IMG_1704.jpg
A mature sassafras tree with its warm, lightly reddish bark
IMG_0187.jpg
Mature sweet birch tree, with its characteristic grey-black bark.

We won’t go hog wild here, but focus on three trees that I use extensively in the winter, all of whom have very distinct aromas which once you have become accustomed to are unmistakable for any other plant or tree. Patches of these trees are best located during the growing season when you can confirm their identity based on other characteristics such as leaves, fruit, flowers or catkins. Of course, there is also no reason one can’t use the bark year-round, but it is an especially welcome addition to the basket in winter. To check your saplings for smell, crack a fresh bit of new growth so the inner bark is exposed and get a strong whiff of it. If you have a lack of scent, you may have the wrong tree, or perhaps one which is weak and not worth collecting. This is especially the case with lower-hanging branches of older sassafras trees, which often become brittle and weak in flavor as they die off.

IMG_2291.jpg
Young, vigorous saplings of sassafras often have a green, bright brown or reddish cast to them. The outer bark slowly begins to become more knotty and textured as well.

Sassafras (Sassafras albidium)

Many foragers know of the incredible taste of sassafras roots, and some will have used the leaves for a seasoning and thickener (known as filé gumbo to Creole cooks), but the vigorous young growth of saplings and twigs have garnered little attention. One is able to approximate the flavor of the root-based tea in a more sustainable fashion by collecting twigs instead of digging up plants, an activity which is also often difficult in the winter months. When gathering sassafras twigs, I look for cleared or semi-maintained areas near a line of mature trees, where one can often find small clumps of young sassafrases growing almost on top of each other. This strategy can be extended to the sweet birch as well, which I tend to collect only when I can find a thicket of them. Sassafras are notoriously weak-rooted trees as well, and one can often find larger specimens toppled after intense storms. In all cases one wants the green or red new growth which is flexible rather than brittle (you will want a pair of bypass pruners to cut these branches, don’t attempt to tear them), and which carries a strong and unmistakeable scent of sassafras. Many compare it to root beer, but I find it a bit more mellow and earthy, less cloyingly sweet than commercially produced soda drinks.


IMG_9598.jpg
Sweet birch branches range from light brown to almost silvery-black, but all will have narrow leaf buds and an aromatic fragrance like wintergreen.

Sweet Birch (Betula lenta)

Sweet birch trees tend to grow very tall and narrow, seldom having any branches within easy reach. It is best with this tree to locate the small thickets of saplings which will grow, often clustered on sloping ground, near more mature trees. While the adult trees have bark that is almost black, the saplings will be a chocolatey brown to dark grey color, with leaf buds forming in fall and persisting over winter. These buds can be used to make a seasoning salt (as can those of sassafras, or the flower buds of spicebush), but they are also a good indicator of the identity of sweet birch. The saplings tend to grow very straight and upright, with few side branches, never becoming bushy or densely-limbed like spicebush. The scent of the broken twigs is quite similar to wintergreen, and will remind old-timers of traditional birch beer. The taste when brewed is not exactly that of wintergreen, but has a more well-rounded flavor, making for a surprisingly good brine as well as tea. The yellow or golden birch (Betula alleghaniensis) has a similar smell to the snapped twig, but I find its’ flavor to be more on the bitter side when brewed. You may wish to experiment more than I if this tree is common in your area, I have very little of it so tend to leave it alone.

IMG_0861.jpg
Female spicebush branch-notice the golden buds which will become yellow flowers in early spring. Spicebush bark is grey, with characteristic “dots” on the bark and an unmistakeable fragrance of resinous, spicy goodness.

Spicebush (Lindera benzoin)

Those who know me know spicebush is a plant I am an insane raving lunatic advocate for. In my area it is most abundant, one of the few natives to have survived the onslaught of invasive plants, canes and shrubs that have slowly taken over our hardwood understory. It is a four-season edible, and probably bears a lot of the responsibility for why I am an advocate of winter foraging. It has a completely distinct scent, but you have to smell it to know it. The most common use by foragers for this bushy shrub has been the ripe fruit, collected and dried in fall to make a kind of “allspice” type seasoning. There are many more ways to use it. In winter, I mostly collect the branches from public parks and maintained trails–spicebush will grow in abundance along the edges of biking and hiking trails, so I try to keep my branch collection to the spots where these bushes will inevitably have to be trimmed and truncated by park officials. I like to think that some of them wonder why their job has already been done, but more likely than not they don’t give it a second thought. If you are wanting to collect flowers of spicebush in the spring, or fruits in summer and fall, I recommend collecting only limbs of male trees, which do not have visible flowerbuds developing. If you do collect female limbs, consider stripping the tiny spherical flowerbuds to make capers or a seasoning salt.

IMG_1724.jpg
Sweet birch branch brewing up into an excellent winter tea.

Wild Bark Teas and Brines

Any of these three trees will make an excellent tea, a process best done in either a stockpot held at very low heat or a slow-cooker on warm or low setting. I greatly prefer the slow-cooker method. It is easy, stress and attention-free, and I never have to worry about the process boiling over. While I don’t think any real damage is done to the nutrition of the tea by boiling (unlike conifer needle teas, which lose their Vitamin C content), it does no favor to the flavor, and generally increases the bitterness of the end product. One thing that certainly must be done, whether making this tea in a slow-cooker or on a stovetop, is to strain the finished tea through cheesecloth or clean kitchen towels. Wild barks tend to have saponins in them which will concentrate on the surface of the tea (they will look like small amoebas or spots of fat), but these are easily removed by straining through cloth. I use the same ratio of liquid to twigs/bark that I use when making coniferous trees, about 1 oz. of material for every 3 cups of water. The same 1:3 ratio applies naturally for a metric measure, I tend to use 200 g for every 600 g of liquid. Note that this is weight of dry ingredients vs. liquid measure for water.

The resulting tea can be drunk as is, chilled or mixed with sugar and chilled, salted and turned into a pickle brine (use 3-5% salinitiy depending on your ingredients to be fermented), or salted and used to brine meats (especially good with pork) or other ingredients for cooking (usually you will want more like 8% salinity, with the amount of time resting in the brine depending on the weight and muscle density of the product being brined). They make excellent kombuchas, either combined 50/50 with tea or raspberry/blackberry leaf Kombucha, or in their own right with a SCOBY and a bit of active kombucha simply added to the wild bark tea. I have enjoyed single flavor teas and brines made with only one of the above mentioned teas, and I have also used two or all of the barks combined to make a complex, multiple bark tea.

If you have a slow-cooker with a warm setting or a clippable thermometer you can also create a basis for a wild yeast beer or mead by making this tea, just be sure to keep the temperature below 140 degrees F, at which point the wild yeast which is abundant in the bark will be killed off. Another option is to replace water in a brew boil with wild bark tea, and then cool before pitching with conventional brewing yeast.

All three of these wild barks also make excellent syrups, individually or combined, which can be started as a simple syrup (1:1 sugar to bark tea or 2:1 sugar to bark tea), but which can also become sorbets or granitas, or indeed the branches may be infused in milk for ice creams or gelati. Infusions in wine or spirits also produce strong results, although for sassafras extract (comparable to a vanilla extract) I tend to prefer the roots for maximum concentration of flavor.

Cold brewing and infusing with these barks is also an option, but I have had much more success with them used as aromatic components in a botanical mix (for vermouth, bitters, or honey-based infusions) as opposed to a “sun tea” or cold-brewed tea which I do not think extracts enough flavor and is certainly more dicey health-wise. I suggest a hot brew to create a liquid base and then proceeding from there in all applications using wild bark.

Perhaps obvious to some, but certainly worth mentioning : since all these thin saplings and twigs are harmless in every way for food use, so they also make excellent kebab skewers! As a child, I used to gnaw on sweet birch sticks and even today a little nibble of sassafras or spicebush bark can provide stimulation on a long winters hike.

Wild & Conventional Herbs Preserved in Salt

IMG_0048.jpg
Picking lovely field garlic in mid-winter to add to herbs preserved in salt.

The harvest and use of herbs and greens is a year-round process in my kitchen. Generally, I use wild herbs and seasonings or those grown in my garden, but of course many fine farms and friends grow herbs as well, so there is plenty of bounty to preserve, even in the off-season. I am always looking to explore ways to keep the ingredients seasonal, but extend their life by various preservation methods, so that I can have my cilantro in winter and not feel too guilty about it. One of the best ways to do this is to employ a bit of salt. Indeed, quite a bit of salt. By chopping fresh herbs (augmented if you desire with a little vegetable material such as leek, celery or carrot) and combining with salt you can keep some of the bright intensity of fresh aromatics from decaying.

Our culinary herbs, especially those that dominate the cooking of the Mediterranean basin, are nearly all drawn from two plant families. The majority of plants that most cooks from that tradition (and indeed, many others) will recognize as herbs are either a member of the Lamiaceae (Mint Family) or Apiaceae (Carrot Family). The first includes the obvious “true” mints such as spearmint and peppermint, but also widely-used seasonings such as thyme, oregano, rosemary, basil, shiso, savory, lavender, etc. The second contains cilantro and parsely, alongside dill, fennel, caraway, chervil, anise, angelica, and many more. In addition to aromatic herbs, the carrot family has a number of vegetables (celery, carrot, parsnip, fennel) and plants whose seeds are used as spices (cumin, coriander, ajwain, caraway, alexanders). It might come as no surprise that a number of the wild plants we can use as herbs also come from these same families.

There are a number of methods available to preserve the flavor of fresh herbs when they are in season. The one most people will be familiar with is drying, I have found this to be a particularly excellent method to use when dealing with the mint family. Indeed, many of the mints which we collect as wild plants or grow have a marked flavor improvement when dried. Oregano, for instance, or the plant Monarda fistulosa (Wild Bergamot) are herbs I don’t use great amounts of fresh, finding them a bit too intense for most things. However, when dried they are huge staples of my kitchen year-round. But while dehydration is effective for the mints, it tends to make the more subtle flavors of the carrot family disappear. Anyone who has used dried parsley will discover pretty quickly that it tastes precisely like nothing. Again, this extends to the wild members of the family–my attempts to dry pushki (Heracleum maximum) leaves without treating them first has invariably resulted in a tasteless product. Drying of aromatic members of the genus Allium (Onions, Chives, Leeks, etc) is also sometimes fraught with difficulty. Leek greens hold up fairly well, and sometimes chives, but the wild members tend to lose their more ephemeral flavors.

My preferred methods to preserve both Alliums and Apiaceae are to use brine or vinegar, infusion or lacto-fermentation, and very occasionally freezing. But the best technique is the one detailed here. What you are creating will be high enough in salt that it becomes a substitute for that when used in a dish. In much the same way that one would use a seasoned salt, or a curry paste, or a pickled or fermented ingredient high in salt, you will want to taste your dish before adding any additional salt or salty ingredients like soy sauce to it. But a small amount of herbs preserved in salt can be used as the base for a vinaigrette or soup, added to a sauce, stirred in with dressing for a composed salad, added to the salt bill for curing meat or fish, stirred into a pasta with a bit of the cooking water, or used as the basis for a fresh salsa. Of course one could get even more creative than this, and luckily there will be plenty of time to–my herbs in salt mixes tend to last at least one year, some may linger even longer.

The recipe I use originated in a book called The Mediterranean Pantry by Aglaia Kremezi, and she uses US/Imperial measurements, always at a ratio of 6 ounces of vegetables for every 1.25 ounces of salt. This works out at a ratio of 4.8:1. For more precise measurement, I tend to use grams, and simplify the ratio to 5:1, but of course you can do as fits your kitchen and scale best. No matter what vegetable and herb components are used, however, the ratio should stay the same. This makes for 20% salinity, which means these herbs will likely stay fresh a lot longer than you. It is quite likely that a lower salinity would work fairly well too, but I tend to stick with this recipe as the color and taste stay so bright and fresh that I simply use the herbs as a salt substitute, and especially when added as the base for soups or stews the intensity of flavor is such that I feel I end up actually using less salt in the long run.

Absolutely any combination of herbs and vegetables is viable and I encourage you to experiment widely with this recipe, but I’ve included a few different iterations of it just as basic models. I always use a fine sea or other natural salt for this, such as Himalayan pink salt. Never use industrial salts like iodized table salt or kosher salt, and never use large crystals or rock salt unless you grind them first. Do not make the mistake either of combining the salt and the herbs and then processing, or you will wind up with more of a slurry than a condiment. In all cases, pack the herbs in salt well into 4 or 8 oz jelly jars (each recipe makes two of the former or one of the latter) and keep refrigerated. Should last at least one year, and often longer. Make sure that you integrate the salt well into the chopped herbs, tossing in a bowl several times before packing into the jars.

IMG_1901.jpg
almost, but not completely done pulsing cilantro, wild chervil and leeks

Cilantro & Leek

chop extremely fine by hand or pulse in a food processor:

160 g chopped cilantro

40 g chopped leeks

mix in:

40 g fine sea or other natural salt

Parsley & Dill or Fennel Frond & Leek

hop extremely fine by hand or pulse in a food processor:

100 g chopped parsley

60 g dill or fennel fronds

40 g chopped leeks

mix in:

40 g fine sea or other natural salt

IMG_1902.jpg
herbs combined with salt, ready to pack into jars

Bittercress, Dandelion & Field Garlic

I make this in spring when all three herbs are at their finest and I can collect them from my yard. This combination of herbs also makes an excellent base for pesto. Make sure that you use a food processor if using field garlic, and that you snip it very fine first as it is quite fibrous. The same can be said of chives

chop extremely fine by hand or pulse in a food processor:

100 g bittercress (Cardamine species)

60 g dandelion greens

40 g field garlic greens or chives

mix in:

40 g fine sea or other natural salt

Waterpepper & Shiso

The sharp intensity of waterpepper (one of the flavorful smartweeds will work too) is balanced by the distinctive herbaceous flavor of shiso. Both grow abundantly in my area as invasives, and I make this in mid-summer before both plants begin to flower.

chop extremely fine by hand or pulse in a food processor:

80 g shiso (Perilla frutascens) or thai basil

80 g waterpepper (Persicaria hydropiper), smartweed or rau ram (Vietnamese coriander)

40 g field garlic bulbils or leeks

mix in:

40 g fine sea or other natural salt

A Sustainable Mind Podcast

IMG_7278.jpg

I had the great pleasure earlier this month to be interviewed by Marjorie Alexander for the incredible A Sustainable Mind podcast. Marjorie highlights people who are doing some truly inspiring work around issues of ecology, food waste, reusable energy, sustainable living and a myriad of other matters that all relate very closely to the issues that are close to my heart. I feel honored to be included amongst these folks who are contributing in a much more direct way to facing and resolving what is one of the great crises of our times.

It is my firm belief that living more simply and in greater harmony with nature is one of the most important and personal steps we can take in life. I urge you to think about the sustainability of your actions every time you collect wild food, to understand and acknowledge the relationships of the plants and wildlife around you and make decisions based on the needs of the community at large. Remember you are part of a much larger whole.

Too often in foraging literature, the focus is on what you can eat. I would like to encourage you to think more deeply about what you should eat.

Listen to the podcast here.

iTunes link here.

Red Spicebush Curry

IMG_8905.jpg
Some of the many possible ingredients to make a red spicebush curry – on the left are the only two essentials : fresh red spicebush berries and red chiles.

Spicebush is a versatile spice, whether dried or fresh. One of the best ways to experience that versatility is by making fresh spicebush berry-based curry pastes. In late spring and early summer, the fresh green berries can be combined with green chiles and aromatics to make a green curry paste. The most pronounced flavor change occurs in the berries when the seed emerges in mid-summer, inside the bright green fruit. Once the color change sets in the berries can be gathered and combined with red chiles to make a red curry paste.

Neither of these will taste identical to the classic green and red Thai curry pastes, unless you use only the traditional aromatics rather than wild ingredients. If you want to make an authentic Thai curry with spicebush as an added aromatic (and I can find no fault at all with that idea!) then you will be better served by simply adding some spicebush berries to a traditional recipe. My non-recipe recipe, which follows, is much more open-ended and designed to let you work with whatever native or imported, cultivated or wild  seasonings and aromatics you might have on hand.

This approach is one of proportions and seasonal, available ingredients. It changes every time I make it, and can include many different aromatics depending on what I have at hand and what I have in mind to use the curry paste with.

Combine in a food processor or mortar :

1/4 cup red spicebush berries, fresh not dried

4 oz red chiles, destemmed and deseeded (I don’t really care for my spice pastes to be super-hot, so that I can add fresh chiles or other hot spices to my final dishes. If you prefer a more traditionally hot paste, double the amount of chiles and use 8 oz.)

1 oz turmeric root or substitute turmeric powder at time of cooking

6 oz alliums and aromatic stalks and/or roots in any combination that makes sense to you : garlic, ginger, wild ginger, galangal, wild carrot root, wild parsnip root, angelica stems, lemongrass stalks, shallots, and leeks or spring onions are all viable options. (an example of how this breaks down from a recent version of this : 2 oz angelica stem, 2 oz shallots, 1 oz garlic, 1 oz wild ginger)

4-6 oz feral or cultivated apple or pear, or combination of apples and pears, and if desired other mealy/juicy rose family fruits such as hawthorns or rose hips. (optional – i add feral fruit generally just to thin out a paste if it is too heavy, or if I intend to use the paste primarily as a grilling medium)

2-4 tbs dried spices, cultivated or wild seeds, two or more of : cumin, coriander, wild carrot, wild parsnip, pushki, black or wild mustard, fenugreek, etc. Any wild or cultivated seeds that you would use in a dried curry mix are good to use here. I generally follow the ratio (used in many traditional masalas) of combining equal parts cumin and coriander seed, accented with smaller amounts of other spices. In lieu of coriander I often use one of the wild carrot family members whose seeds have a “coriander-like” quality. In my area those are wild carrot, pushki and wild parsnip.

1 tbs ground sumac (optional)

handful of turning sassafras or spicebush leaves (sassafras will be yellow, orange or red, spicebush yellow) (optional)

grated zest of chinese bitter orange (Poncirus trifoliata), kaffir lime or other citrus (optional)

1 tbs shrimp paste (optional, but adds intense depth of flavor and that oily ring of authenticity)

Process until smooth. A food processor is the easiest fix for this, but I recommend chopping into small pieces most of what you add. Cloves of garlic should be crushed. Dried leaves should be crumbled. Stringy things like leeks, angelica, or lemongrass should be cut into small pieces across the grain. If you want to prepare this more traditionally, a mortar and pestle works fine with a bit of pre-chopping and patience. I don’t mind a coarse grain with this, as is obvious from the picture below, but you can go coarser or finer as you like.

Red spicebush curry paste will store in the fridge for a few weeks, but I recommend putting recipe-size batches in small jars and freezing them.

IMG_9062.jpg
The color of red spicebush curry paste is generally a bit more orange than red.

As to using this concoction? Certainly any traditional recipe which calls for a Thai red curry paste can be made, substituting this. The flavor will of course vary from that of the traditional, but the results will doubtless be delicious.

I prefer to use my curry pastes, especially if I have loaded them with native or locally-grown ingredients, with local vegetables, seafoods and meats. I particularly enjoy the red spicebush curry paste with autumnal and winter vegetables like squash, beets, potatoes, leeks, evening primrose and other root vegetables. Shrimp and squid are fantastic grilled in the paste, with a little miring or vinegar or chile sauce added to thin out the mix. Fantastic curry soups can be made with lentils, sweet potatoes, and so on, simply cooked in broth and pureed with curry paste. I find it works equally well thinned or mellowed with coconut milk, broth, yogurt, or wild bark teas. A simple vegetable dip fit for the gods can be made by combining spicebush curry paste, miso and homemade yogurt.

IMG_9100.jpg
A curry of blue hubbard squash with red spicebush curry paste. 

A Broth of Fallen Leaves

IMG_9756
A typical basket of fallen leaves and pine needles, circa late October

This is that rare preparation that sounds as poetic as it tastes. But between making a success out of it and a shambles there lies a very thin line.

If you just grab a bunch of random leaves from the forest floor and bring to the boil (Latin bullire, hence “bouillon”), you will certainly achieve some kind of a broth from them. But its flavor will be questionable. At best, it’s a roll of the dice that might make you lucky. At worst, it’s your stomach that is tumbling.

Leaves fall at different times. They contain many different flavors and elements that age and decay in different fashion. They aren’t all “edible,” but the ones you use should all be non-toxic. A handful of trees bear leaves that should be avoided (eucalyptus, yew, certain fabaceae family trees). Every leaf that makes its way into my broths is non-toxic, and every tree type mentioned below is broadly “edible” in my area. As always, your local species are the ones you need to look into.

I eat a lot of tree leaves. They don’t remain edible for very long, usually only a couple of weeks, but within that time frame things like beech and basswood leaves have become some of my favorite spring greens. The leaves of fruiting and non-fruiting Morus alba (White Mulberry) are another favorite, a sweet leaf more mild than cultivated lettuce once briefly boiled. Maple leaves can be or become bitter quite quickly but in their earliest incarnations most are mild enough to make a tempura or mead from, or boil and add to a salad.

I also use a lot of tree leaves. Oak leaves in particular, both for their tannins to stiffen a pickle a la grape leaves, and for their bite in brews and forest infusions. Those maple leaves that have become sharper are fine in small quantities in these same preparations. Dried black walnut (and by extension hickory and walnut leaves) are a traditional bittering agent, adding astringency and woody richness to alcohol, honey, or vinegar. As they age, edible or non-toxic tree leaves change in character, appearance and flavor. These intriguing elements can be used in the kitchen, but only once you have ascertained which leaves are safe to experiment with.

IMG_9688.jpg
Its more complicated than throwing a bunch of leaves in some water and boiling, but not that much more.

There is no substitution here, not for ingredients and not for experience. Learn which trees grow locally, and learn which ones are generally safe for food use. Taste and use the ones that are safe. Experiment with them – whether it be in a salad or a vinegar. Roll the dice, but set your own limits. Nibble before you bite, and bite before you swallow.

To make a broth of fallen leaves, you should worry more about proportion than volume. A good place to start is a few handfuls in the bottom of your stock pot, maybe about 6-8 cups of loosely packed leaves to about 4 quarts of water. Start small at first–what do you have to lose? My first broths of fallen leaves were a handful in a saucepan, filled with water and just simmered until flavorful, then drained and immediately used in miso soup, or a noodle dish, or mushroom soup. Or simply drunk, almost like tea, or better yet bone broth, with perhaps a pinch or three of sea or seasoned salt.

While I approached it very tentatively at first, you can be a bit bolder. I would suggest that for starters you can make a stock pot full of this broth, as long as you follow three simple rules :

1) pick clean, newly fallen leaves or tug leaves which are nearly ready to fall from the lower branches. its more poetic to gather the cast off leaves, but rule no.2 is more important than poetry – generally the milder leaves (mulberry, beech, linden) are later to fall. Carefully wash and sort your leaves, and strain the finished broth through a clean dishtowel or cheesecloth to filter out any noise, including the resinous issue which exudes from all the conifers.

2) use the proportions listed below to keep your broth within the bounds of reason. Feel free to deviate from them, but at your own peril. Adding a few more oak leaves can mean a wide shift in the dryness, aroma, and taste of your final broth.

OF THESE LEAVES, USE

50 % mild, edible leaves (beech, linden/basswood, white mulberry, birch, sumac, some viburnums)

10 % bitter, astringent or strong leaves (oak, hickory, black walnut)

20 % aromatic, seasoning leaves (spicebush, sassafras, maple)

20 % coniferous needles or branches (pine, spruce, hemlock, fir)

3) taste your broth, and pull it when it is to your liking. Don’t allow the leaves to sit and linger once you’ve achieved the flavor you want, or it will become much more woody and bitter. Of course, this can work too–and is a great basis for beers or vinegars. But we will discuss that elsewhere. Before all else, a broth should be sippable, soothing, nourishing. Something you can reach for when at your worst. Remember, this is a base. It should be flavorful but restrained enough to be a background for other flavors.

IMG_9679.jpg
A broth of fallen leaves that is on its way to becoming a tea, with sweet birch bark and a larger handful of white pine needles.

It occurs to me that this is essentially a very open-ended recipe, not only in terms of how it is described here, but in how it could mutate or evolve. I have made over the years many things that exist somewhere in-between this “broth” and a wild tea, concoctions which have been not only cooking medium or tea but also brine for marinating or pickling other foods, and so on. To cut off at the pass the most obvious notions, I would suggest that any wild tea plant could be added, along with such as rosehips, wild spices such as pushki, juniper or spicebush, spicebush or sweet birch bark, rubus spp. leaves, goldenrod flowers, bayberry leaf, und so weiter.

As for using this, I have found broth of fallen leaves to be very versatile, I have made everything from strong, pho-style noodle dishes to delicate sipping, restorative broths with just a few dried mushrooms or seaweed strips, to hearty minestrone and creamy turkey stews with it. In the end, the flavor of the final product will dictate its use best. This isn’t a broth patched from scraps, but a good reason to go out in the woods in itself. And let the results of your careful experimentation be your guide.


Boullion of the Woods

IMG_5339.JPG
BOTW before grinding.

If you’re a mushroom forager, Chicken of the Woods (Laetiporus spp.) aren’t really the first fungi that spring to mind when thinking about drying the harvest. Indeed, the appearance of a slightly-too-far-gone specimen is something of a wild food cliché, sometimes accompanied by gags of the “no spring chicken” variety. Hilarious.

When they are fresh, it is their tenderness, as well as their flavor that encourages comparisons with poultry. Newly-emerged Laetiporus can be stir- or deep-fried to resemble chicken breast meat to a very credible degree. When they are still fresh but not quite as soft, I can still deep-fry them or use them in a slow-cooked dish with great results. They can also be used at this point, and perhaps a little further along, to make a great mushroom and herb powder that substitutes quite handily for powdered or cubed chicken bouillon.

First, the mushrooms should be dried in a dehydrator or by placing on wire racks in a place with a great deal of air movement and not much humidity. Once they are dried quite thoroughly they can be made into the BOTW or left in glass or plastic jars bags until ready to be ground. You will get the most optimal results by using the freshest mushrooms. If the fungus is really quite dry when you encounter it, it may already have lost too much of its flavor to be saved. If you prepare this, also try the test mentioned below and see if the flavor is adequate.

Combine in a food processor :

4 oz. dried chicken of the woods mushrooms (Laetiporus spp.)

2 tbs good-quality sea salt

1/4 cup dried wild bergamot (Monarda fistulosa) leaf

2 tbs dried sweetfern (Comptonia peregrina) leaf

Pulse and then process until the product resembles semolina or corn meal.

IMG_5336.JPG
Ground BOTW.

To test the flavor, dissolve a small amount in a coffee mug full of hot water. If the flavor resembles chicken broth, you’re good to go.

As far as substitutions, you can use oregano in lieu of wild bergamot, and perhaps thyme or bay leaf in half the quantity listed to substitute for sweetfern. The flavor won’t be exactly the same, but should still serve amiably.  You may wish to add more salt to more closely approximate dried chicken bouillon (which is extremely salty), but I usually find it more helpful to add salt to the dish directly, leaving this powder with just enough salt content to use as a broth base without making it too salty to add to dishes with abandon.

Texture of the ground powder is a consideration. I like to leave it a bit coarse, even allowing for the occasional lentil-sized nugget of Laetiporus to go unground. These larger bits can always be strained out of a broth later if I am looking for consommé-like refinement. More often I am using BOTW to add to meatballs or stews, or as a base for a ramen bowl. In these cases, small chunks of mushroom are a bonus rather than a hindrance. If you prefer it finer, simply grind until it is as fine as white flour.

IMG_5342.JPG
Ramen made with BOTW, shredded parsley root, cooked leeks and parsley root leaf.

To use as a soup base (it makes a lovely ramen powder), use 1 tbs to 2 cups of water. You can also use it to enhance a tired or weak broth by adding in the same ratio or slightly less. Be careful when adding to quickly-boiling water or broth, as the BOTW will make the hot liquid tend to foam vigorously if the heat is too high. The coarser the grind, the more likely you are to use it as a substitute for breadcrumbs in dishes with good success. In a heavily-breaded dish I may add a couple of tablespoons of BOTW for every cup of panko or breadcrumbs.

There are a myriad of other uses for BOTW, from adding to soups or stews to savory bread and pancake mixes, or adding to liquid sauces which will be strained in lieu of broth. The powder is relatively low in salt, so can be used as a lower-salt substitute or liason for dishes in which savory flavor is called for but salt must be kept to a minimum. BOTW can also substitute in any recipe that calls for ground dried mushrooms or mushroom powder. Bear in mind its’ salt content while using, and increase or decrease the salt content in the initial grind accordingly.

As I post more recipes using this handy kitchen helper I will post them here, for now :

Oyster Mushroom “Meatballs”


Forest Vinegar

IMG_9408.jpg
A late October scene in the Oak-Hickory Forest

Even for those of us who visit the woods nearly every day, there is something undeniably enchanting about a forest on a warm, clear day in autumn. I notice too, when I am in state and national parks that other people feel the same way. At no other time of the year are the woods so crowded. The aroma of the forest at this time of year is something truly special, the scent of fallen leaves and fungi, of pine needles and juniper branches filtering the autumn winds.

There are a number of excellent ways to capture this flavor, from pine family teas to juniper berry-laden pickles, bark and twig beers and wild sodas, and jams and sauces made from late-season fruit. The autumn is prime harvest time, with drying racks laid on every surface to preserve mushrooms and herbs, fruits and nuts. One of the best ways to incorporate this pantry of wild foods into everyday-use items is to make an infused vinegar. Single-ingredient vinegars are of course a perfectly fine way to experiment with flavors, but to me nothing beats an complex medley of seasonal flavors infused into a good cider, apple scrap or wine vinegar. At its’ best a forest vinegar is nuanced and sophisticated, and can lend a unique flavor and touch of personality to foods as diverse as your everyday salad, a jar of pickles, a marinade, or a finishing sauce.

I am going to present this recipe in two ways, first as an example of one of the forest vinegars I have made, second as a simple list of seasonal ingredients to experiment with, with a number of suggestions as to bases. You should feel free to experiment pretty widely with infused vinegars, just remember a few basic rules :

1. Sterilize your infusing vessel, and keep everything submerged while the flavors are infusing.

2. You may find a mother forming on the vinegar, like a kombucha SCOBY. This is natural and even desirable. You may also notice fermentation activity if you use ingredients that have wild yeast, such as juniper berries. This is fine, and generally dies off after a bit. I would suggest not overloading a vinegar with too many yeast-bearing ingredients to avoid an excess of activity.

3. Don’t overload the infusion with ingredients, allow for some space for the liquid to circulate and the flavors to mix thoroughly. I have tried using large quantities and shorter infusing times and the flavors come out strong but less-integrated. The longer these very disparate materials spend in each others company, the more they will rub off on each other and create a complex harmony of flavor.

4. Know when to strain. Strain when your tastebuds tell you to strain. Don’t hold out for the promise of more flavor, especially if you have a concentration of bitter ingredients. Bitterness develops over time–a good example would be the chinese bitter orange (Poincirus trifoliata), which makes an excellent vinegar but will turn quite bitter if the oranges are left in for more than a few days. If you find the infusion beginning to taste too bitter for you, strain it immediately. Better to have a weak forest vinegar than one that is unusable.

5. Know the flavors of what you are using – don’t just chuck something in because it is cool and you know it to be edible. This is especially true of ingredients with strong or bitter flavors–a heavy concentration of things like turkey tails or juniper berries may overpower a subtle blend of other less assertive flavors.

The following recipe makes a great batch of vinegar, and is a good starting point to experiment with. If you’re a total novice but can assemble the ingredients, it’s a safe and stable recipe to use as is. As you become more familiar with ingredients, and fine the ones that grow locally to you, it’s a good basis from which to add or remove ingredients as whim and season dictate. Because I am posting this in Winter, I’ve chosen a recipe which uses only ingredients which are still fairly available or were dried in late autumn (the mushrooms). The oyster mushrooms can be store-bought or you could even use conventional mushrooms, they are present mainly to round out the flavor of the stronger turkeys tail.

IMG_0997.jpg

Forest Vinegar #3

Combine in a large jar :

2 oz toasted hickory bark, broken into pieces

1 oz pine needles, cut into pieces

1 oz spicebush twig, broken into pieces

1 oz hemlock branches, cut into pieces

1/2 oz dried oyster mushrooms

1 oz dried turkey tail or dryads saddle mushrooms

1 1/2 oz rosehips from Rosa multiflora or cultivated rose

6 cups apple cider or apple scraps vinegar, homemade or good quality (look for brands with “the mother” like Bragg’s)

Cover and keep ingredients submerged, shake or stir regularly and allow to infuse until the flavor is to your liking. I usually allow at least three weeks to infuse this combination, you may also find that it infuses faster or slower depending on ambient temperature.

There is really no limit to what can be added to these vinegars, and below I’ve included two lists of seasonal ingredients that are often available in my location (Northeast US). Obviously some of these may not persist in winter in some locations, but in general even faded or dormant edible plants can provide useful flavors. A handful of worn and weathered mugwort flowerheads in December or some brick cap mushrooms past their prime can often bring a subtle flavor to infusions that might be overwhelming were the parts used when in the full bloom of their season. The key here is to work with small amounts of various ingredients to create subtle effects, never allowing one flavor to dominate the proceedings. Remember that strong-flavored ingredients create strong-flavored results. This list is by no means exhaustive, just a jumping-off point really.

IMG_1002.jpg
Another late-autumn Forest Vinegar, with bayberry leaf, juniper cone, sweet birch twig, sassafras root and birch polypore fungus with other aromatics.

Winter ingredients for Forest Vinegar

Roots (sassafras, wild carrot and parsnip, burdock, pushki, smilax)

Needles & Branches (pine, spruce, fir, hemlock, arbor vitae)

Twigs (sassafras, spicebush, sweet birch)

Fungi (turkey tail, birch polypore, oyster mushroom, wood ear, brick cap, velvet foot, chaga)

Fruits (LInden viburnum, blackhaws, juniper, crabapples, persimmons, cranberries, Highbush cranberries)

Leaves (wild chervil, garlic mustard, northern bayberry, deadnettle, ground ivy, bittercress, wintergreen)

Persistent dried tops of autumn-flowering aromatic plants (mugwort, wild carrot, goldenrod)

Autumn ingredients for Forest Vinegar

Including most of the above, plus :

Fallen Leaves (beech, maple, mulberry, oak, black walnut)

Fungi (too many and varied to list, but boletes, oysters, dryads saddle, and resinous polypore are all good for flavoring vinegars)

Fruits (apples, pears, silverberries, paw paw, persimmon, bitter orange, quince, spicebush)

Leaves (wild bergamot, northern bayberry, mugwort, wild carrot, pushki, dandelion, asiatic dayflower, quickweed)

Flowers (goldenrod, evening primrose, chicory, wild mustards, new england aster)

Seeds (pushki, wild carrot, nettle, evening primrose, wild mustards)

Pumpkin Wild Curry

IMG_3867.jpg

An easy and delicious curry perfect for my nearly-wild curry mix, or any good homemade mix from wild or cultivated spices. I like to use this recipe to test out different combinations or variations on my wild or cultivated curry mixes, since it has a very simple set of ingredients that I almost always have on hand in the fall and winter. It’s the perfect test recipe to use for your own variations and experiments – the tartness of the tomatoes is softened by the sweetness of pumpkin (calabaza squash works great too), creating a perfect canvas for your spice combination!

This recipe works great on the stovetop, but can also be made in a slow-cooker. When I cook stews like this in a slow-cooker, I don’t simply add everything at once, but follow the basic procedure for stovetop cooking, adding the ingredients in stages to the slow-cooker set on high.

Combine in a pan or slow-cooker

2 tbs neutral vegetable oil

2 tbs ground curry powder, masala mix, or near-wild curry mix

4 oz onion, minced  (grated if using slow-cooker)

2 cloves garlic, crushed and minced

3/4 cup chopped canned tomatoes, strained of juice

Cook until onions are softened (10 minutes stovetop, 1 hour slow-cooker), then add:

1 lb. pumpkin or calabaza squash, cut into chunks

3/4 cup tomato juice or stock or nettle tea or water

1 1/2 cups vegetable stock or water

Cover and cook until pumpkin is softened and liquid is somewhat reduced (45 minutes stovetop, 3-4 hours slow cooker)

This is excellent served over brown rice or lentil dal. I like to add a little chopped fresh cilantro, wild chervil, pushkin or other aromatic herb leaf. I also recommend combining with tart fermented vegetables or torn bitter leaves of wild or cultivated greens, such as dames rocket, dandelion, or escarole. To tart things up a bit, dried coconut flakes (unsweetened), crushed cashews, fermented chile sauces, grated lemon zest, and thinly sliced thai basil leaves are all good options. But the beauty of this recipe is it is so simple it can be accompanied with whatever is handy.