An easy and delicious curry perfect for my nearly-wild curry mix, or any good homemade mix from wild or cultivated spices. I like to use this recipe to test out different combinations or variations on my wild or cultivated curry mixes, since it has a very simple set of ingredients that I almost always have on hand in the fall and winter. It’s the perfect test recipe to use for your own variations and experiments – the tartness of the tomatoes is softened by the sweetness of pumpkin (calabaza squash works great too), creating a perfect canvas for your spice combination!
This recipe works great on the stovetop, but can also be made in a slow-cooker. When I cook stews like this in a slow-cooker, I don’t simply add everything at once, but follow the basic procedure for stovetop cooking, adding the ingredients in stages to the slow-cooker set on high.
3/4 cup chopped canned tomatoes, strained of juice
Cook until onions are softened (10 minutes stovetop, 1 hour slow-cooker), then add:
1 lb. pumpkin or calabaza squash, cut into chunks
3/4 cup tomato juice or stock or nettle tea or water
1 1/2 cups vegetable stock or water
Cover and cook until pumpkin is softened and liquid is somewhat reduced (45 minutes stovetop, 3-4 hours slow cooker)
This is excellent served over brown rice or lentil dal. I like to add a little chopped fresh cilantro, wild chervil, pushkin or other aromatic herb leaf. I also recommend combining with tart fermented vegetables or torn bitter leaves of wild or cultivated greens, such as dames rocket, dandelion, or escarole. To tart things up a bit, dried coconut flakes (unsweetened), crushed cashews, fermented chile sauces, grated lemon zest, and thinly sliced thai basil leaves are all good options. But the beauty of this recipe is it is so simple it can be accompanied with whatever is handy.
This is an eminently simple preparation, adapted from a traditional German recipe. My eternal thanks to Steffi / Sycamore Spirits for translating this and many other recipes for me from a cookbook brought to the states with her from Germany. Though acorns are considered largely a famine food in most of Europe, they aren’t really thought of as food at all here in the US, even though they formed a substantial part of the diet of many early settlers.
For me, there is likely no more significant wild food in my diet than acorns. Not perhaps, in terms of quantity – but in terms of importance. I look forward with great eagerness to harvesting acorns in the fall, for while time-consuming it is a supremely relaxing activity. Processing acorns, too may be an exhaustive activity but it pleases me to no end, and there are few wild food products I treat with more reverence than a jar of pickled acorns or a tub of acorn flour.
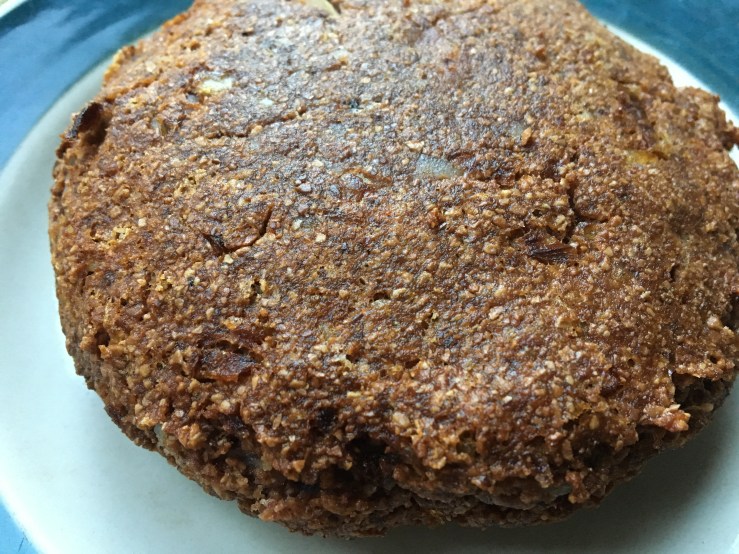
These acorn burgers use the latter, combined with milled or pureed potatoes to make a burger that is soft, somewhat fragile and has an amazing rich umami flavor. Unlike a lot of “veggie” burgers it doesn’t rely on pulses or TVP so it melts in your mouth, the way a properly cooked burger does. You don’t need particularly finely-ground flour for this, but you do need to process the potatoes so that they are fluffy and light, so a food mill, ricer or other form of fine-processing is required.
Combine a mixing bowl :
1 1/2 cups riced or milled cooked potatoes
1/2 cup acorn flour (preferably cold-leeched red oak flour)
1/3 cup grated onion
1 tbs prepared mustard (preferably high quality whole-grain or homemade)
salt to taste
freshly ground black pepper, optional
Mix the ingredients by hand and form into small patties. This recipe usually makes four burgers, about 3.5 oz each before frying. I usually fry the patties in a small amount of oil until brown and crispy on the outside, but you can also bake them at high heat.
The original recipe calls for the burgers to be stuffed with meat or sautéed mushrooms, and this can be done (I would recommend adding a few tablespoons of flour first if you go that route). However, I have found that simply adding sautéed mushrooms to the burger is much tastier. These are incredible simply served on a soft roll, with a dab of chile sauce or mayonnaise, some crispy lettuce and a few sliced onions. Really, any way you would prepare a traditional hamburger, falafel, or kebab meat suits them, from gyros to banh mi to Big Mac style double decker burgers. The flavor is deep but quite simple, so goes with almost any kind of topping, pickle or sauce.
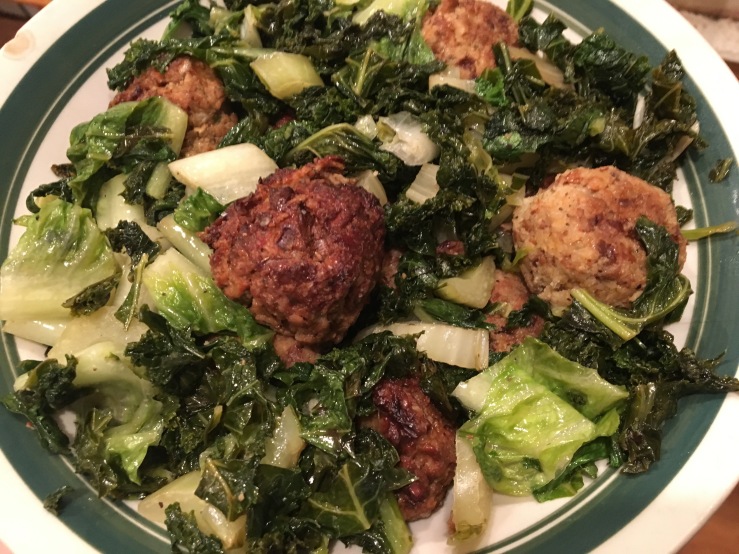
Oyster Mushroom “Meatballs” with Acorn & Potato “Burgers” – two winter favorites
I love the humble Oyster Mushroom (Pleuratus ostreatus and others) : it appears in our area, in one incarnation or another, in almost every season. It’s dependability reduces it to a minor note in the logs of mushroom collectors – it can often assuage the hurt of not finding more esteemed mushrooms, such as morels in spring or maitake in fall, but few people seem to get excited about it. Some mushroom hunters seem to dismiss or even despise it, but I adore it. While it may not have the deep, rich flavor of a porcini it is a reliable workhorse mushroom and can stand in for more exotic or laudable fungi in spare seasons. More importantly for my needs, it serves admirably as the basis for rich stocks and essences, dries well, and appears in such quantity that it can be used to make mushroom ketchup or soy sauce or put up as mushroom pickles.
Beyond all these virtues, it has a quality that isn’t often celebrated even by its’ enthusiasts, at least not in Western food culture : oysters have a firm, dense texture. While they can be reduced down, or even rendered crisp or dry with enough cooking, the better option is to use them in recipes that celebrate this texture. This is just one such recipe, operating on the principle that finely chopped oysters resemble meat when cooked quickly, allowing their natural texture and moisture-retention to become a quality that assists in a dish with an excellent flavor and a remarkable similarity to meat-based polpette.
Conventionally-grown or home-grown oyster mushrooms can of course be substituted in this dish, you may also find it works with the conventional button mushroom of the supermarket. I recommend using the brown variety, often labelled “Cremini” as they have a bit more structure. If collecting wild oyster mushrooms or harvesting home-grown ones, you will want to collect them when they are firm and have attained at least most of their full growth, but before they become very dry, yellow, and fragile. You will also want to avoid collecting water-logged specimens, or if you do being sure to dry them and squeeze them of excess moisture first.
Combine in a mixing bowl :
5 oz oyster mushrooms, very finely chopped or pulsed in a food processor
3-4 oz onion, grated and squeezed free of liquid or pulsed in a food processor
1/2 cup breadcrumbs, preferably homemade
2 tbs mushroom powder or “bouillon of the woods” (see note)
1-2 eggs or equivalent egg substitute
salt to taste
dashes of mushroom soy, soy, maggi seasoning, or worchestershire sauce
herbs or dried herbs, if desired
freshly ground black pepper or american juniper, if desired
Mix the ingredients with your hands and shape into golf ball-sized “meatballs.” There should be about 12. This recipe can be doubled, tripled, etc. I have deliberately kept the size of the batch in this recipe small, so that you can experiment with the preparation of it and determine how best to process and cook the meatballs. I personally favor chopping the oyster mushrooms by hand, finding that the food processor renders far too uniform a product. If resemblance to meat is your goal with this recipe, however, that may be the route you want to go. I also recommend using both mushroom soy and a dash or two of maggi or worchestershire.
“Bouillon of the woods” is a simple preparation that I make as often as I find chicken of the woods fungi (Laetiporus spp.) that are just a bit too far gone to serve as is. A simple dried mushroom powder can be substituted – for which all you need to do is to grind dried mushrooms in a spice grinder. You may use wild mushrooms you have collected and dehydrated yourself, or dried mushrooms from the fancy or conventional supermarket (it’s actually a fantastic use for the dust or shake found in the bottom of bags of purchased dried mushrooms). For the preparation of my “bouillon of the woods,” I add a pinch or two of salt and a little crumbled wild bergamot, with perhaps another spice or two if desired, to a base of dried and ground chicken of the woods. It is meant to resemble the bouillon cubes found in supermarkets, but in a powder form and with much less salt. Another possible substitute if you don’t have any dried or powdered mushrooms is to use a purchased mushroom bouillon cube, such as the Telma brand from Israel. If a commercial product is used, you will likely want to reduce the amount of salt added.
Once assembled, these can be baked in hot oven, grilled or fried in vegetable oil or other fat. I prefer the latter two options, which tend to keep the insides moist while browning the outside nicely. You can also cook them in a sauce, but I would recommend rolling the shaped meatballs in either a little flour or extra breadcrumbs and then frying first before doing so. If you encounter difficulty in keeping the meatballs together, you may have had too much moisture in your mushrooms. I find that even conventionally-grown mushrooms require a little bit of drying before incorporating into polpette.
While these are quite tasty on their own, especially with a nice sauce for dipping as an appetizer (I love them with blackhaw ketchup), they can also be substituted for pork, beef, or veal meatballs in classic Italian, European, or Asian cuisine dishes. One of my personal favorite ways to serve them is in a dish inspired by Marcella Hazan’s recipe for winter pork meatballs smothered in savoy cabbage.
the below recipe made with kale and cabbage greens and romaine lettuce
After cooking the meatballs, I cover them to keep them warm and then in a sautée pan heat a little oil or butter. To this I add whatever greens I have available, whether wild or conventionally cultivated, adding the firmer or denser greens first and the more fragile ones later. Cauliflower greens, cabbage, kale, collards and the like are cooked a bit longer, and then blanched wild mustards, wintercress, dandelion greens or even raw watercress or lettuce are added with minced garlic once the firmer greens have softened. A minute or two later, the “meatballs” are then returned to the pan with a little white wine, and perhaps a splash of balsamic or blackhaw vinegar, and the whole is covered until heated all the way through.
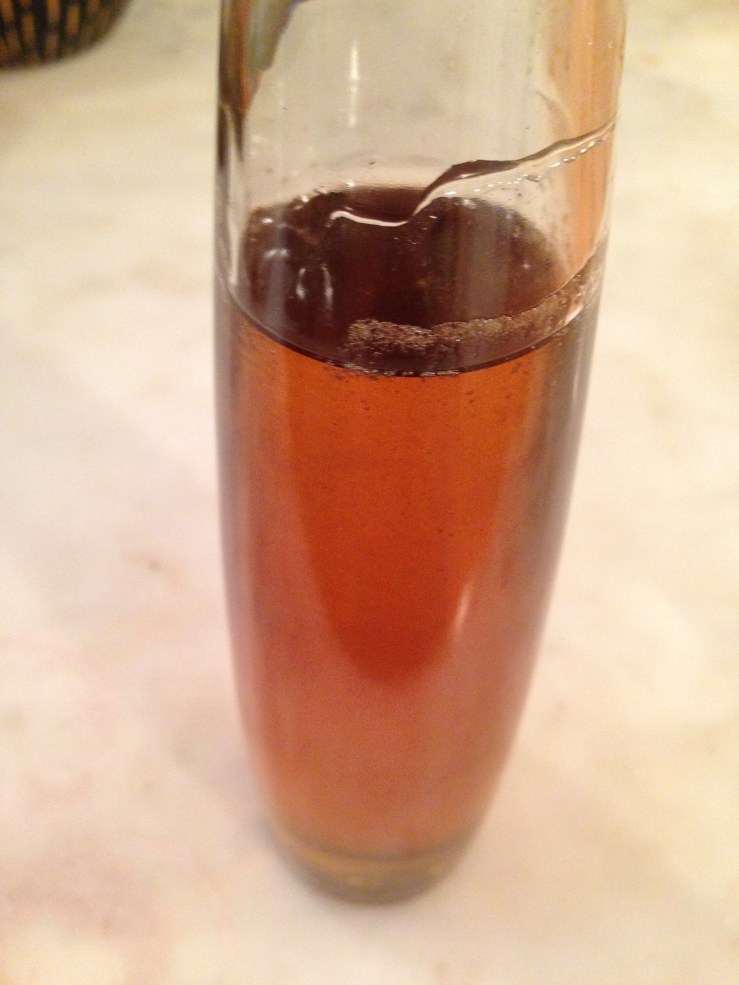
Hickory syrup is golden, smoky, beautiful and has legs for days…
The Hickory is a characteristically American tree, an irreplaceable member of the great deciduous forests of our continent. It is most known to those with only a casual interest in native trees as the genus which contains the Pecan (Carya illinoinensis), but there are a number of species of Hickory tree which are found, not commonly, but regularly in the woodlands of the Eastern half of the US. The mature stage of eastern hardwood forests is commonly referred to as the “oak-hickory forest,” underscoring the importance of this native tree.
Wild food gatherers will of course be familiar with the Hickory in the form of its edible nutmeats, gathered in the autumn as the nuts drop in their (usually) smooth green and segmented outer shells. While all hickory nuts are technically edible, not all species conform to what we would consider palatable. Within that window of taste, there are also variances from tree to tree. One of the most widely distributed and appreciated for both beauty and flavor is the Shagbark Hickory, Carya ovata.
Mature shagbark hickory with its characteristic “shaggy” strips of exfoliated bark.
In addition to providing delicious nuts, the shagbark hickory has a bark which can be used to add flavor to smoked or grilled foods, in the fashion of other hardwoods such as apple, cherry and mesquite. Excitingly for our purposes here, it can also be used more directly, in the form of a tea which can be turned into a sugar syrup. This product of the hickory is often likened to maple syrup, but it is different in some fundamental ways. First of all, maple syrup is a natural product which is extracted from the natural sap of trees by a somewhat laborious process. Second of all, maple syrup tastes quite different from hickory syrup. So perhaps not such a great comparison. In terms of use, however, there is a certain similarity – hickory syrup can be substituted for maple syrup in both direct use and in recipes, with of course the knowledge that the flavor will be that of hickory, not maple.
I quite like maple syrup. I don’t wish to demean it in any way. But, to me, hickory syrup tastes better, and is far more interesting culinarily. Those who find maple syrup good but somewhat cloying may agree with me. Hickory syrup has an incomparable smoky, woodsy flavor that is a more complex than maple syrup, something which to my tastes makes it more useful for both sweet and savory recipes. Maple syrup is delicious, but hickory syrup is adventurous. The only flaw that I see is that the manufacture of hickory syrup relies on an outside product to sweeten it, in most cases cane sugar, which is of course an industrialized, tropical plant and carries with it a cost in terms of ecological impact. In its defense I will say that making hickory syrup is one of the best ways to use sugar, a product I generally avoid. And while the amount required is no more or less than one would use to make a simple syrup, the product is one that carries a huge amount of flavor in even small doses, especially when used in cooking and baked goods. Maple syrup is also quite expensive in terms of money if one buys it, and time if one makes it. Making hickory syrup is quick, simple and costs nothing more than the price of whatever amount of sugar one uses.
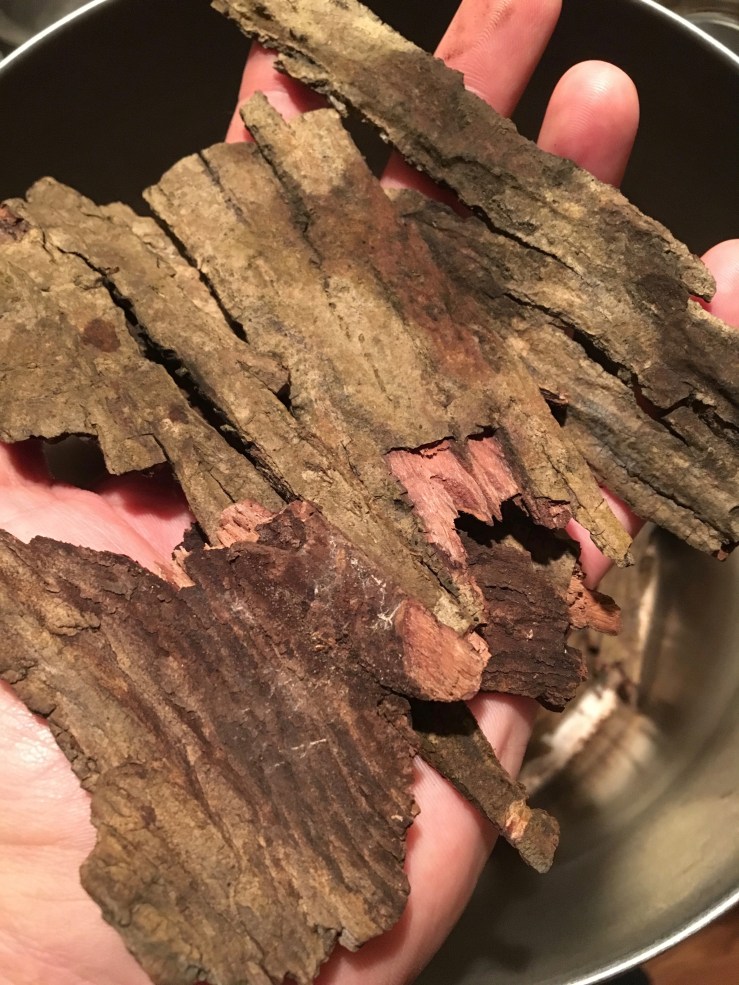
To produce hickory syrup, one first needs to locate a shagbark hickory tree. The shagbark is quite distinctive, having naturally exfoliated bark which hangs “shaggily” off the tree in large, easy to remove pieces (pictured above). This bark can be collected in any season, but I usually gather it in winter when other wild food options are reduced. First, I scout around the base of the trees I find to see if any strips have fallen to the ground. There is no direct harm done to the tree by removing its bark, but one does run the risk of exposing the inner bark to attack from insects (another reason to collect in winter). It also reduces the natural beauty of the tree, so I try always to take only a few strips from each tree and minimize the impact both ecologically and visually. It does not require a great quantity of bark to make a rich syrup, so I would recommend starting with just a few ounces and seeing how well you like it.
Toasted shagbark hickory bark, ready to be made into a syrup.
To prepare the syrup, you will want first to toast the bark in a low oven. This works on the same principle as dry-roasting spices before using them in a curry. The heat brings out flavors and aromas in the bark which would be less intense if the bark were not treated in this way. I have made hickory syrup without toasting it first, and it is perfectly serviceable, but not as deep in flavor. To toast the bark, place on a baking sheet in a low (under 200°) oven for 1-2 hours or a slightly hotter one (325°) for a half-hour or so. When I use the higher heat method I turn the bark halfway through. I’m not entirely sure that this is necessary, I am likely just being fussy.
Once the bark is toasted, allow it to cool and then prepare a tea from it. I generally use a ratio of 4-5 ounces of dry bark to 6 cups of water. Bring close to a boil, then cut the heat and allow the bark and water to simmer until the amount of water (now dark and flavorful) has been reduced to a third of its original amount. The amount of time this takes will vary greatly, so the best way to proceed is simply by measuring, reducing, and measuring again until one gets the liquid down to a third. I have prepared this tea with amounts as small as 2 oz of bark and as high as 1.5 lbs and found the general ratios to be effective in both small and large recipes. To make a practical, easily bottle-able amount the most usual proportion that I prepare is 8-10 oz. of bark to 12 cups of water, reduced down to 4 cups of tea. Avoid boiling, which will result in bitterness. It is perfectly acceptable (and perhaps beneficial) to allow the mixture to sit until cool, for several hours, or even overnight before straining the bark. When done, do not discard the strained bark. Instead, save it and use for additional flavor when grilling or smoking foods with hardwoods.
Hickory syrup being reduced. The color will vary from pale gold to reddish amber.
Next, you will want to add sugar. I prefer to use a proportion of 1 : 1 to make the basic hickory syrup, and then reduce it if I want a more concentrated and thick product (I usually refer to this as hickory glaze).
To make a hickory simple syrup, rather than a glaze, all one has to do is combine the sugar and tea over a low heat until the sugar dissolves. It is best to avoid stirring this mixture as it begins to get warm, as this will cause crystallization. This syrup will not be as thick as maple syrup, but is perfectly fine for most applications and is actually much better if you are going to add hickory syrup to drinks or use it in a recipe that will be cooked for any length of time.
Reducing the syrup to a glaze is more useful if it will be used to make salad dressings, added to dishes as a finishing touch, or poured over pancakes like maple syrup. I tend to reduce the syrup by anywhere from a quarter to a third, so going from a cup of hickory syrup to 2/3-3/4 cup of hickory glaze. I have found that reducing it much further results in a product that solidifies at room temperature. There is nothing much wrong with this thick syrup, it just requires heating in a water bath to become fluid again.
As to the uses of either hickory syrup or glaze, the only limit is one’s imagination. Of course it works wonderfully as a substitute for maple syrup, but don’t let your experimentation end there. Hickory syrup makes an amazing addition to various mixed drinks and cocktails, alcoholic or not, and is an ideal sweetener for lemonade or sumac-ade, adding its characteristic smoky flavor to the mix. It’s fantastic when substituted for honey or maple syrup in baked goods, makes a great base for vinaigrettes and yogurt dressings, and is inspiring drizzled on homemade ice creams and frozen yogurts. The combination of smokiness and sweetness means it pairs excellently with meats, especially pork sausages, bacon, and fried chicken. My favorite way to use it may be as a finishing touch to bitter greens, of which I eat quite a lot. And it almost goes without saying that it is an awesome pancake syrup.
It’s extraordinarily easy to identify shagbark hickory and make this syrup – there is an added bonus to collecting this bark in the winter, as well. Identifying hickory trees now means one can be there in the fall, when their nuts are available, for the shagbark hickory is one of the consummate wild foods, under appreciated in our area where they are so naturally abundant.
Perhaps the quintessential first dish to make using acorns, a simple acorn bread with a 50/50 ratio of acorn meal to white or wholemeal flour is a great way to really taste the flavor of the acorn meal. It doesn’t matter whether you use hot-leached or cold-leached acorn meal, just that it is very finely ground.
A light, moist, soft loaf with a very crispy almost cracker-y crust. If you’re feeling decadent you could turn it into a bread pudding, but I enjoy it as is, especially hot from the oven with just a dab of salted butter or jam made from wild berries. Hickory syrup and a touch of molasses really make the difference, both of those flavors combining well with the earthiness of acorns.
My method for hot-leaching acorns to obtain acorn meal is here.
Whisk together :
2 cups acorn meal
2 cups bread flour
4 tsp baking soda
1/2 tsp salt
Whisk together :
1 egg or egg substitute
1/2 cup milk, whey or rice milk
1 tbs molasses
1/4 cup hickory or maple syrup
3 tbs olive oil
Add the liquid ingredients to the dry ingredients, stir to combine, and pour into a greased loaf pan or cast iron skillet. Place the pan in a 400° oven for 30 minutes or until a toothpick inserted into the center of the bread comes out clean.
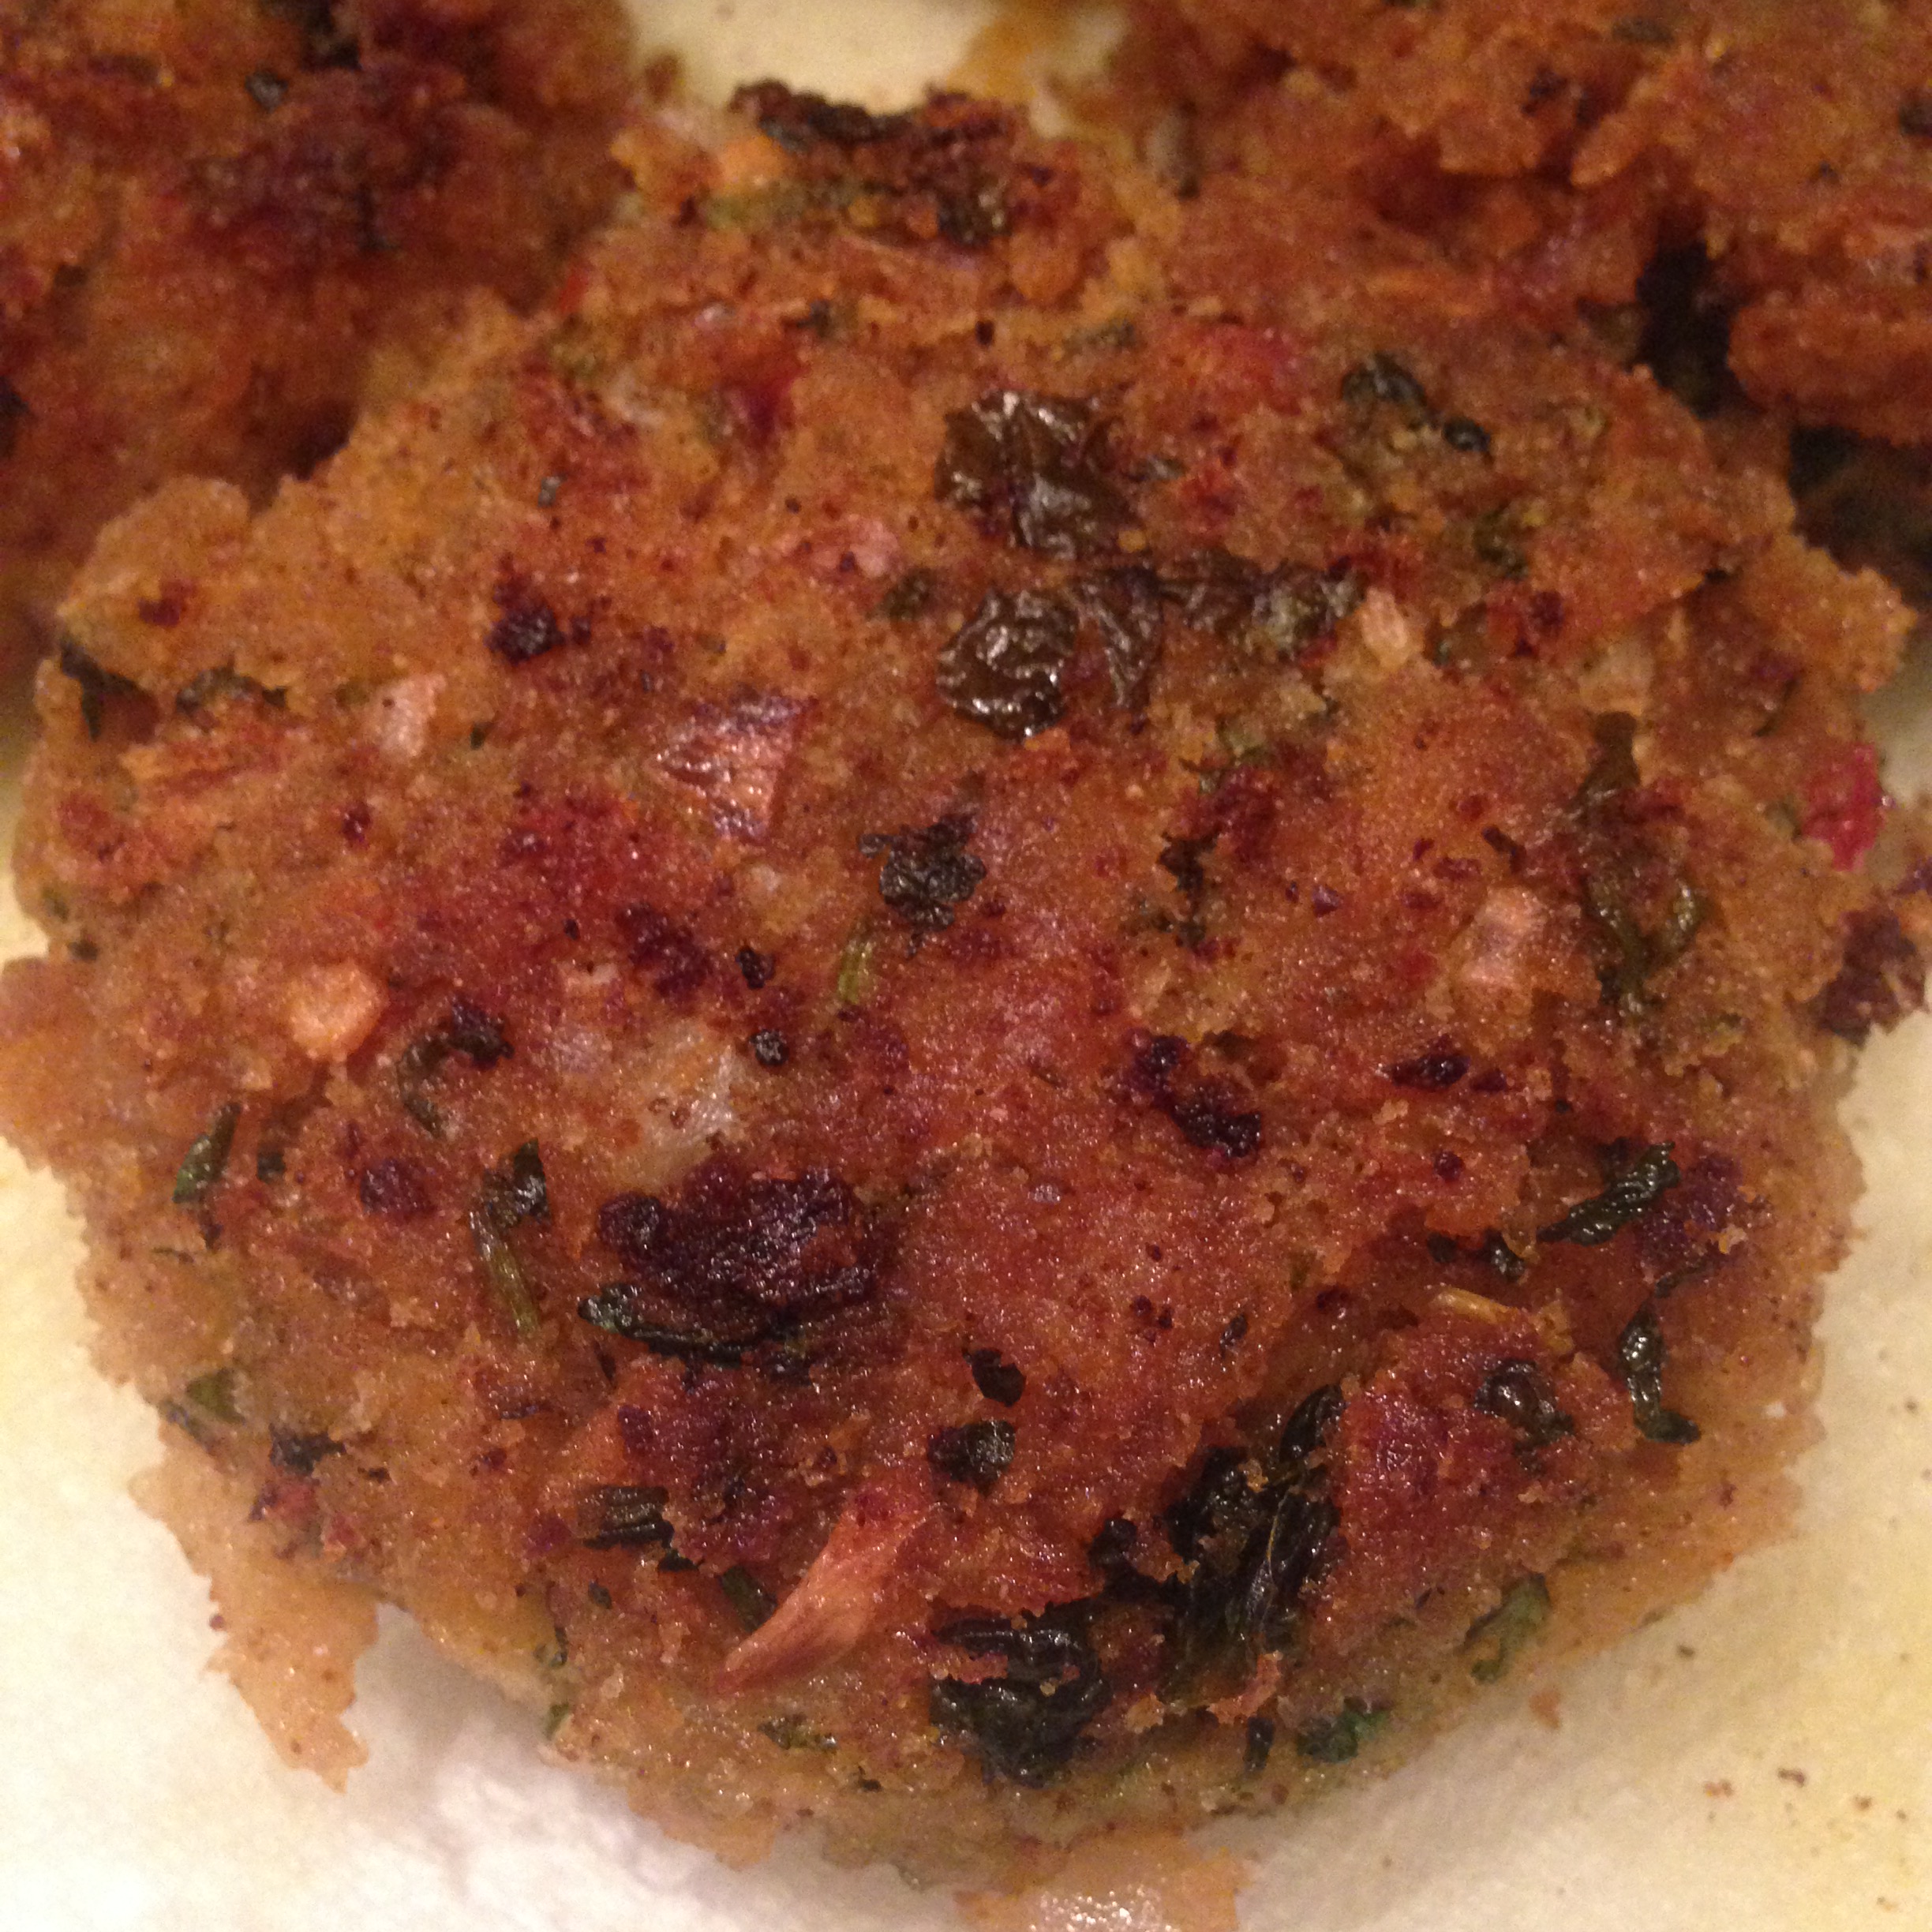
The Hericium genus of edible fungi grow wild throughout much of the Eastern US. And while they aren’t common, they are unique. When fresh they have a tender, fleshy texture and delicate flavor strongly reminiscent of shellfish, particularly crab. They grow on living trees or dead wood, hence “Tree Crab.”
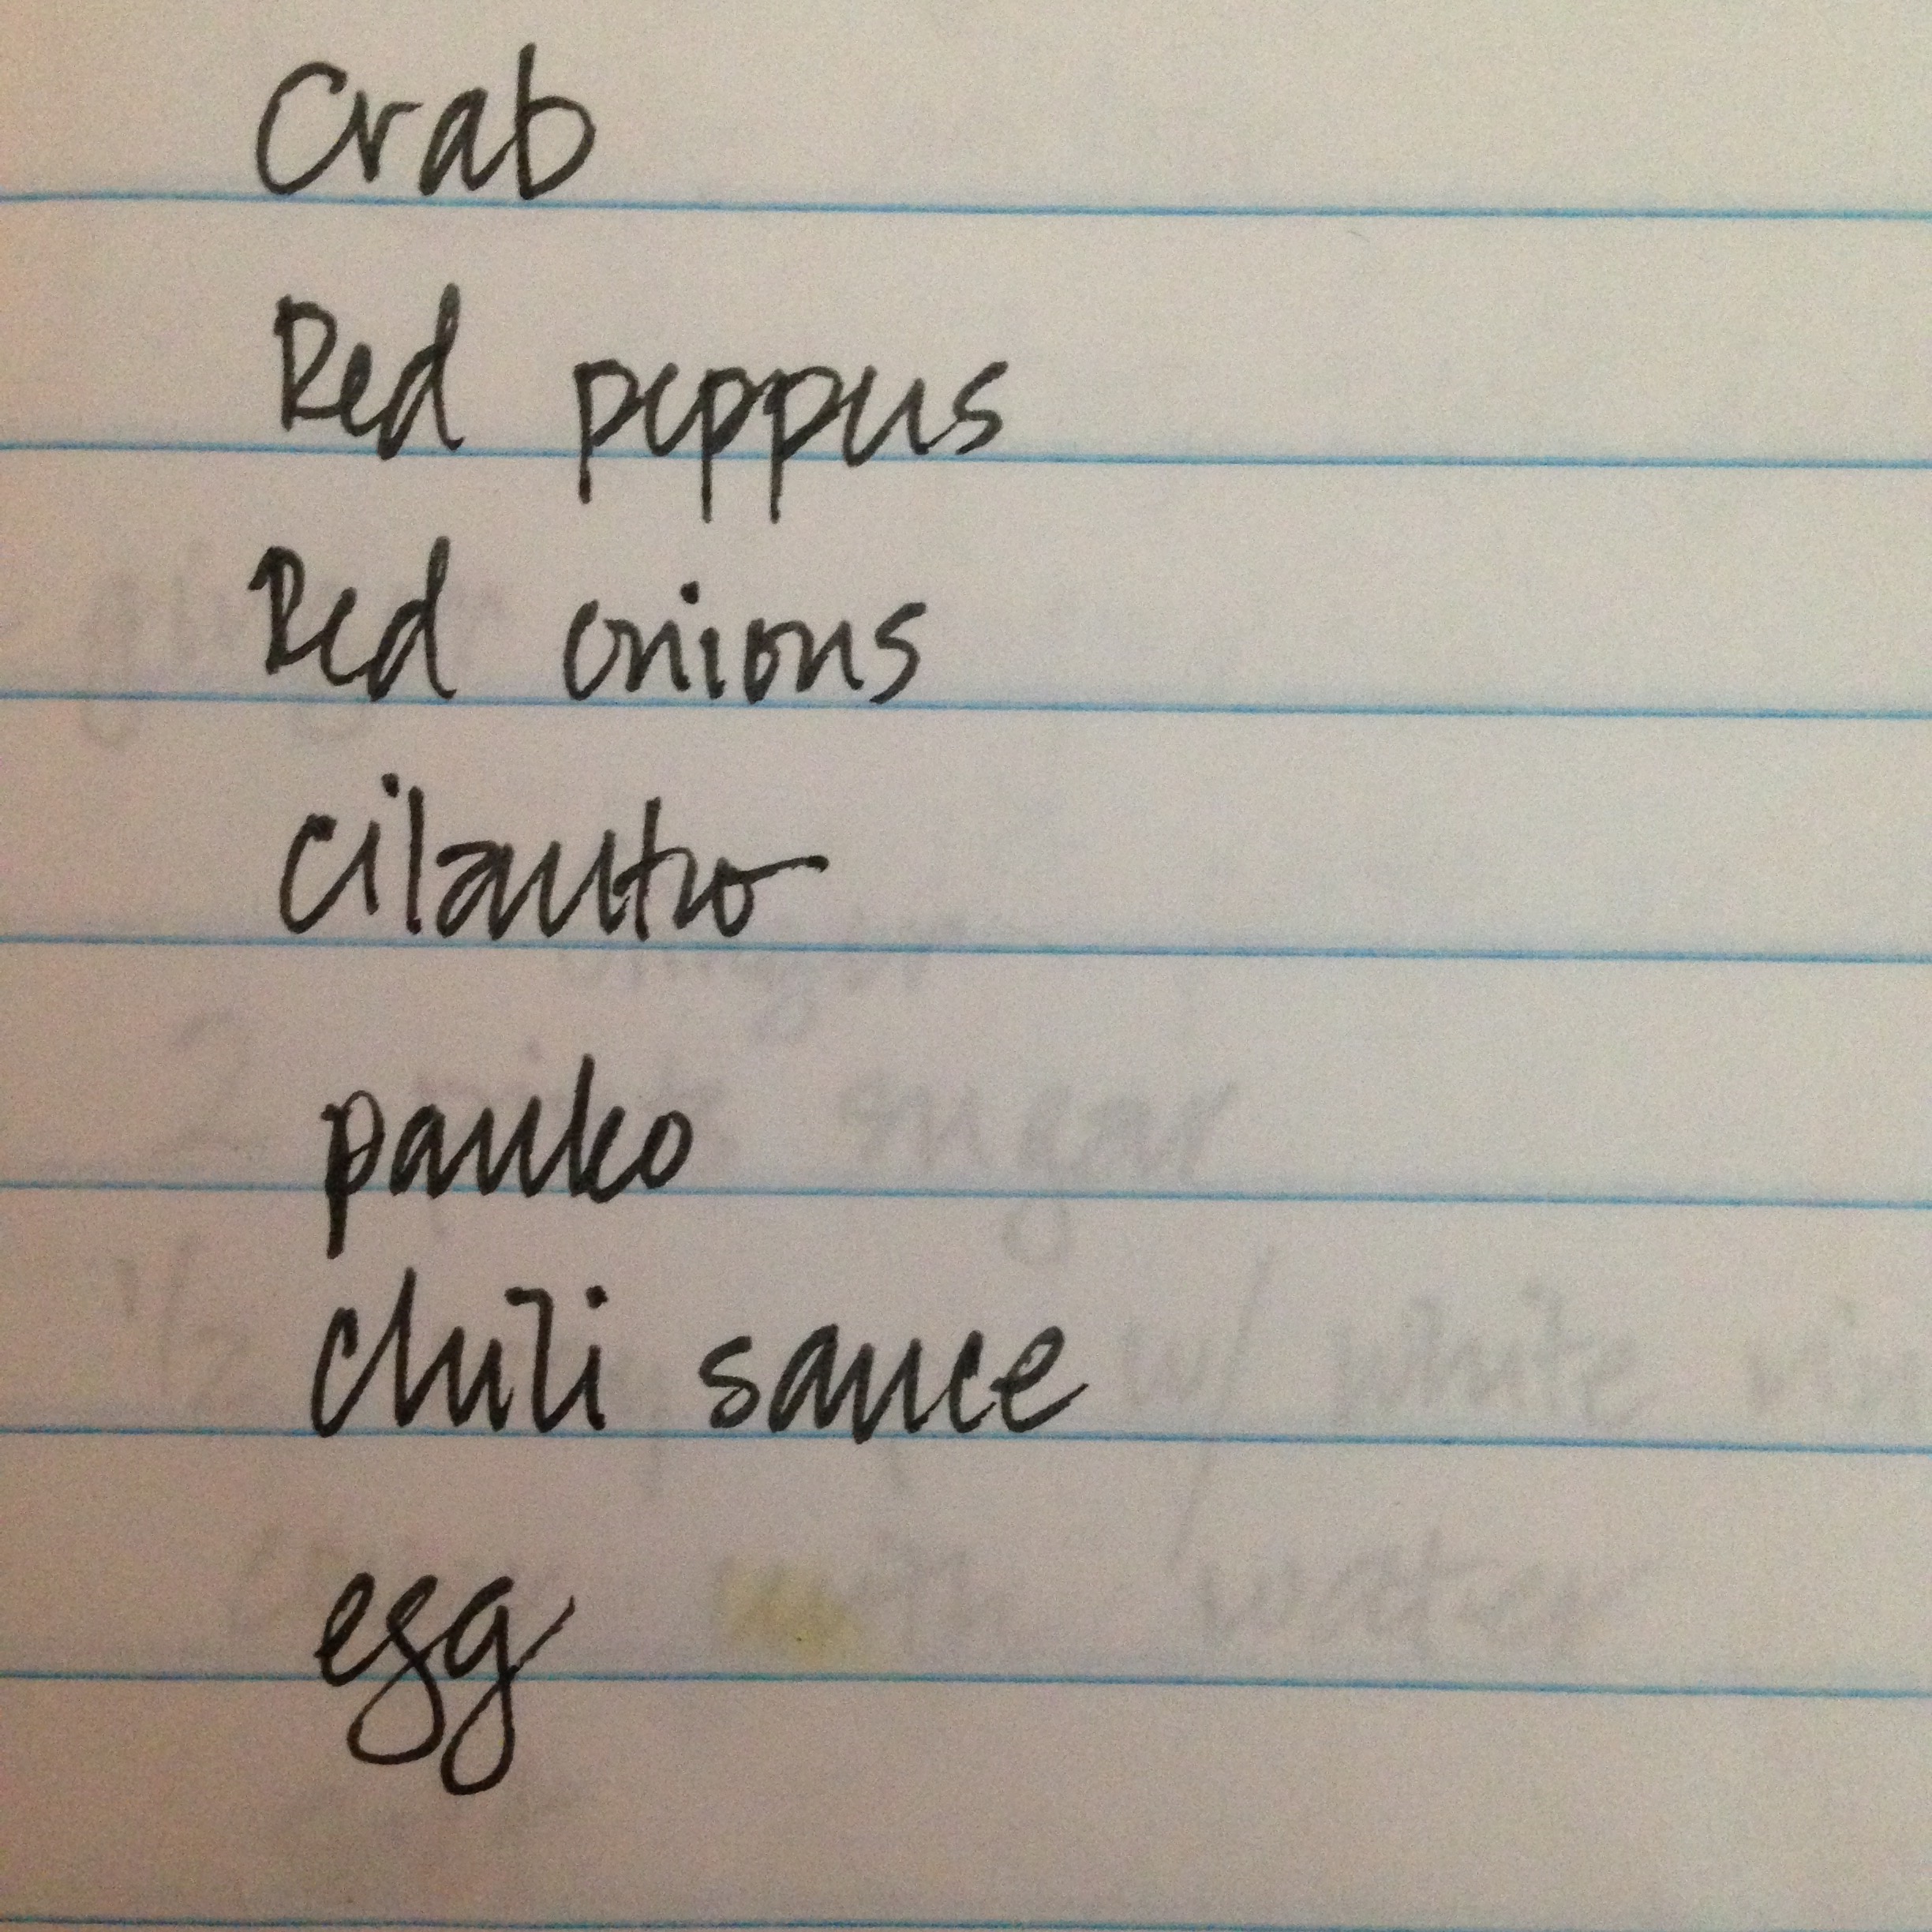
The recipe itself is one I plundered from my first real (some would say only real) restaurant job. You know, I’m not even sure it was a real job, come to think of it. But the recipe is very very real, at least in the sense that it exists as a handwritten list of ingredients that I ran off with when we closed. In the lovely angular script of my kitchen manager Amy (although it isn’t her recipe either) :
I like that egg has an egg stain next to it. Anyway, for about fifteen years I’ve carried these old sheets of notebook paper with all the lists of ingredients for the recipes of Chez Nameless around but the one that I have made time and time again is this one, never exactly the same as we made it then but never very different. Having acknowledged my theft, here is the recipe.
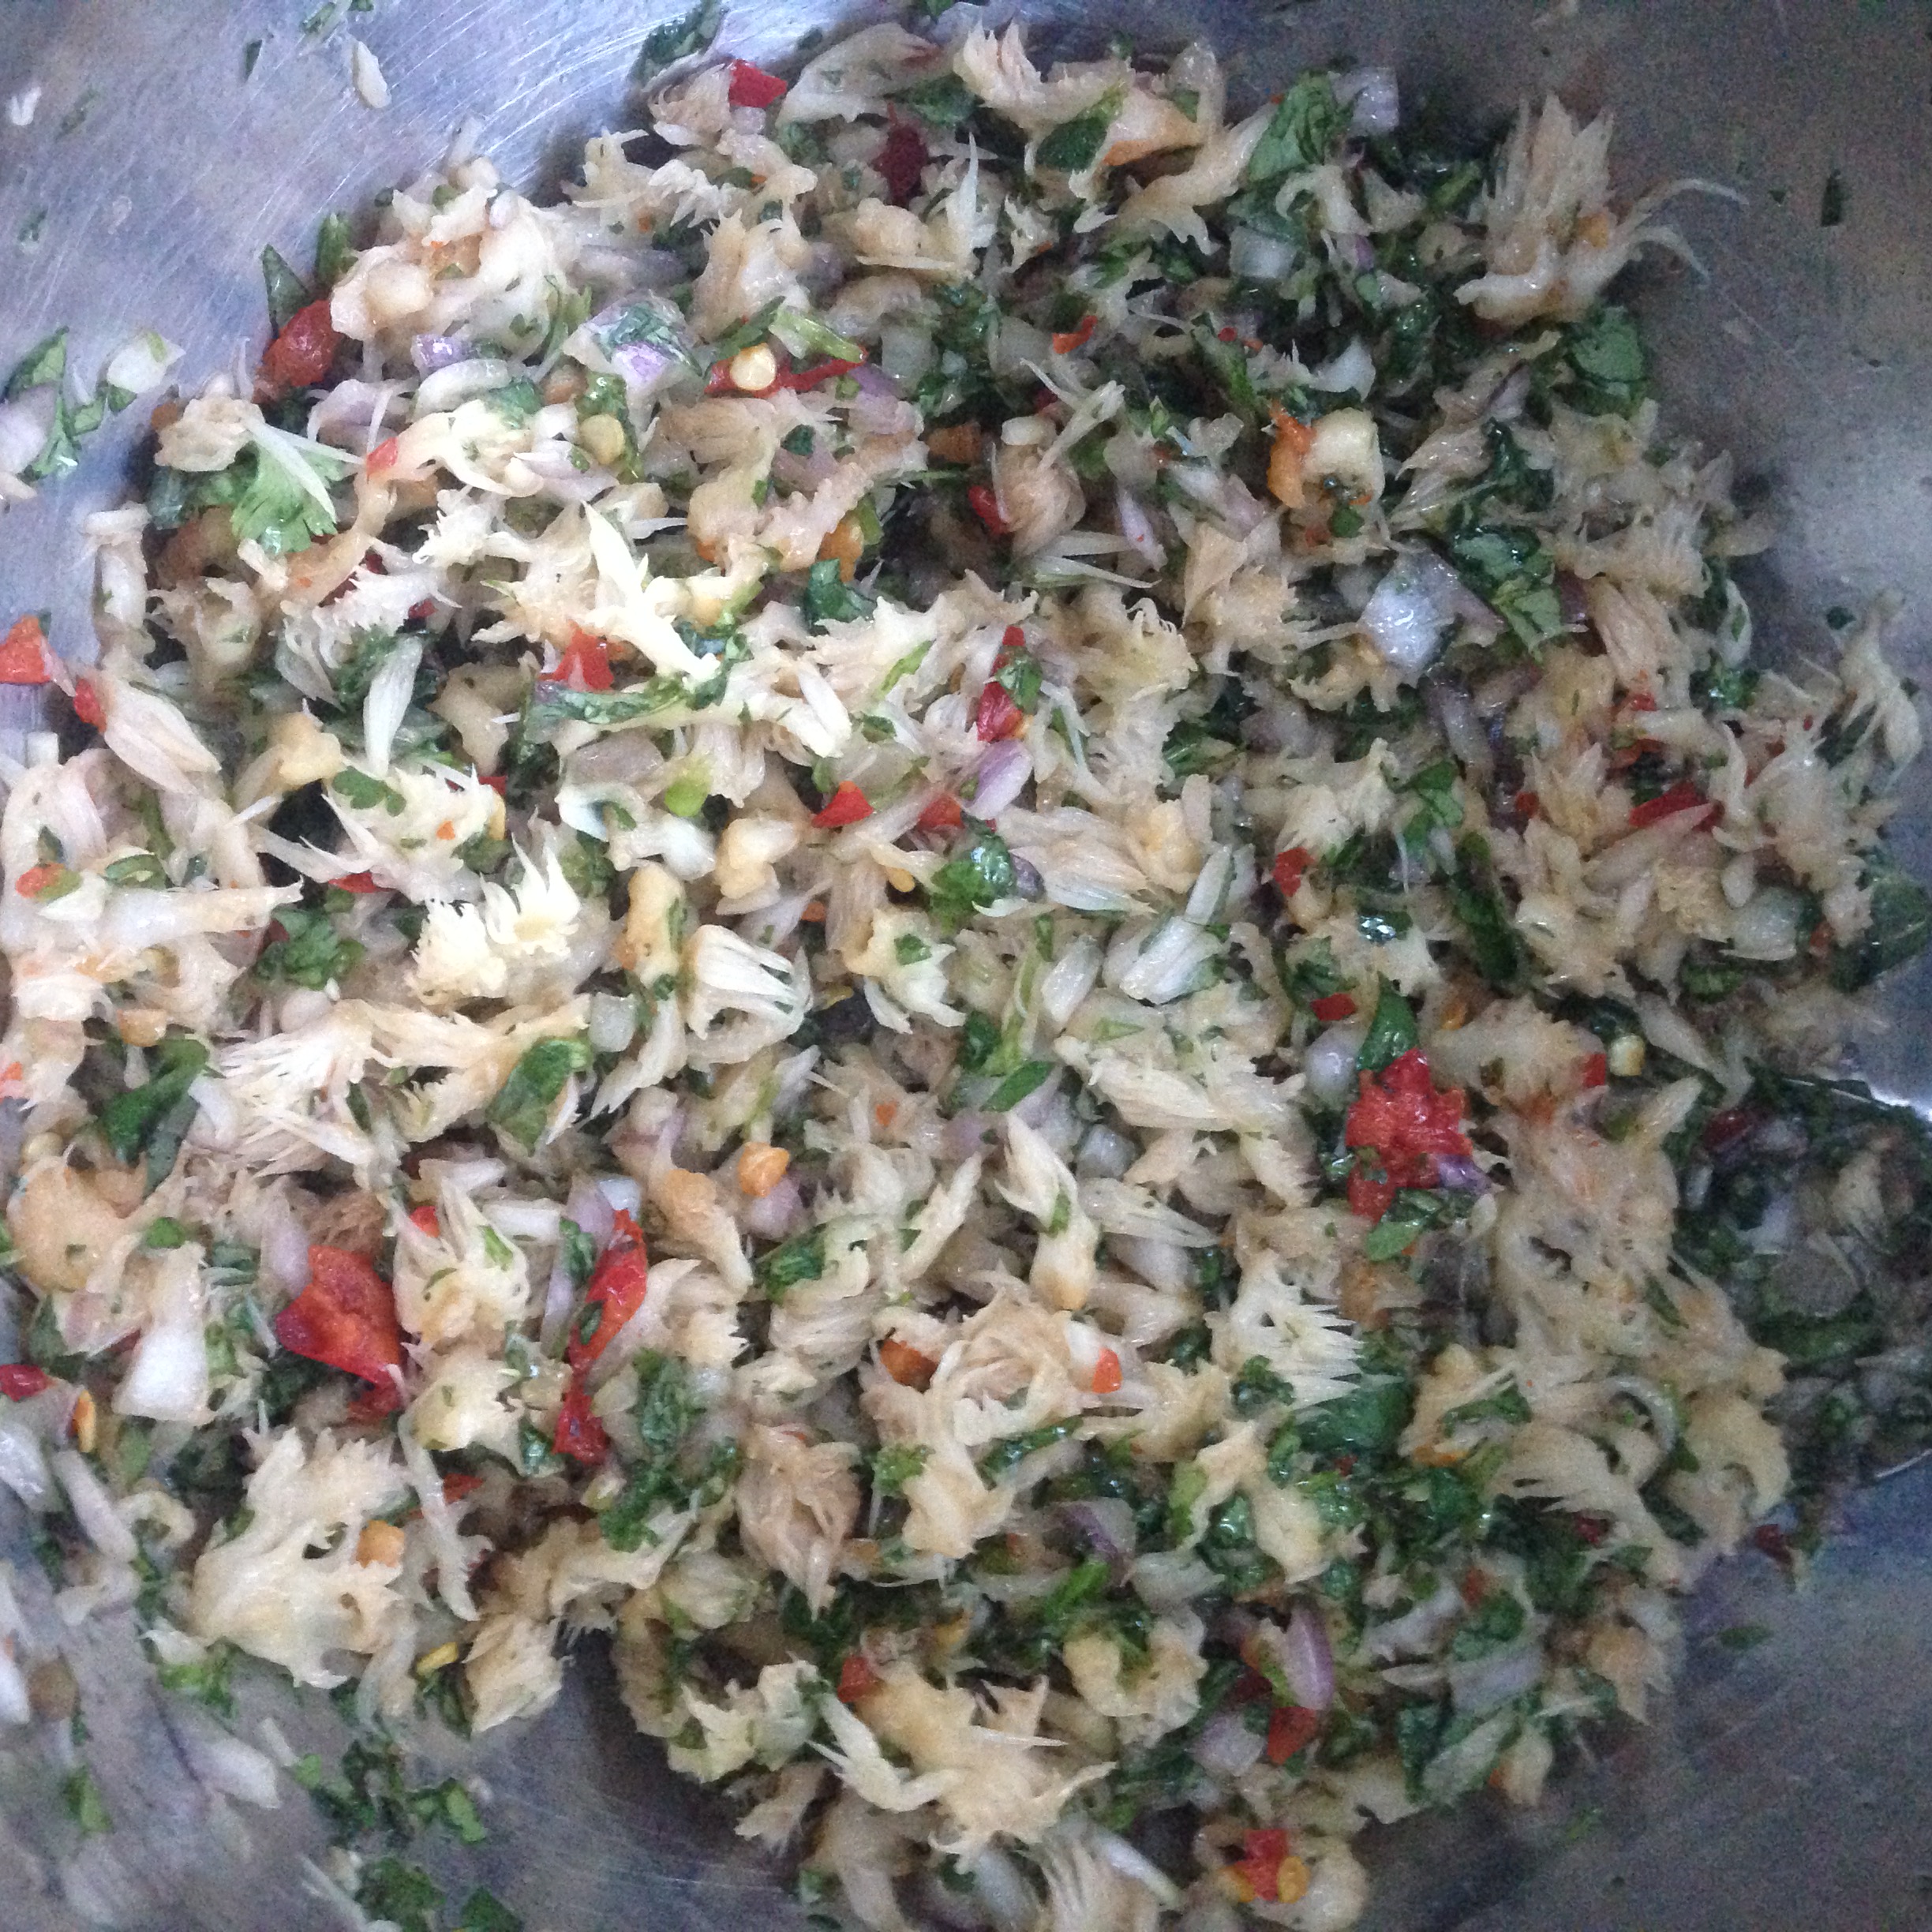
Combine in a mixing bowl :
12 oz. Hericium genus fungus (Lions Mane, Bears Head Tooth, etc), shredded into small pieces by hand, sliced thin if too firm for shredding
4 oz red onion, minced
2 oz shallot, minced
handful of chopped shiso
handful of chopped cilantro
1-2 tbs of tuong ot toi
2-4 tbs of thai sweet chili sauce
*There is no egg. Don’t add any eggs.
**Adjust the amount of sauces used based on your own taste and the moisture content (see below).
Combine these ingredients and mix them together very well, preferably with your hands.
Add enough breadcrumbs to dry out the mixture slightly. The amount will vary depending on how much liquid is in the fungus. You will have to use your own judgement, but the normal range is between a half cup and full cup.
Shape the mix into patties of whatever size you prefer, firming them with your hands. If the mix is too watery, add more crumbs. If it is too dry add more sauce.
Roll or coat the patties in panko or more breadcrumbs and prepare hot oil for frying. I usually use just a small amount of oil in the pan, rather than deep frying but either will work. Fry until golden brown.
At this point you may freeze the cakes for later serving. You may also finish them by placing them in a very hot oven or under a broiler. Finish them at very high heat and very quickly. In this way the moisture content and crispiness will both be ideal.
Oh and of course, this also works with “real” crab.
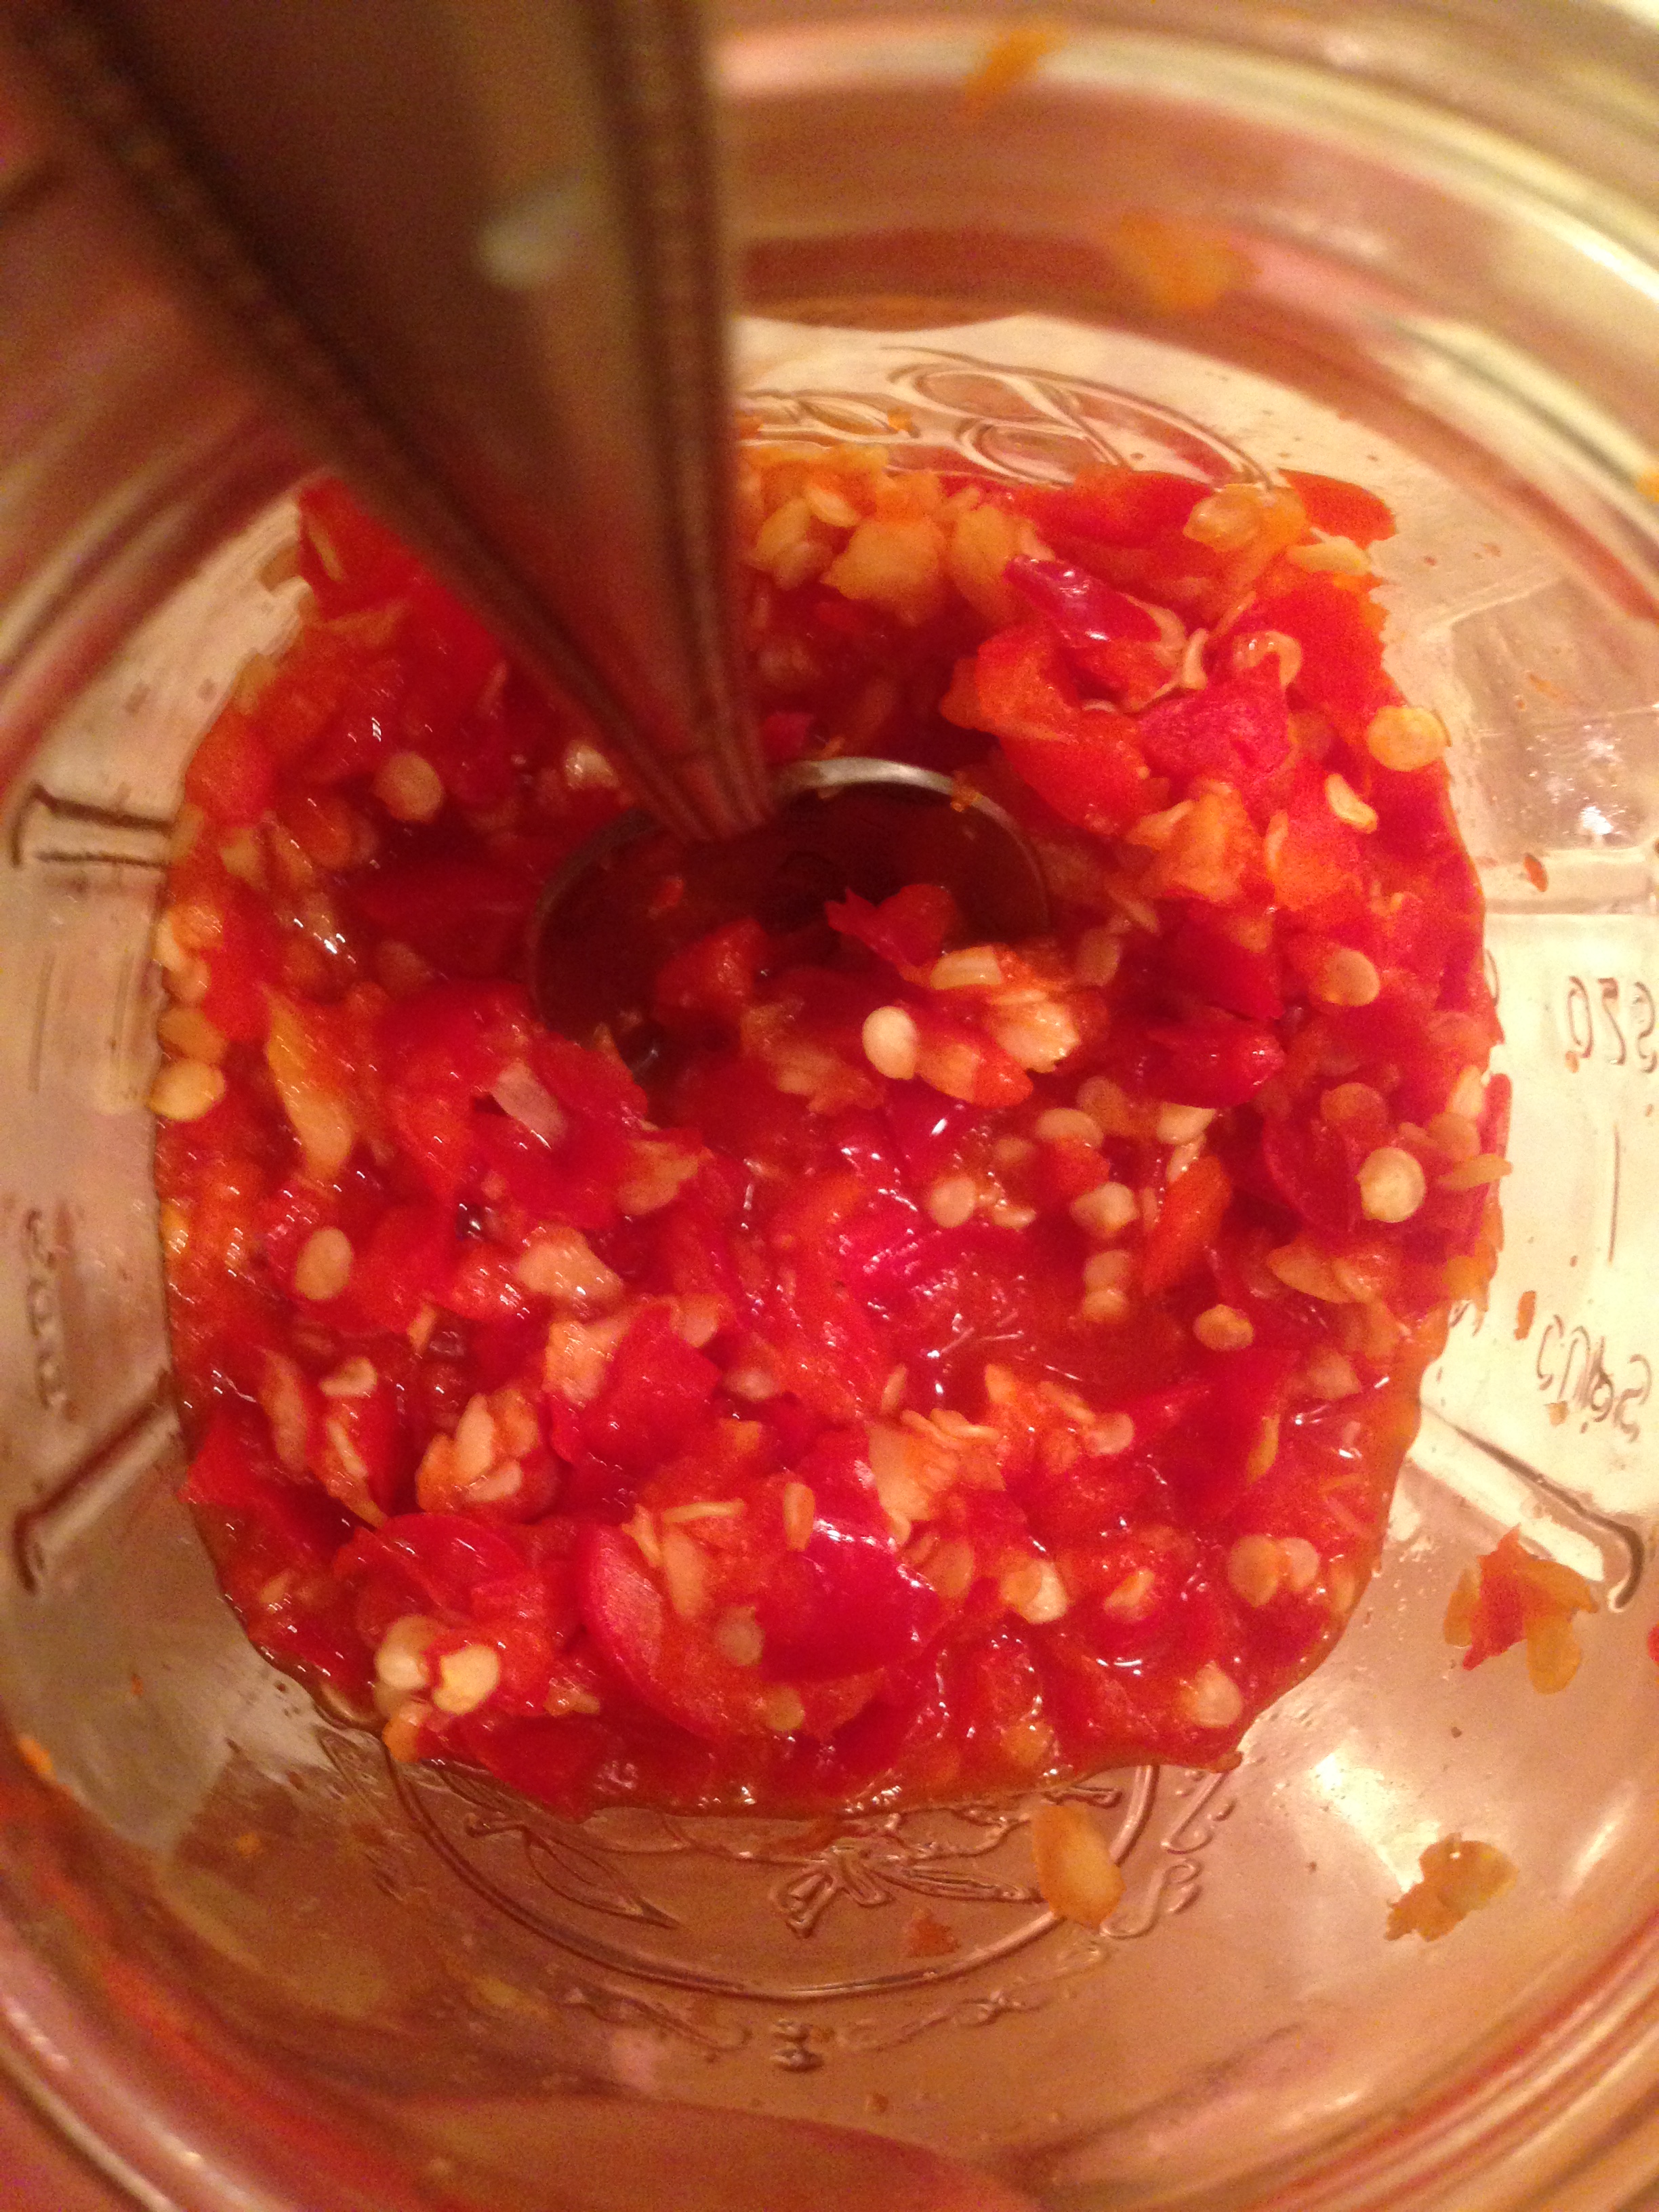
24 oz cherry bomb or fresno chile peppers, or other medium-hot to hot red chiles, destemmed but not deseeded and cut into quarters, halves or chunks as appropriate
1 head garlic, crushed and peeled
a pinch or two of salt
Pulse until chopped into smaller fragments, stopping to scrape and redistribute if necessary.
Add :
2, 4 or 6 tbs sugar (see note)
1/4 or 1/2 cup seasoned rice wine vinegar (see note)
Process until chile and garlic and finely enough diced. Place in medium to large saucepan over medium heat.
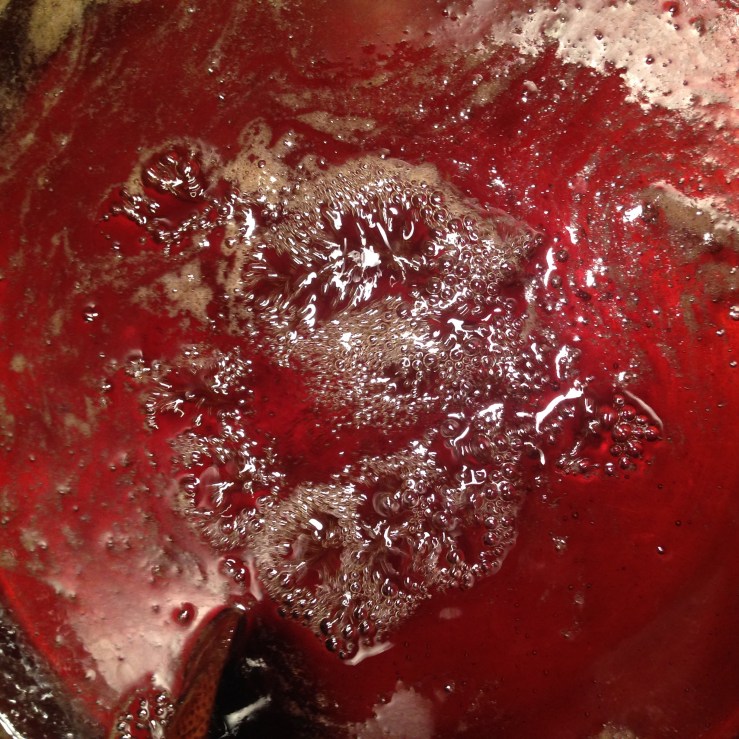
Bring to a simmer and cook at a low simmer until the liquid has mostly evaporated.
Allow to cool, then refrigerate and serve with EVERYTHING.
Note on proportions :
It’s best to play with the proportions of this recipe to suit you or your fellow diners taste. In particular sugar and vinegar should be tweaked : 6 tbs sugar makes something close to what is purchased in asian markets as shelf-stable tuong ot toi, 2 tbs is more like what would be served on the table at a restaurant. The larger amount of vinegar will make it take longer to cook and reduce but easier to process everything initially. And naturally it will make it more sour. I usually use 2 or 4 tbs of sugar and 1/2 cup of vinegar.
Ideally, you should play with all the other proportions as well, and even what kind and color of chiles to use, to suit yourself and your diners, and the dictates of the moment. I often replace 4 oz or so of the red chiles with green chiles, it ruins the impressive red majesty of the original, but it reminds me of when I used to buy it in the Asian market, where there is usually a bit of green since the peppers are pulled in big farms and often still have a hint of green. I used to think it was scallions 😐
This is undoubtedly the world’s finest table sauce. There is simply nothing finer in any cuisine that goes so well with so many cuisines and especially with so many simple foods. Raw and cooked vegetables, eggs, noodles, soups, sandwiches (unbelievable on banh mi), salads, tofu, pork, fish, and really pretty much anything is enlivened with a little dab of this. Butter, noodles and a spoonful of this with maybe a little cilantro would probably be my final meal if I had to have one. But I won’t! I will live forever, making millions and millions of batches of tuong ot toi! At least, that’s the plan.
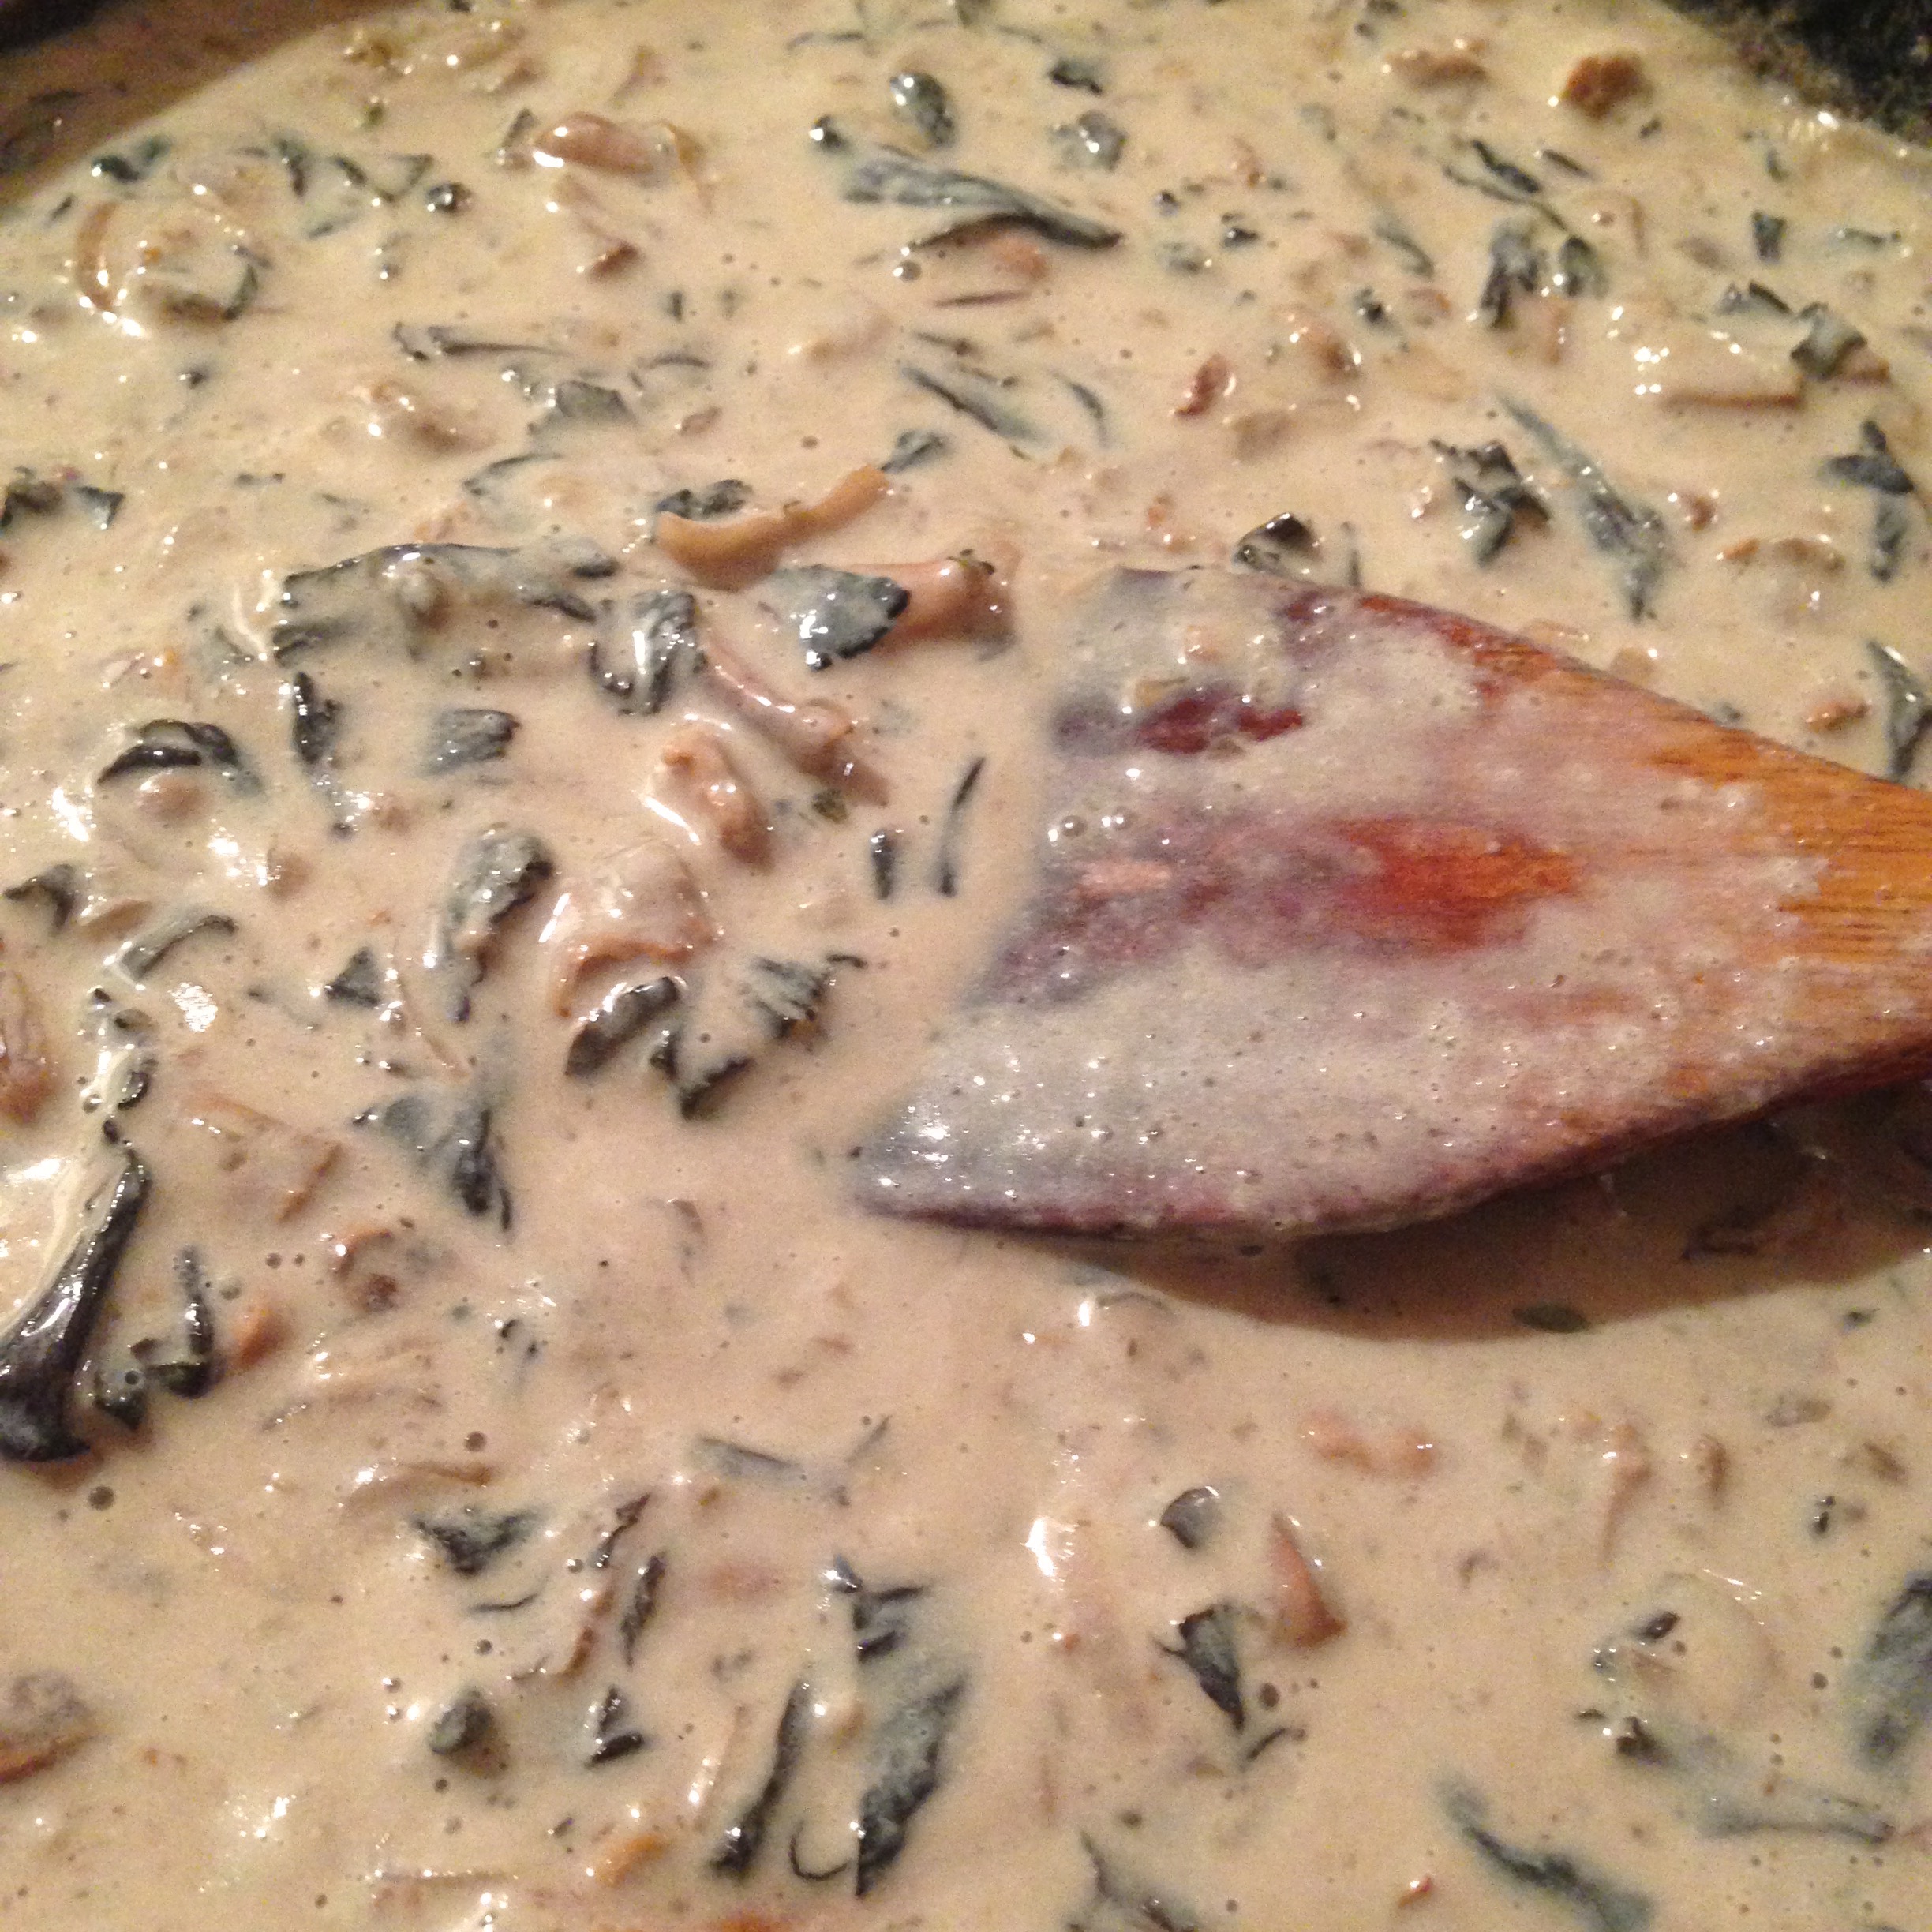
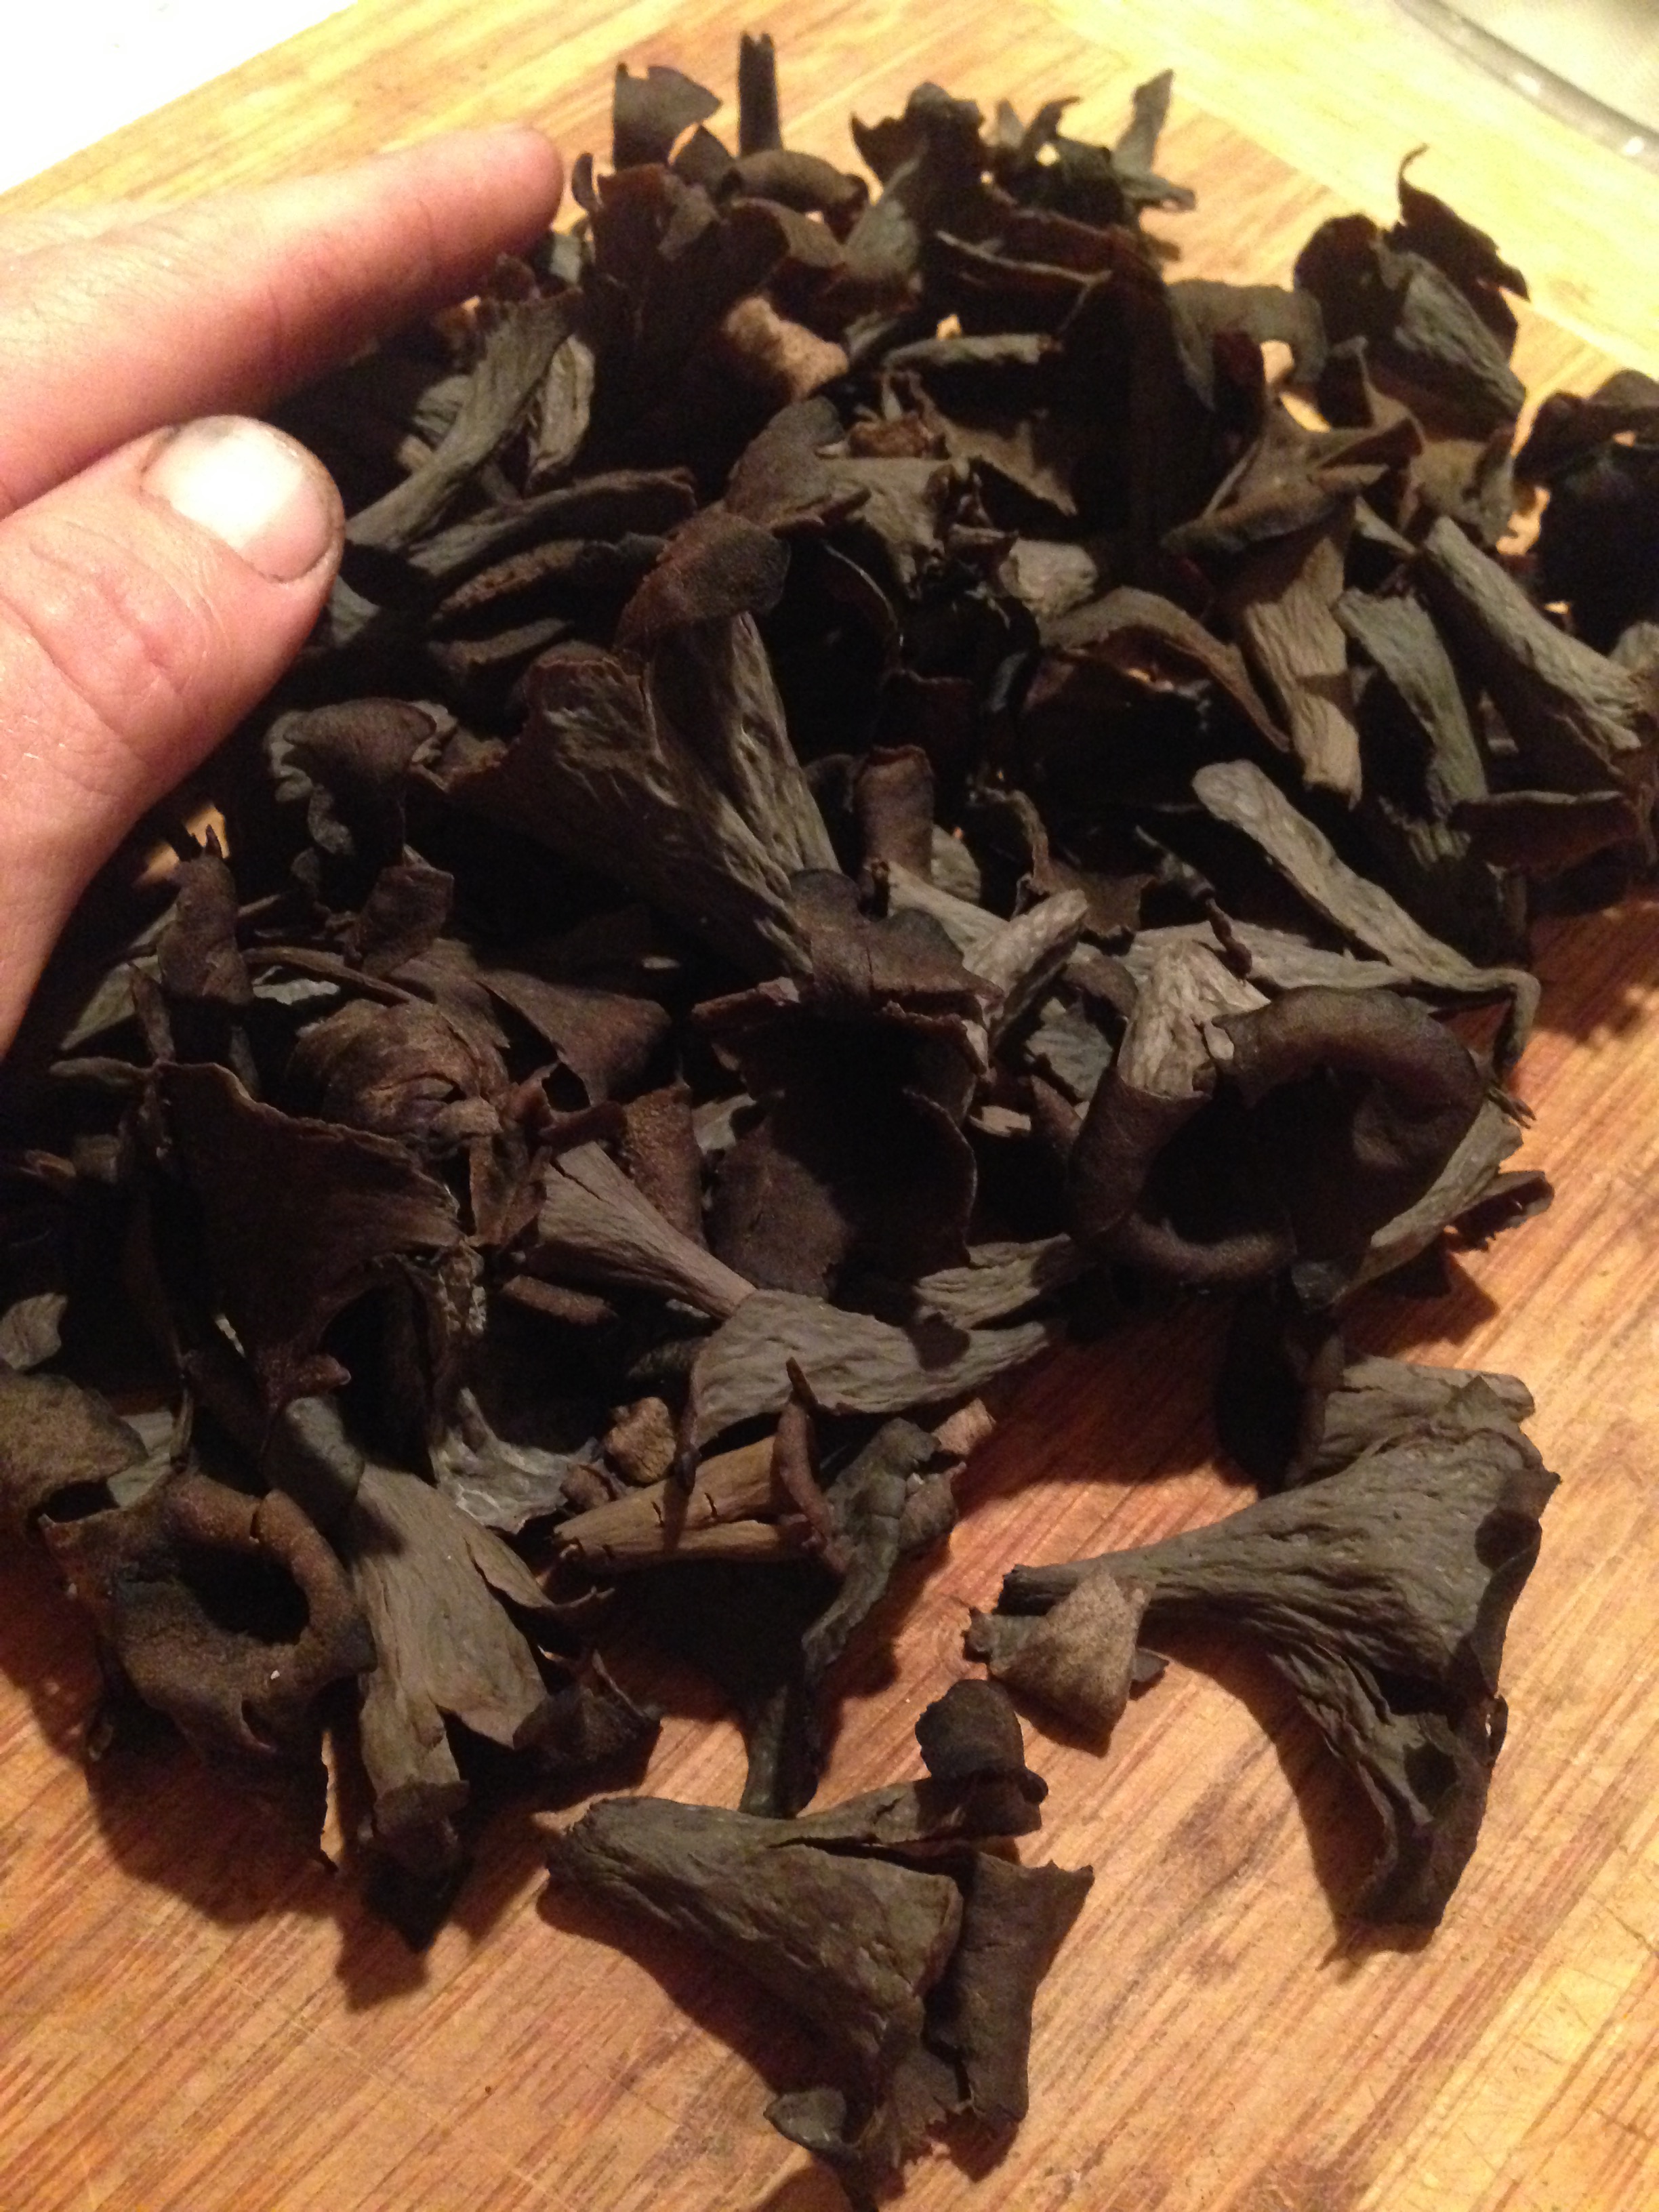
This is a simple sauce that tastes creamy and luxurious without using heavy cream – highlighting the natural flavor of some of the seasons’ finest wild mushrooms. You can use any kind of chanterelle or craterellus mushroom for this, but the sauce is at its’ best and most pleasing to the eye when a mix of different, colorful mushrooms is used. In the variation pictured above we used black trumpets (Craterellus cornucopioides) and golden chanterelles (Cantharellus cibarius).
As always, prepare everything in advance and have handy when making a sauce so you aren’t rushing around chopping shallots or looking for sour cream when the time comes to add it.
Melt / heat in a sautee pan:
2 tbs butter or oil
Add :
1 tbs. whole field garlic bulbils or conventional or field garlic cloves, minced
2-3 oz shallots, finely chopped
A grating of fresh nutmeg
Sautee the onions and garlic until softened, then add:
1/2 lb. of chanterelle or craterellus mushrooms, chopped into similar-sized pieces
NB >>> Different mushrooms will cook at different times, so if using a mix, they should be added one at a time. I usually find that golden chanterelles take the longest and horn of plenty the shortest.
Cook the mushrooms until they are softened but not yet completely tender, and add:
1 tbs. potato starch (corn starch may also be used. Flour can be used but must be well-cooked to avoid leaving an off taste)
Stir and sautee for 1-2 minutes, then add, slowly, mixing to incorporate :
1 1/2 cups hot whole milk, preferably fresh and of very good quality
Cook while slowly adding the milk for fifteen minutes or so. Add seasoning to taste while the sauce reduces a bit. If it becomes to thick and/or is cooking too fast add 1-2 stock cubes or ice cubes and reduce heat if needed. Season with :
Freshly ground black or white pepper to taste (optional)
Salt to taste (not optional)
Fresh or good quality dried thyme to taste
Once the sauce is close to the desired consistency and the mushrooms are mouth-tender, remove the sauce from the heat. If it is very hot, allow to cool a bit before adding :
1/2 cup sour cream, preferably at room temperature
Snipped chives if desired
Taste and adjust for seasoning. Serve immediately.
If not eating immediately, allow the sauce to cool on its’ own without adding the sour cream. When serving, reheat and then stir the sour cream in, with chives if desired.
Craterellus cornucopioides being prepared
There are of course any number of herbs or other seasonings that could be added to this sauce, but in this its’ simplest form I’ve used only the classic mushroom herb thyme and a bit of nutmeg and optionally pepper. Fresh parsley or celery leaf in small, finely-chopped quantities are a nice addition for a bit more green color. One could add a stronger herb as well such as oregano or tarragon if it seems appropriate for the dish it is to be used with.
The temptation with a sauce this rich is to toss pasta in it, and revel in the sumptuous texture combination of chanterelle and toothsome starch. And I won’t deny that it is a fine sauce to serve with a starch – heavenly with freshly-made egg noodles, homemade biscuits (a nice vegetarian replacement for Southern-style sausage gravy), even simple buttered rice. Some more interesting uses? A cream sauce for greens or a green vegetable, a base sauce for a pizza, on top of heated stuffed vegetables or grape leaves, especially ones filled with rice or grains, on top of a hearty bowl of cooked, mashed lentils or pulses, and a dynamite partner with polenta. I have even eaten this on top of some scrambled eggs with a bit of cheese and green herbs and had no complaints about the experience.
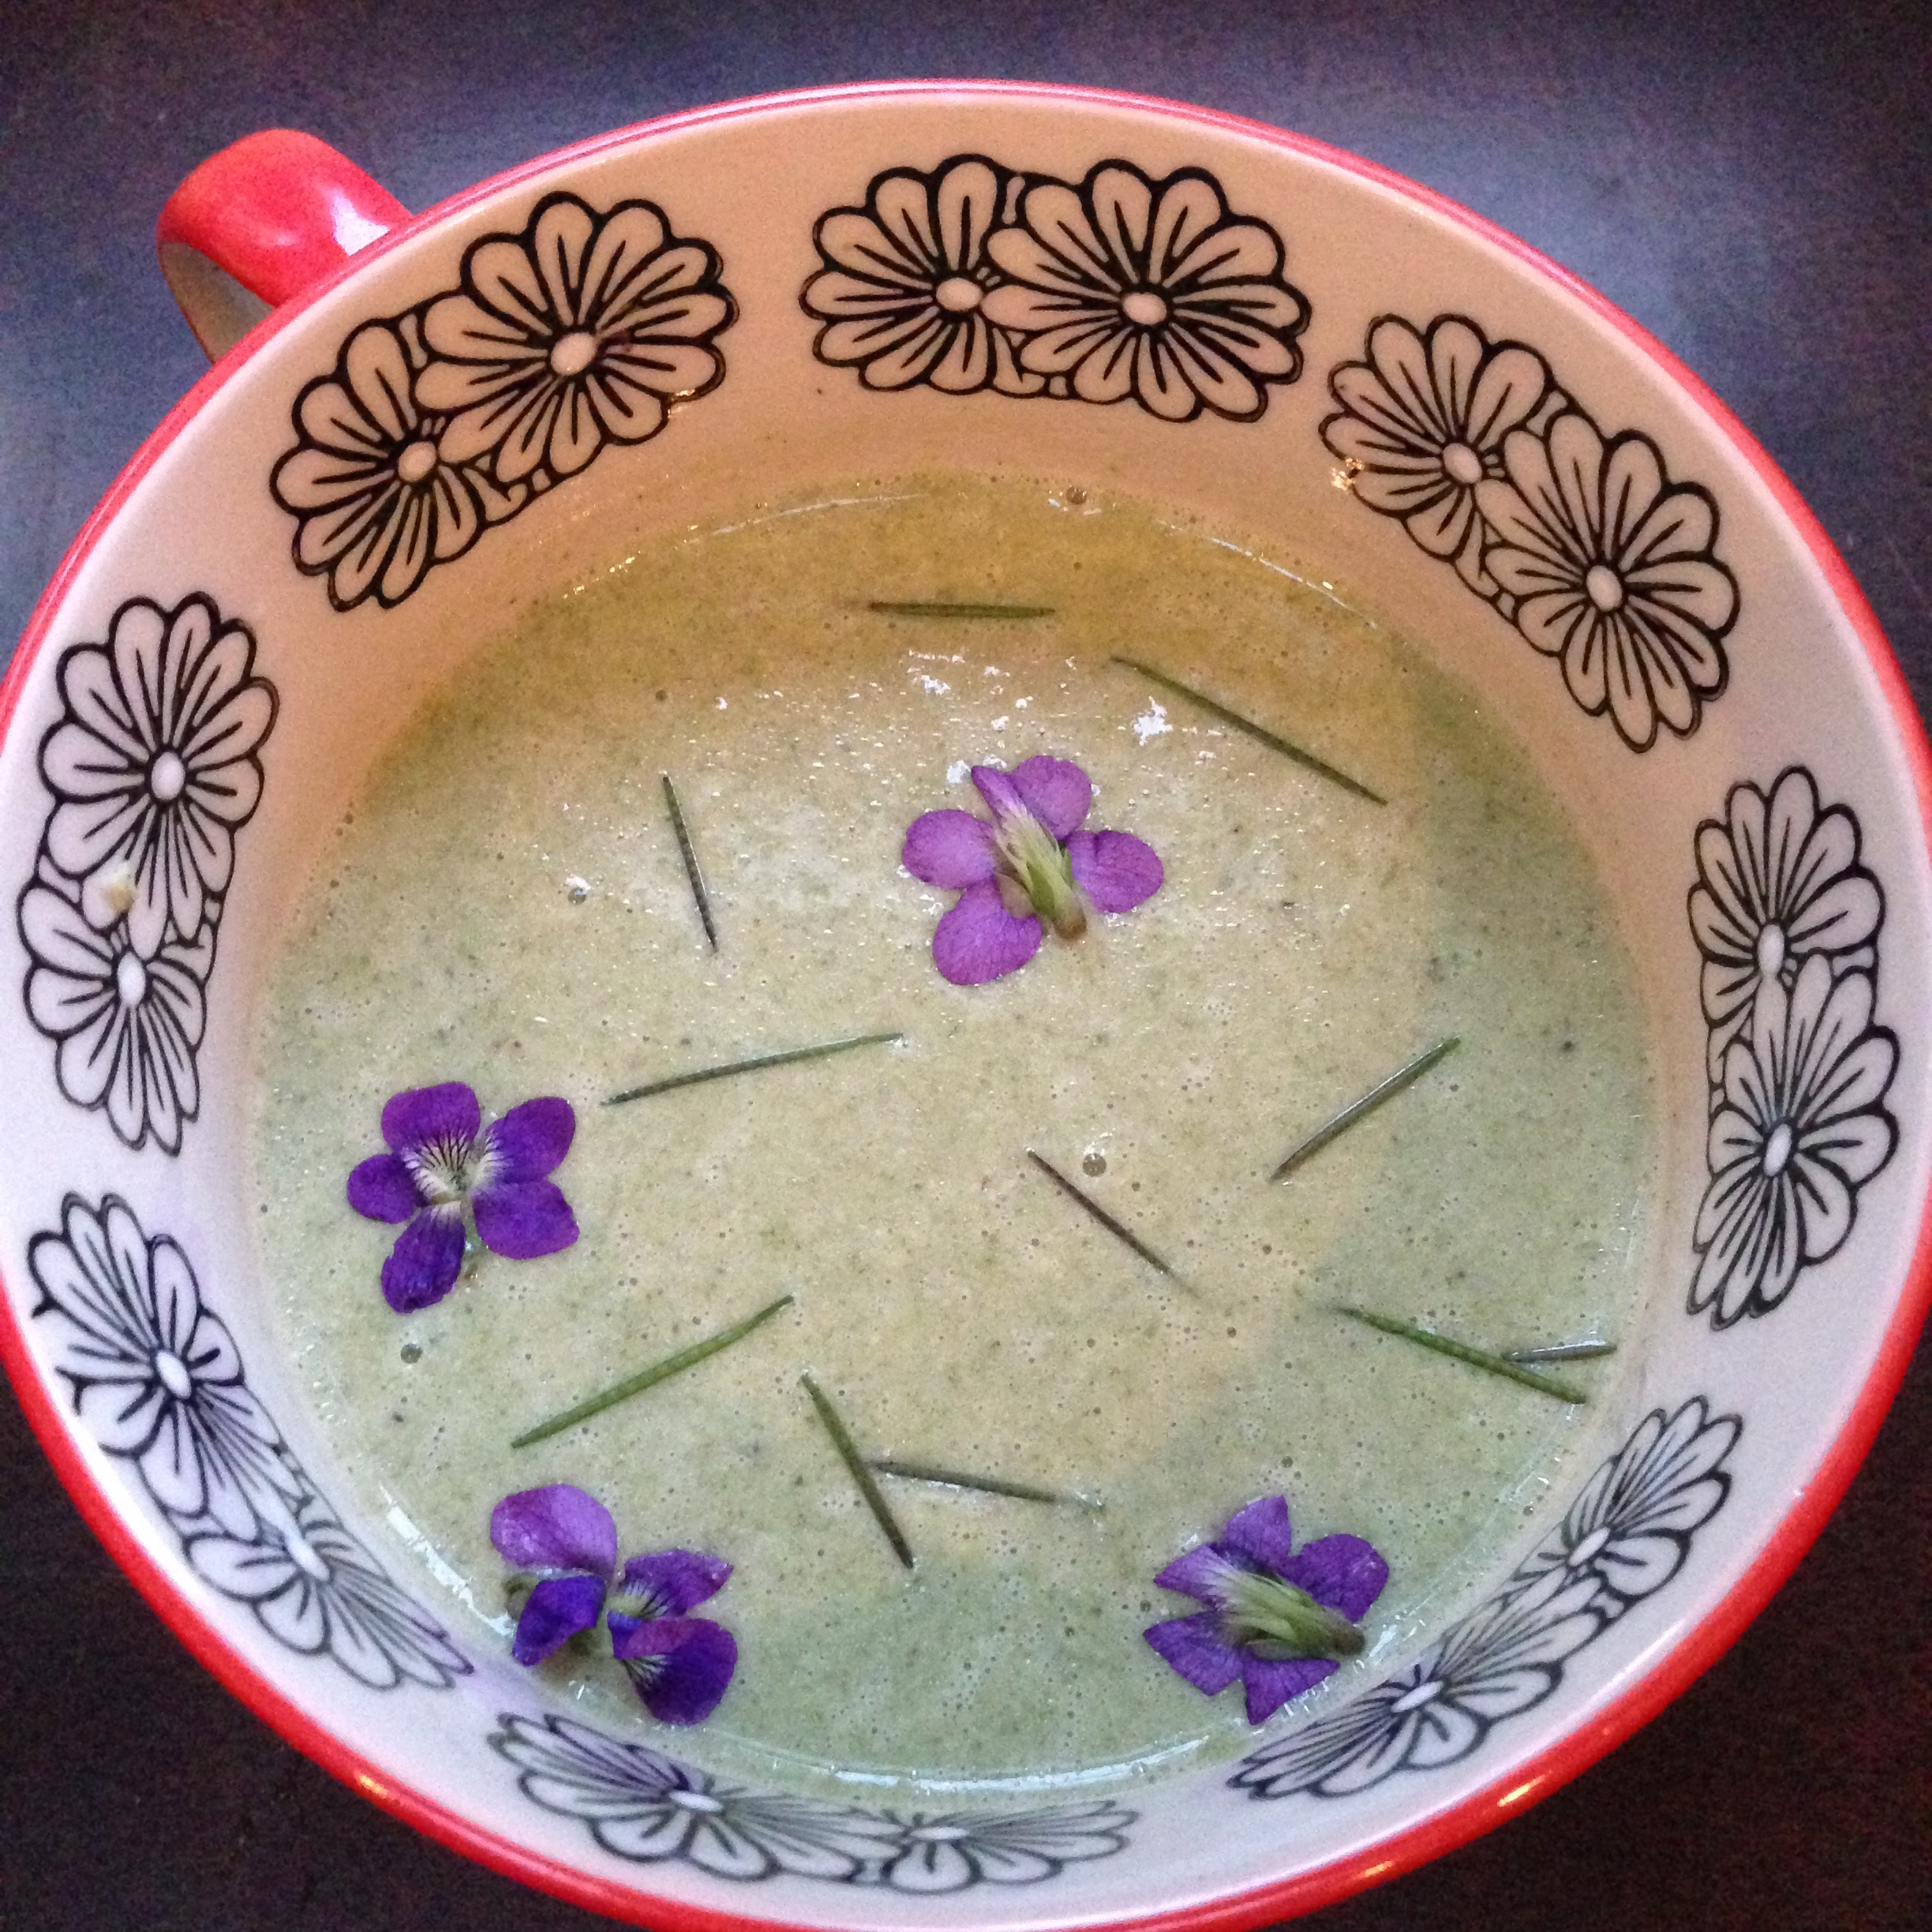
This is a charming spring soup that can be prepared and served three different ways. It can be a rough country soup, a robust puree or a subtle and warming cream soup. Either way, it has a very unique flavor.
Blanch in boiling, salted water for one minute :
8 cups loosely packed mugwort (Artemisia vulgaris) leaves, collected early to mid-spring
Drain, rinse immediately with cold water, then squeeze free of liquid and allow to dry.
Bring to a simmer :
8 cups chicken or strong (but not roasted) vegetable stock
2 fresh bay leaves (optional)
Add :
1 1/2 tsp ground coriander seed
1 tsp ground ginger or several thin slices of fresh ginger root
freshly ground white or black pepper to taste
4 oz celery, diced
Simmer for 5 minutes, then add :
12 oz potato, peeled (or not) and diced
Simmer for 20 minutes, then add :
The prepared mugwort, finely chopped
1 tsp salt (or to taste)
Simmer for 5 minutes, then remove from heat.
The soup can be served as is. If that is your plan, you may wish to make the chopping of the celery and potato more uniform. If I am serving it like this I will keep it more rustic, like a rough country soup made quickly at the end of the working day. In fact, that is exactly what this is, a soup that takes only an hour or so in total and most of that spent simmering.
Alternatively, you can puree it. Pureeing will give you a complex bright olive green soup that is an intriguing first course for a spring meal. It’s equally great as just plain eating, but it has a mysterious flavor that might have your local foodies scratching their beards to describe. I like to think of it as a mix between parsley and sage, but not quite that… although handling the plant itself also makes me think of those two herbs.
Another option would be to puree, then add :
2 tbs butter
1/2 cup light cream
This makes for an even more elusive tasting soup, which can be garnished very nicely with bright violet flowers and bittercress pods, if you like, or forsythia blossoms and chives. A perfect soup from early to mid-spring.
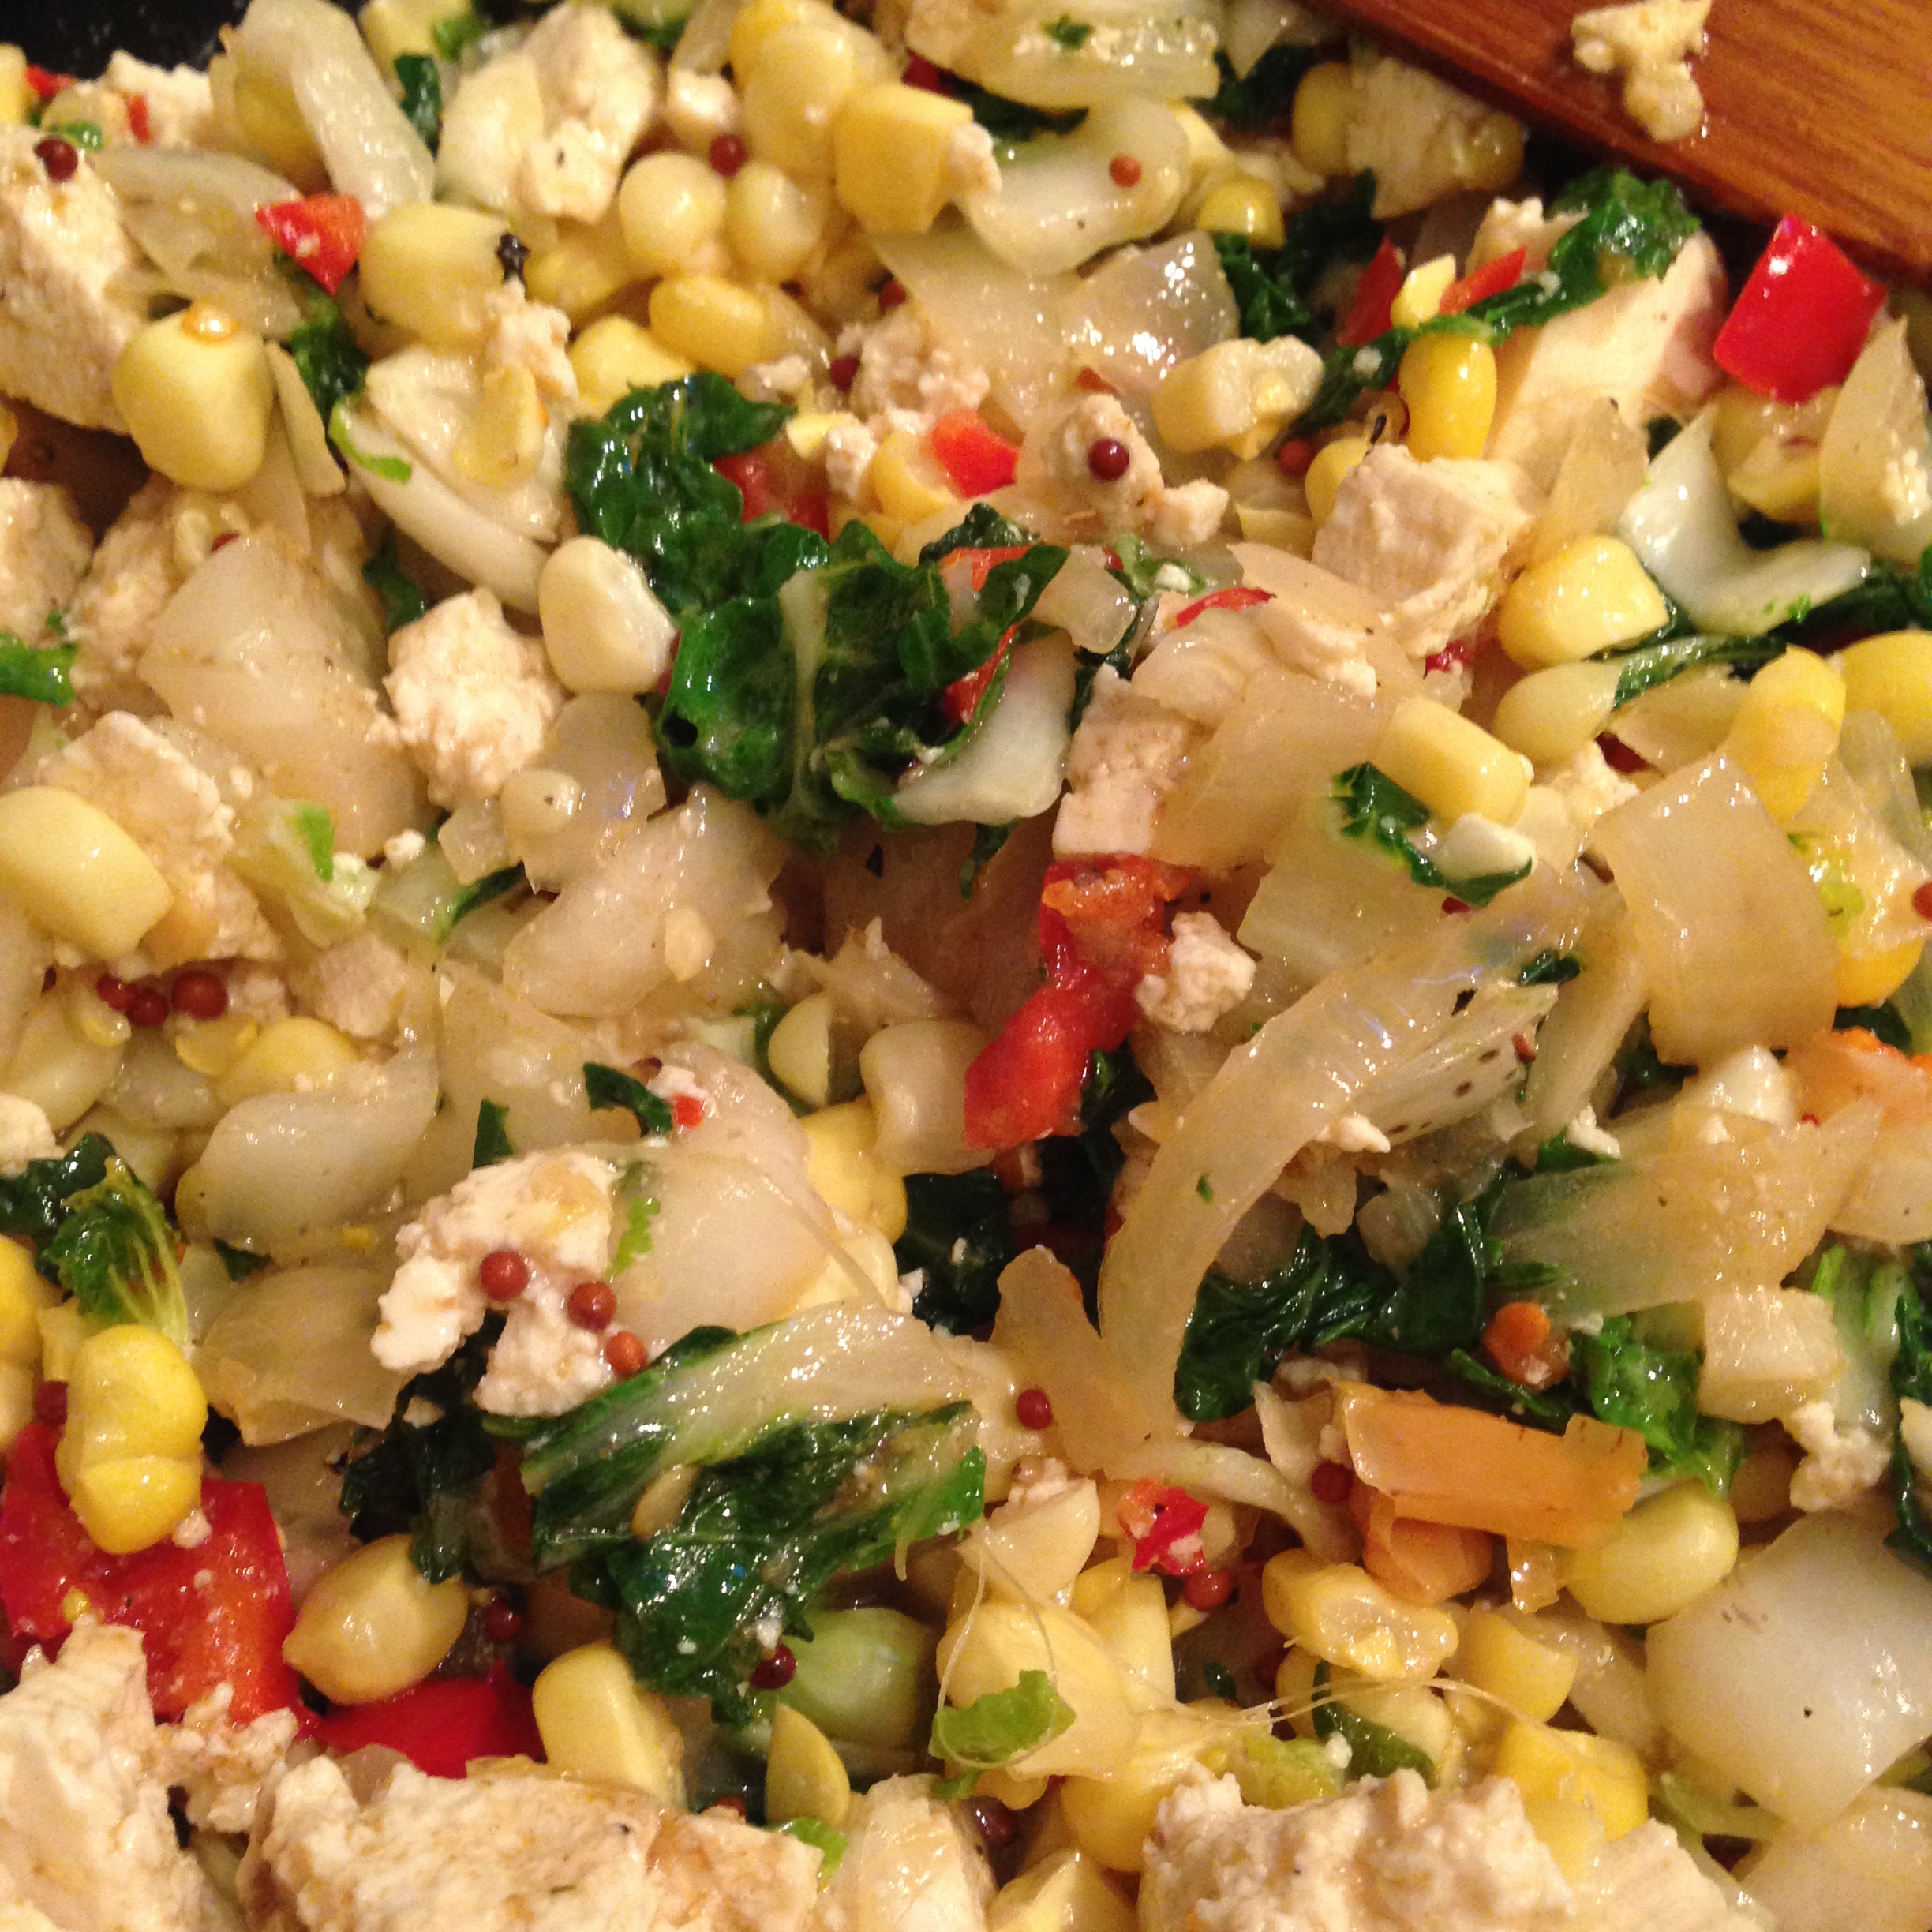
These are exceedingly simple. Perhaps too simple to even need a recipe for. Nonetheless I will present it in the hopes that it will inspire other simple improvised tacos.
Heat over medium in a large skillet :
2 tbs. neutral vegetable or seed oil
Add :
5 oz. onion, diced
Sautée for three to four minutes, until softened, then add :
8 oz bok choy or baby bok choy, leaves chopped and stems diced
Sautée for two to three minutes, until softened, then add :
a few cloves of garlic, minced
one or two small red chiles, chopped into small dice
Sautée for another minute, then add :
1 tbs Shao Xing wine, cooking wine or sherry
a few dashes of Maggi or Golden Mountain seasoning
a few pinches of salt
1 tsp. of cumin powder
freshly ground black pepper, if desired
ground cayenne or hot chili powder, if desired
Stir and add :
1/2 lb firm tofu, cut into about six or eight pieces
Sautée for about two to three minutes, enough to warm the tofu through. Break the tofu into pieces of whatever consistency is preferred with a flat-ended wooden or silicone spatula. I usually like a little variety.
Remove from heat and add 1/2 cup of fermented corn. Regular corn can be substituted.
Serve on freshly-made or store (or better yet, taqueria) bought corn, flour or whole-wheat tortillas.