Spiced Daikon Pickle

IMG_0539

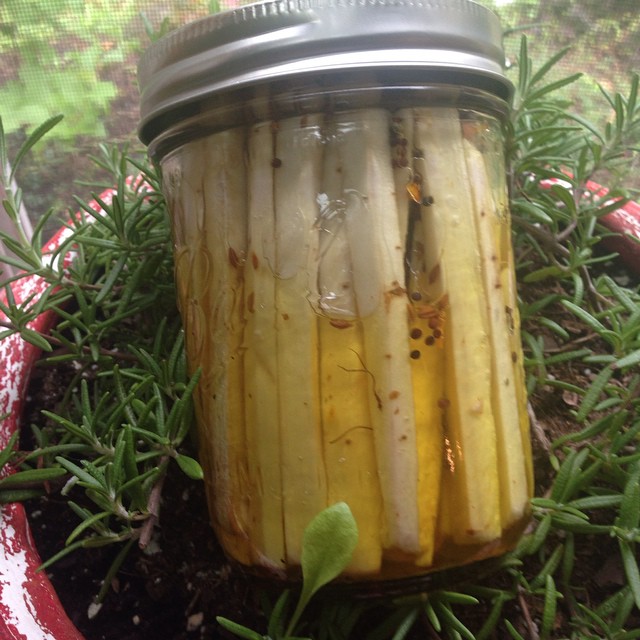
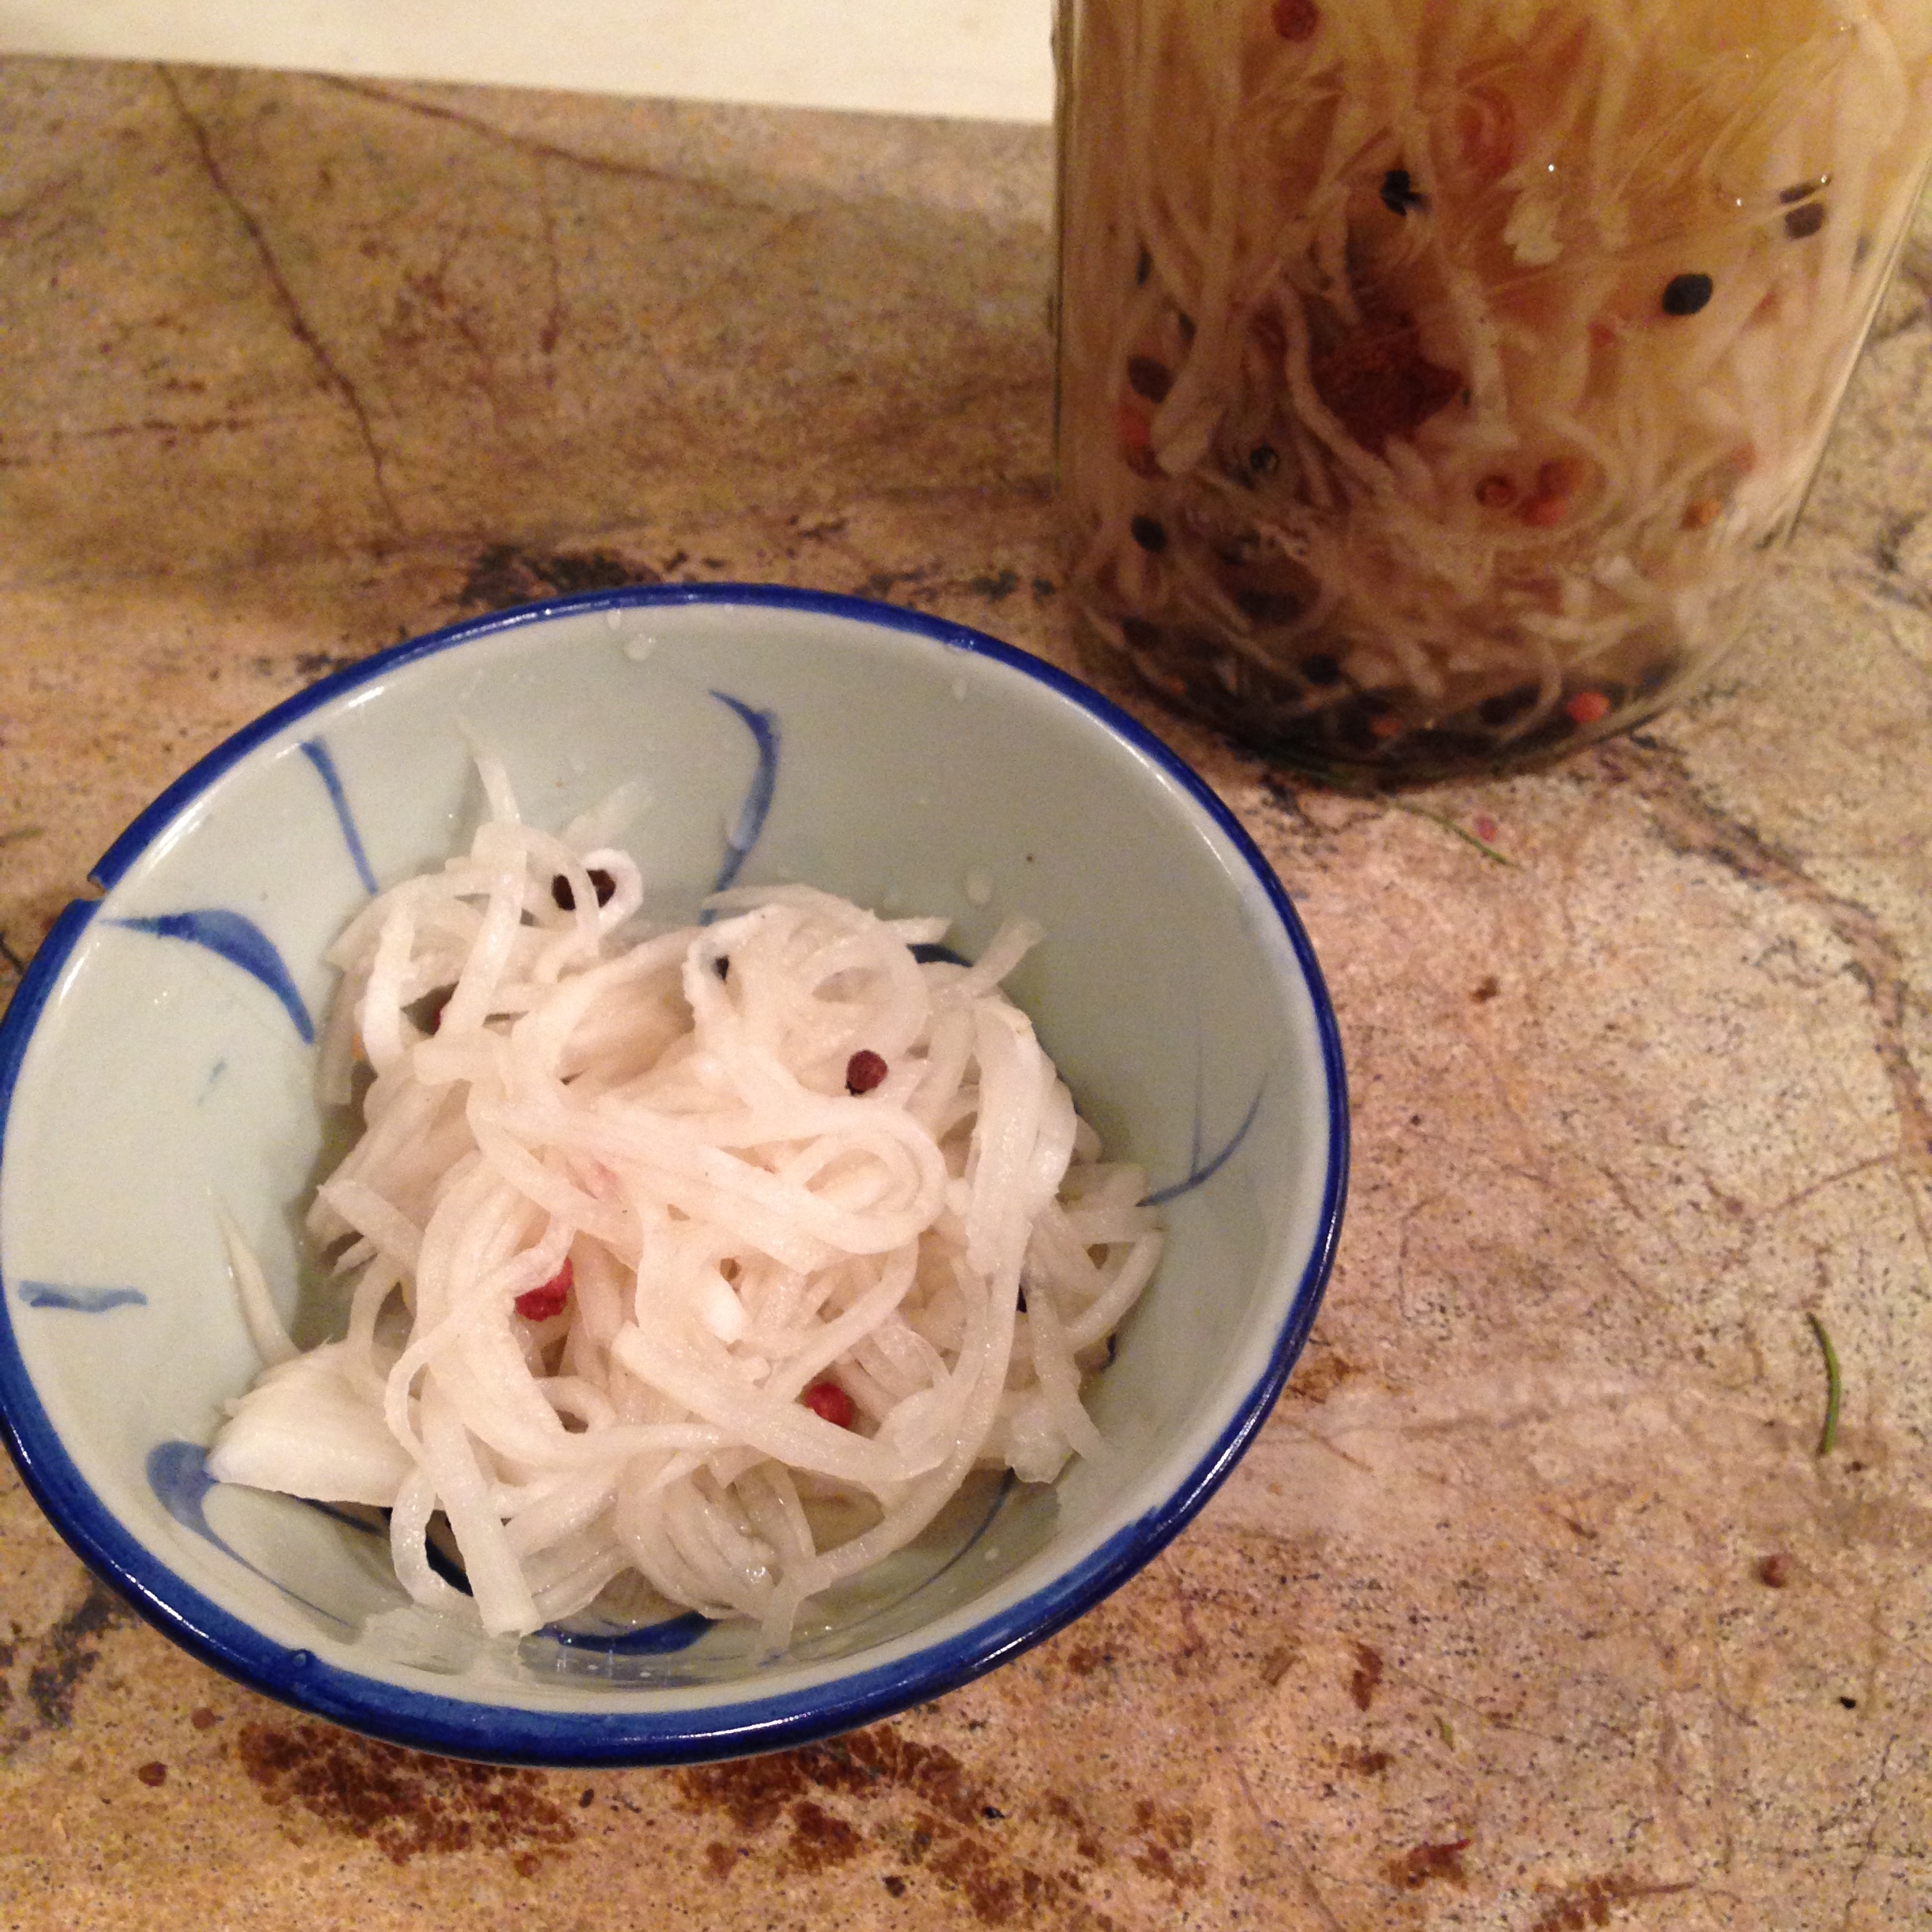
Another year-round staple of my kitchen, this is pickled radish inspired by the Vietnamese do chua pickles, served with noodle dishes, salads and banh mi. I specifically made this to pair with my sweet-hot pickled carrots. I was introduced to the combination of pickled carrot and radish threads (sometimes with cucumbers added) in the Vietnamese restaurants and sandwich shops of Houston, and have made some variation on do chua ever since. My love of variety gave me the idea a few years ago to separate the pickles into two different treatments, adding chile and more sugar to the carrots and a mix of savory spices to the radish.

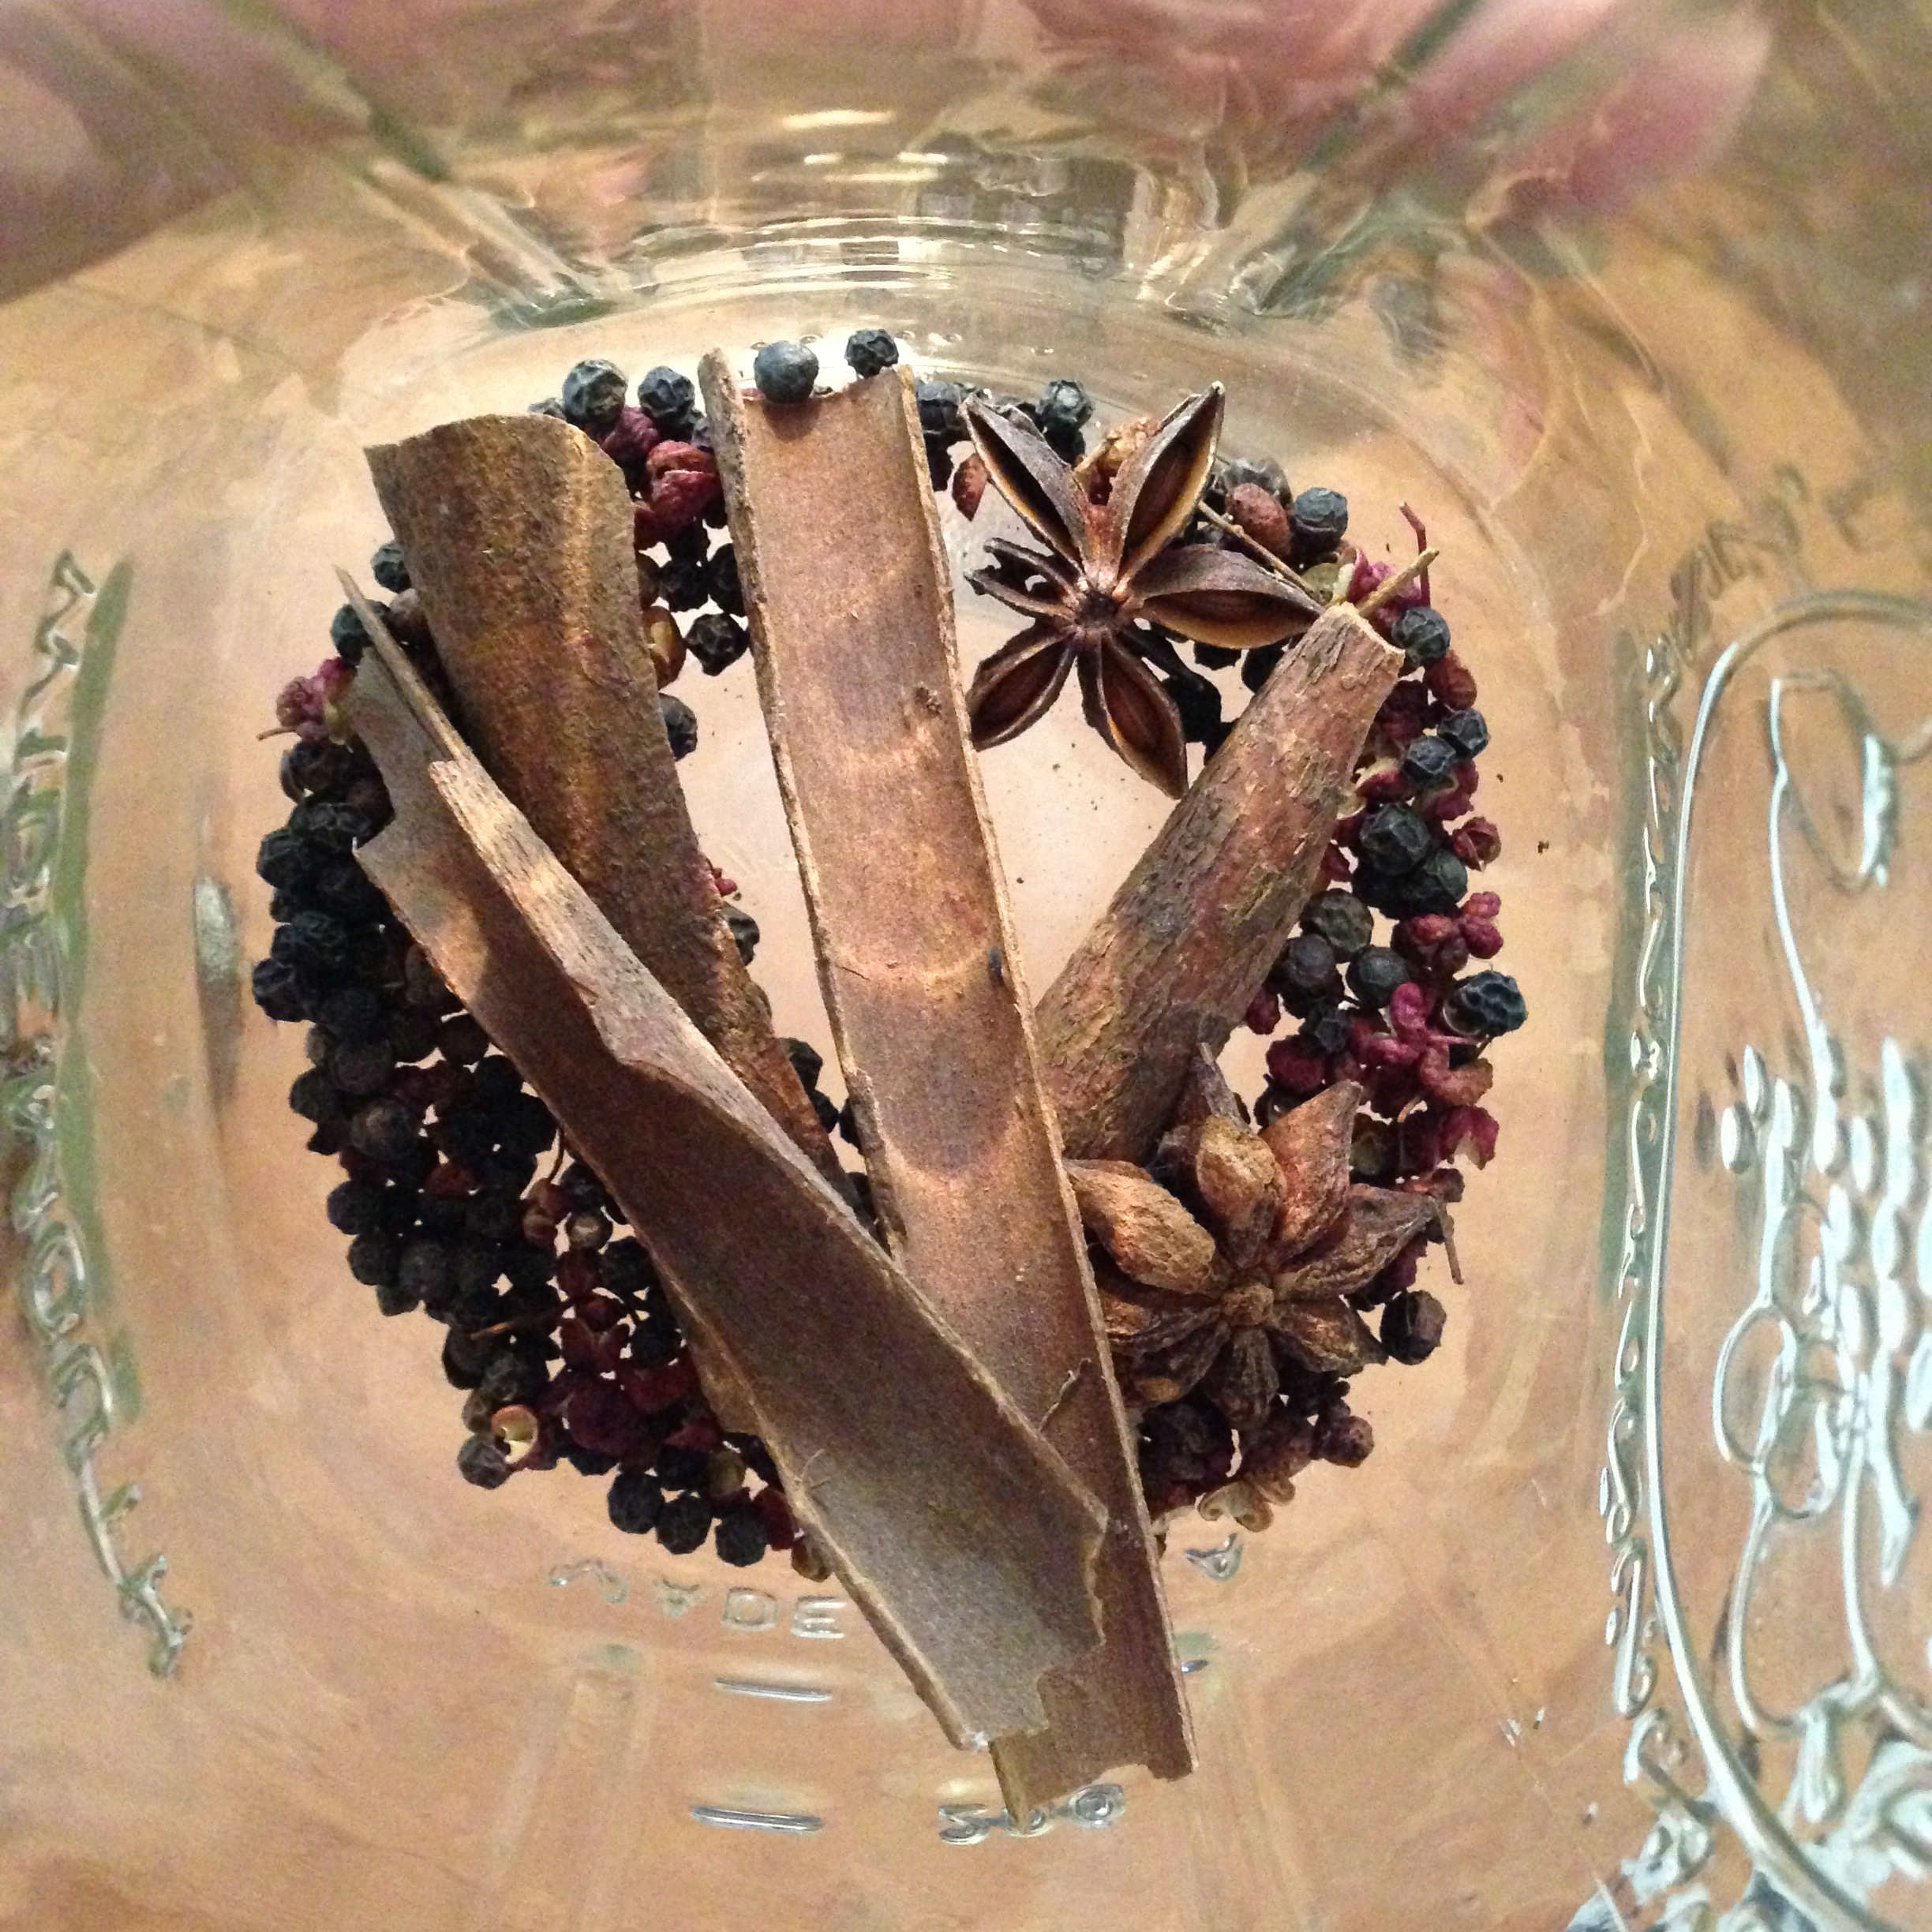
Place in a glass quart jar* :
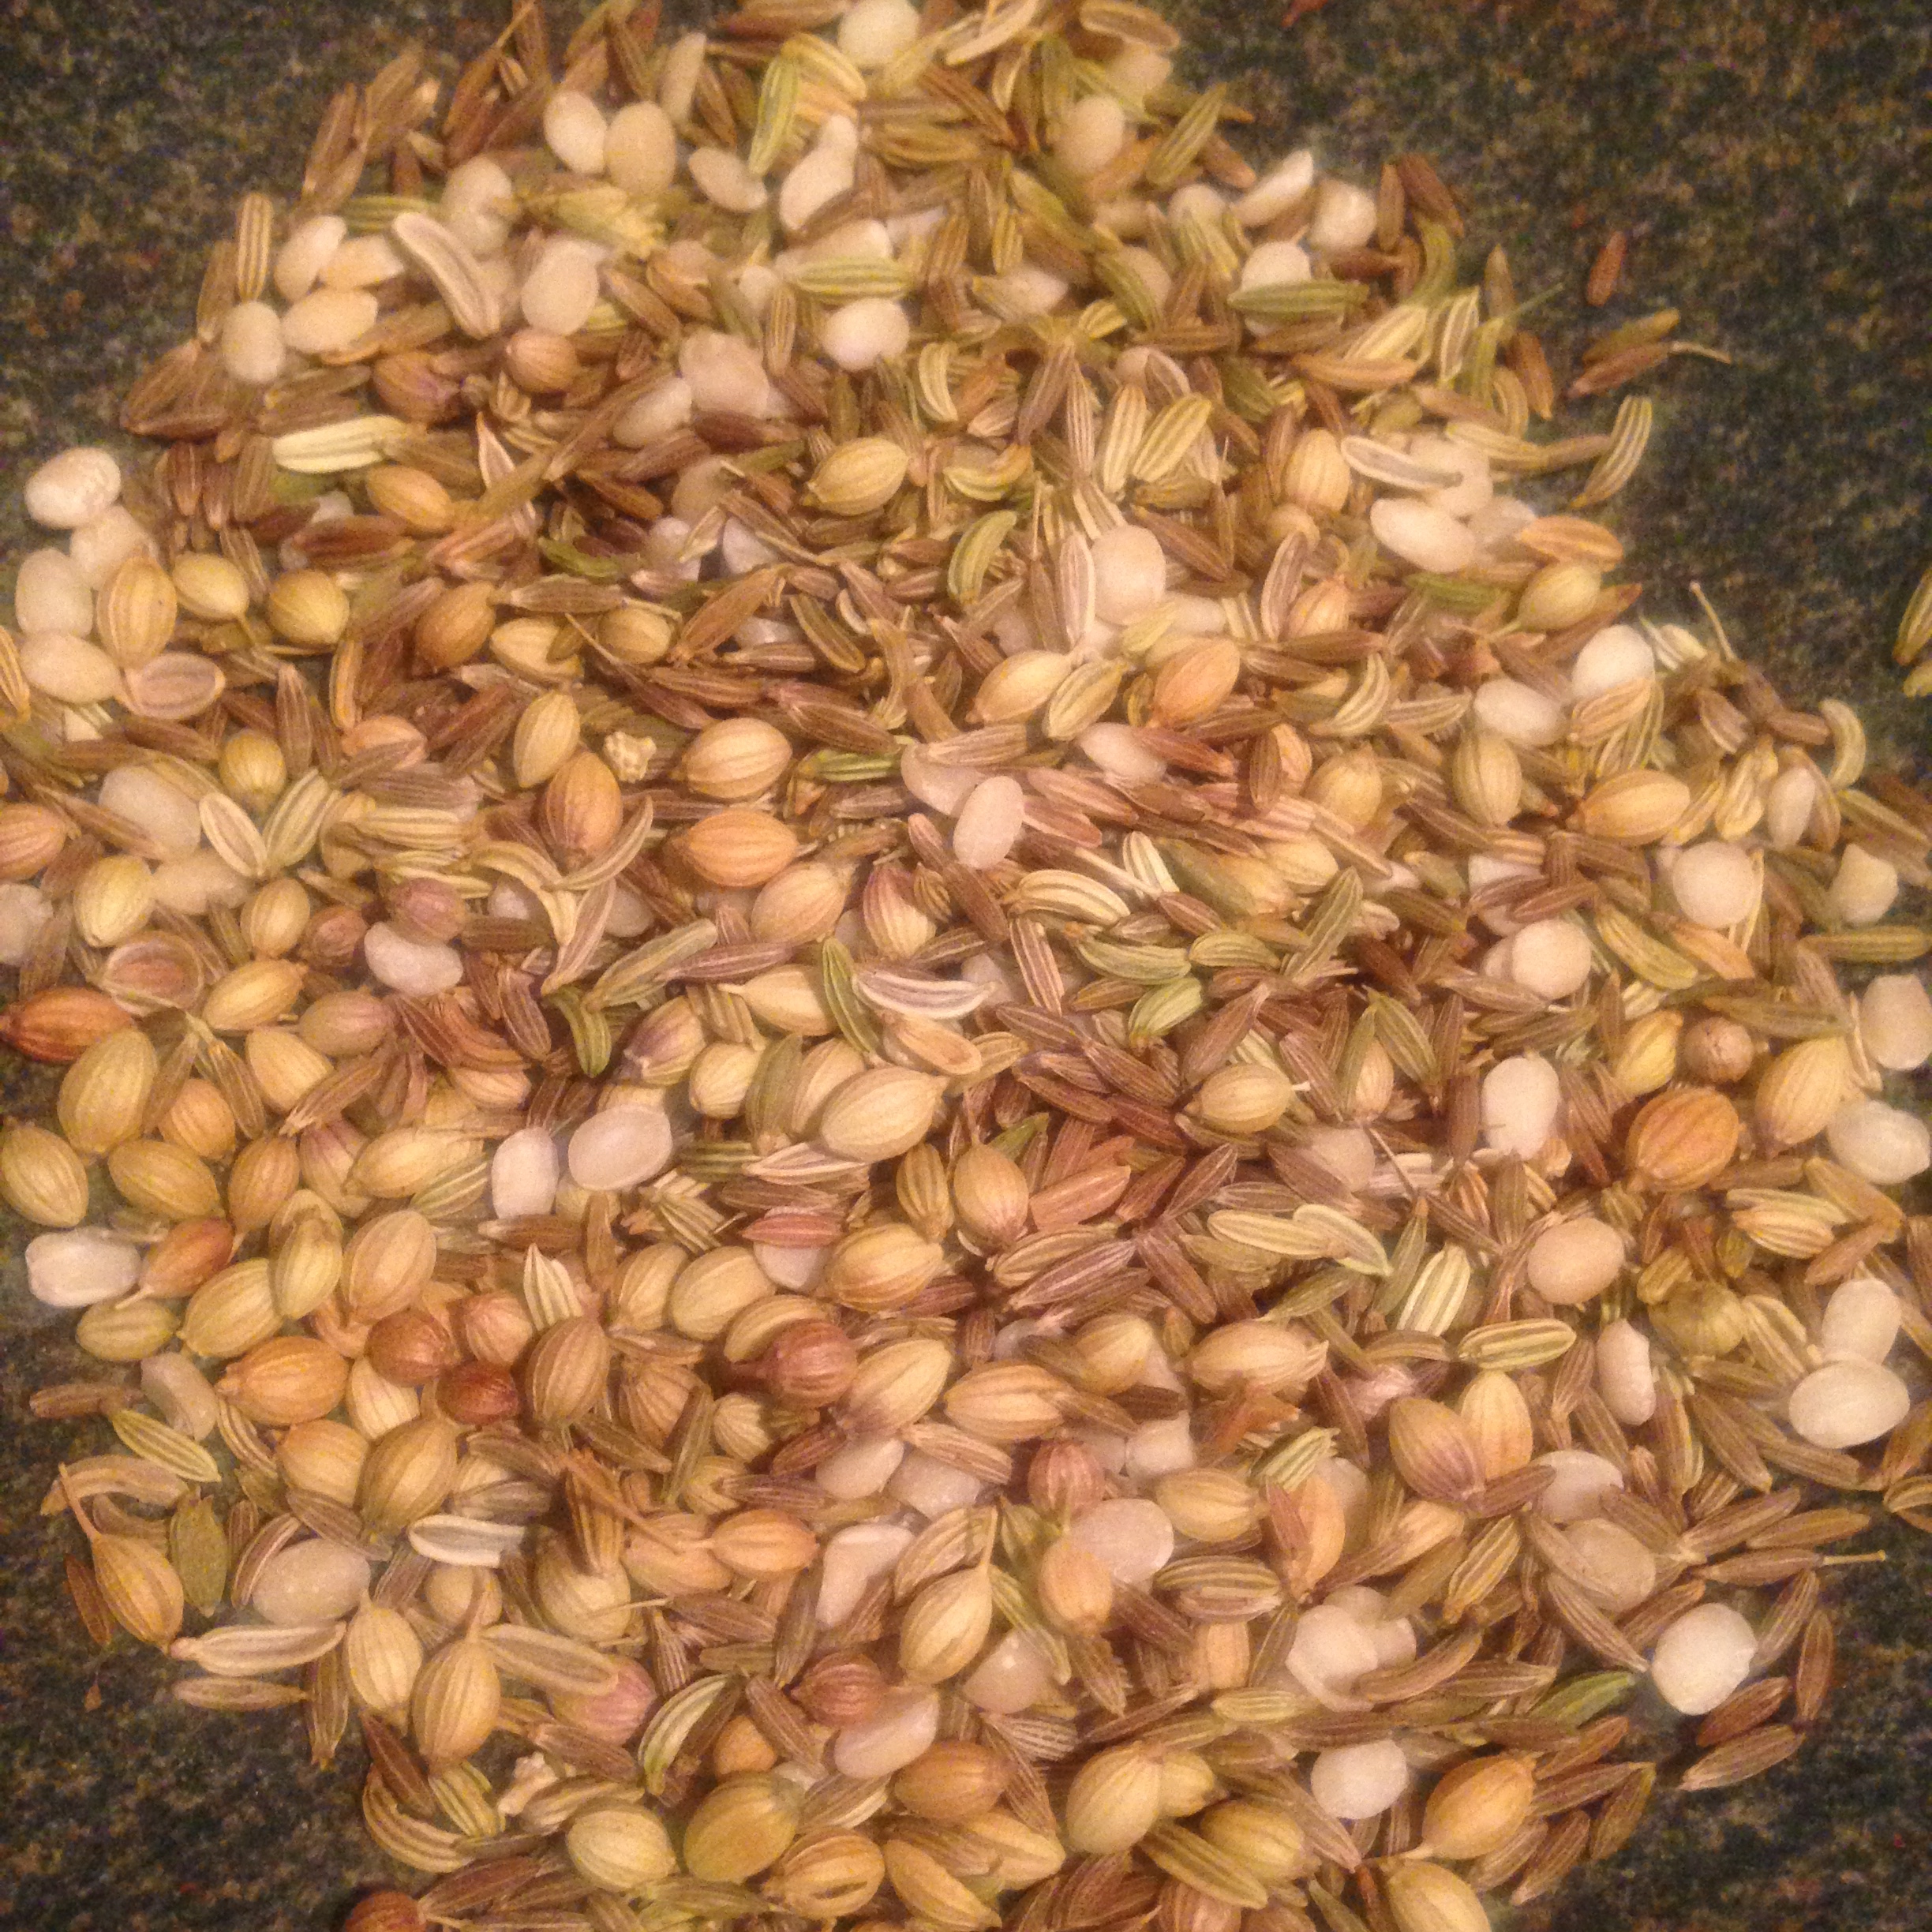
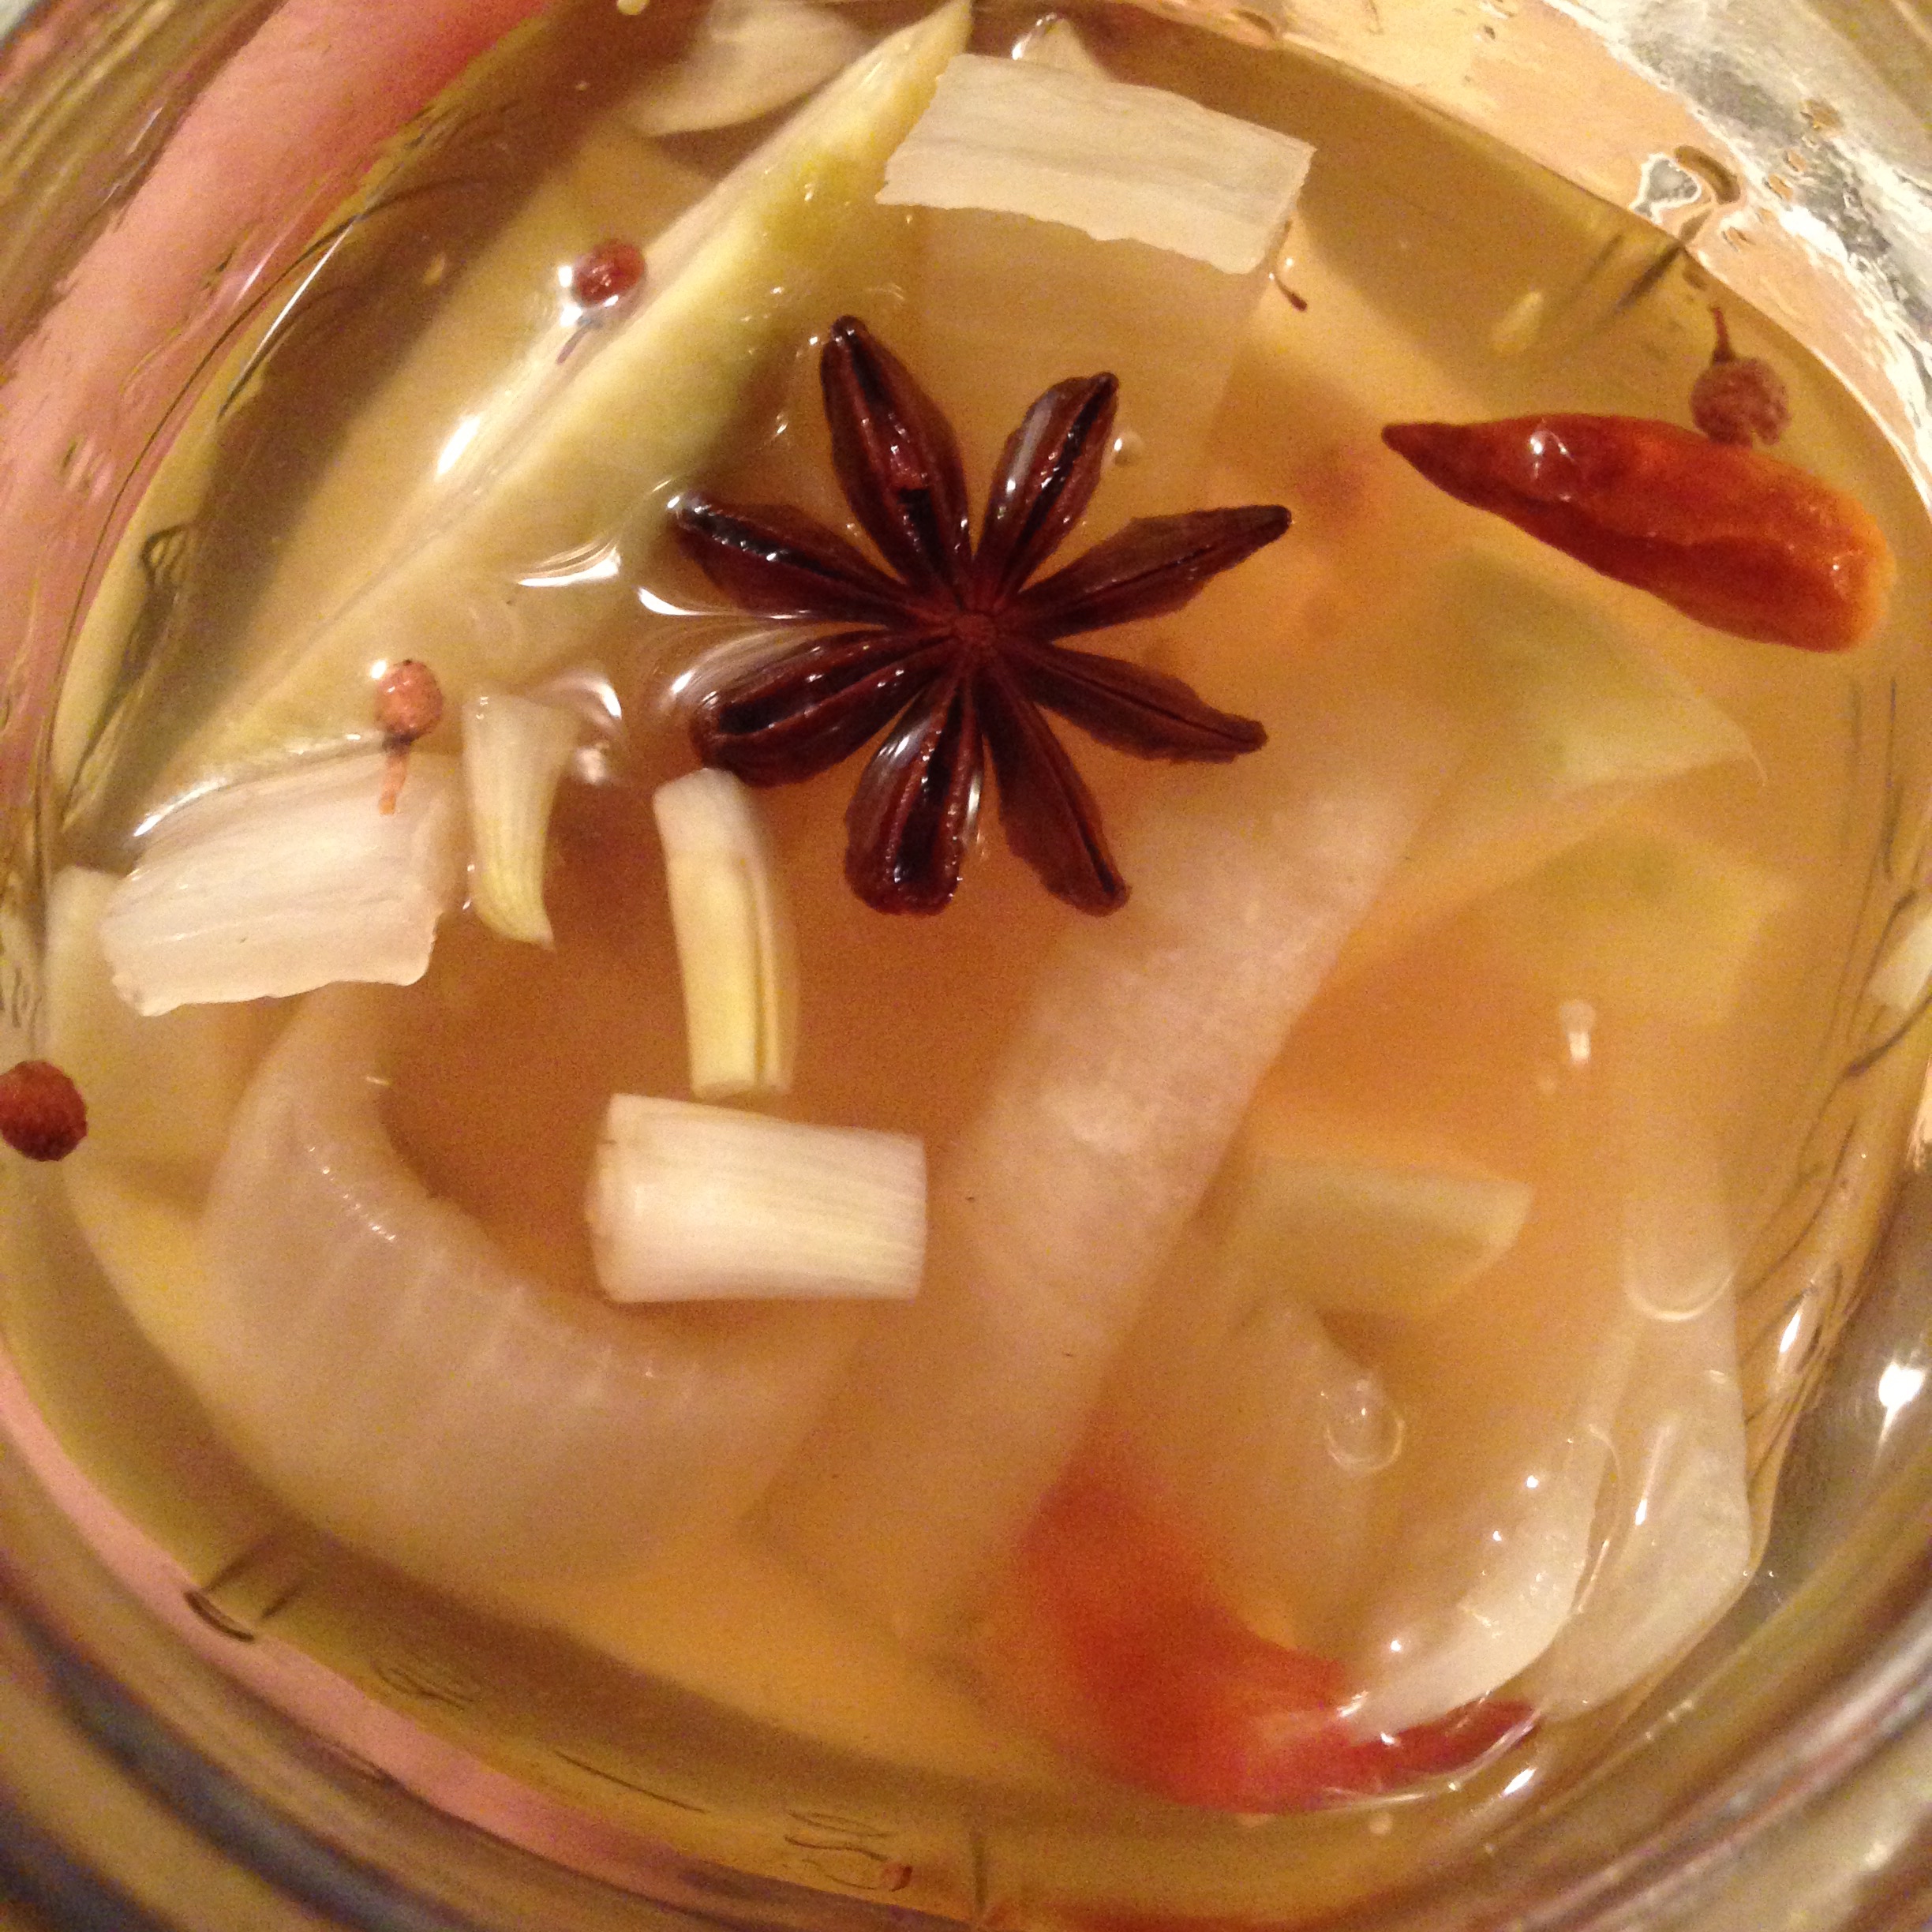
2 star anise

2 tsp sichuan peppercorns, whole

2 tsp black peppercorns, whole

1 stick of cinnamon or a few pieces of cassia

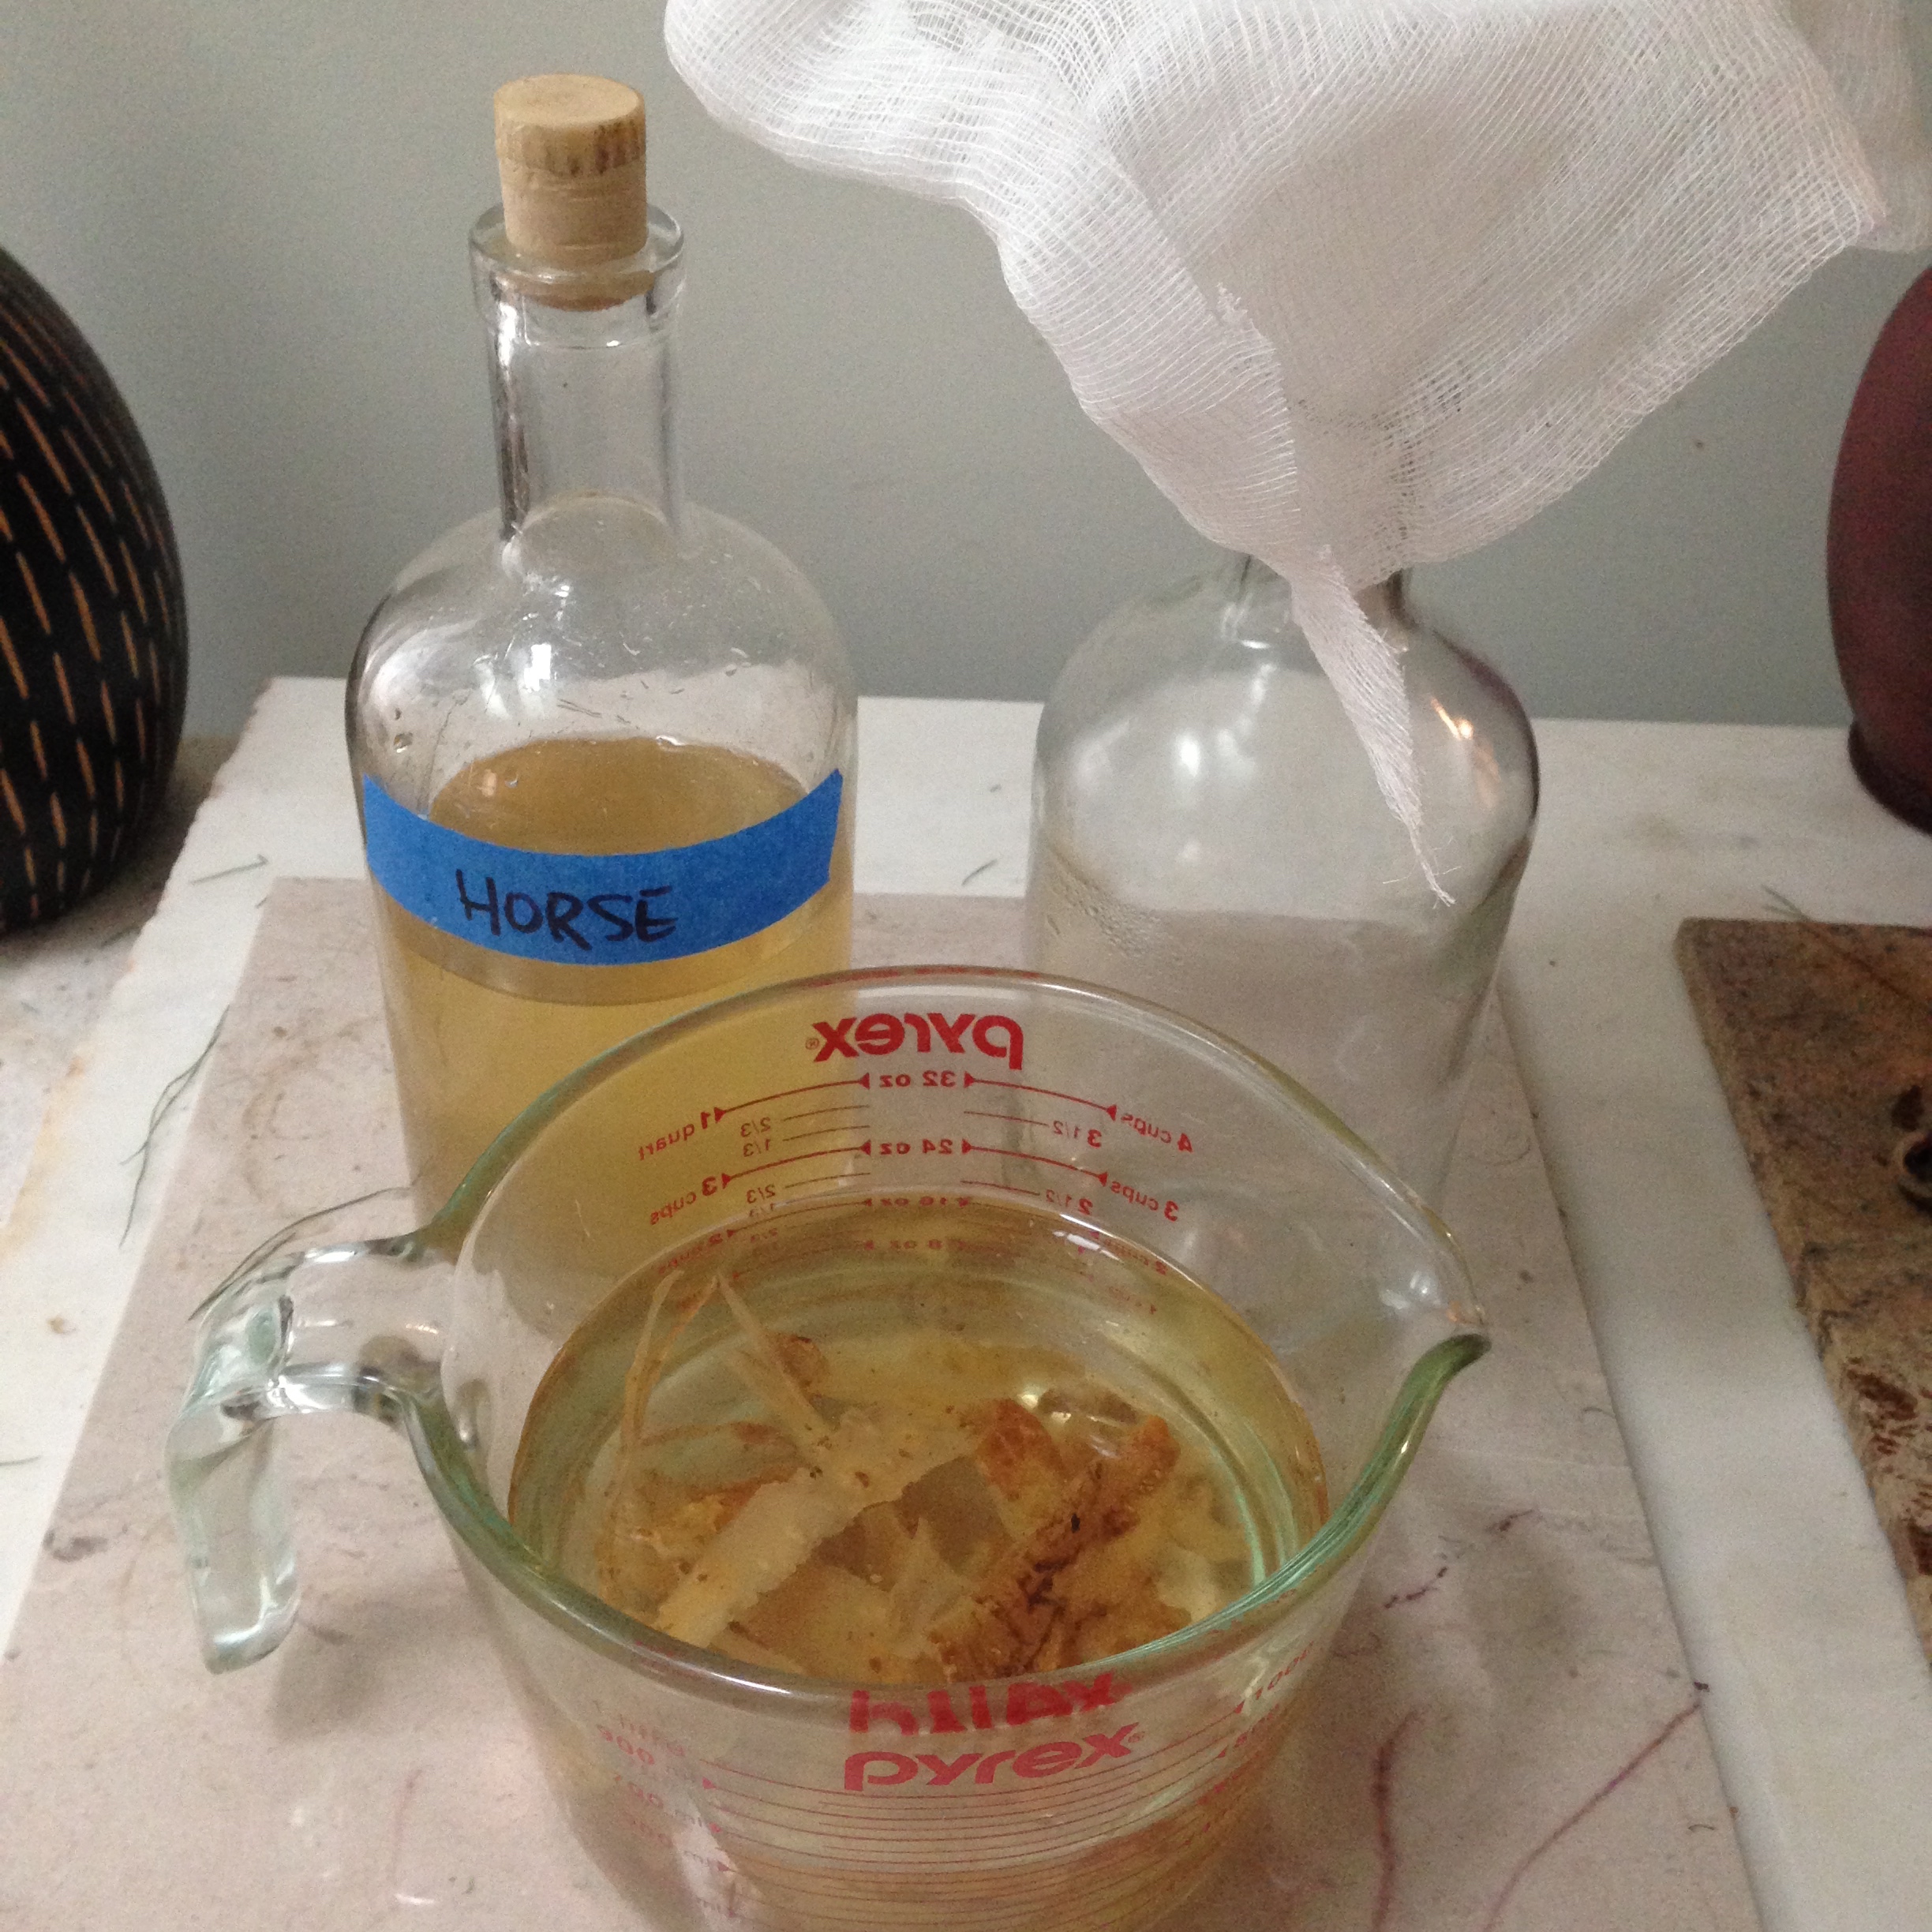
*You may choose to place these spices in an infusion bag, so that the flavors get into the pickle without having whole spices scattered amongst the pickle. You may also simply leave them in, and enjoy the intense flavor of crunching into whole spices. I like both, and will vary according to my mood or what I plan to serve this with.

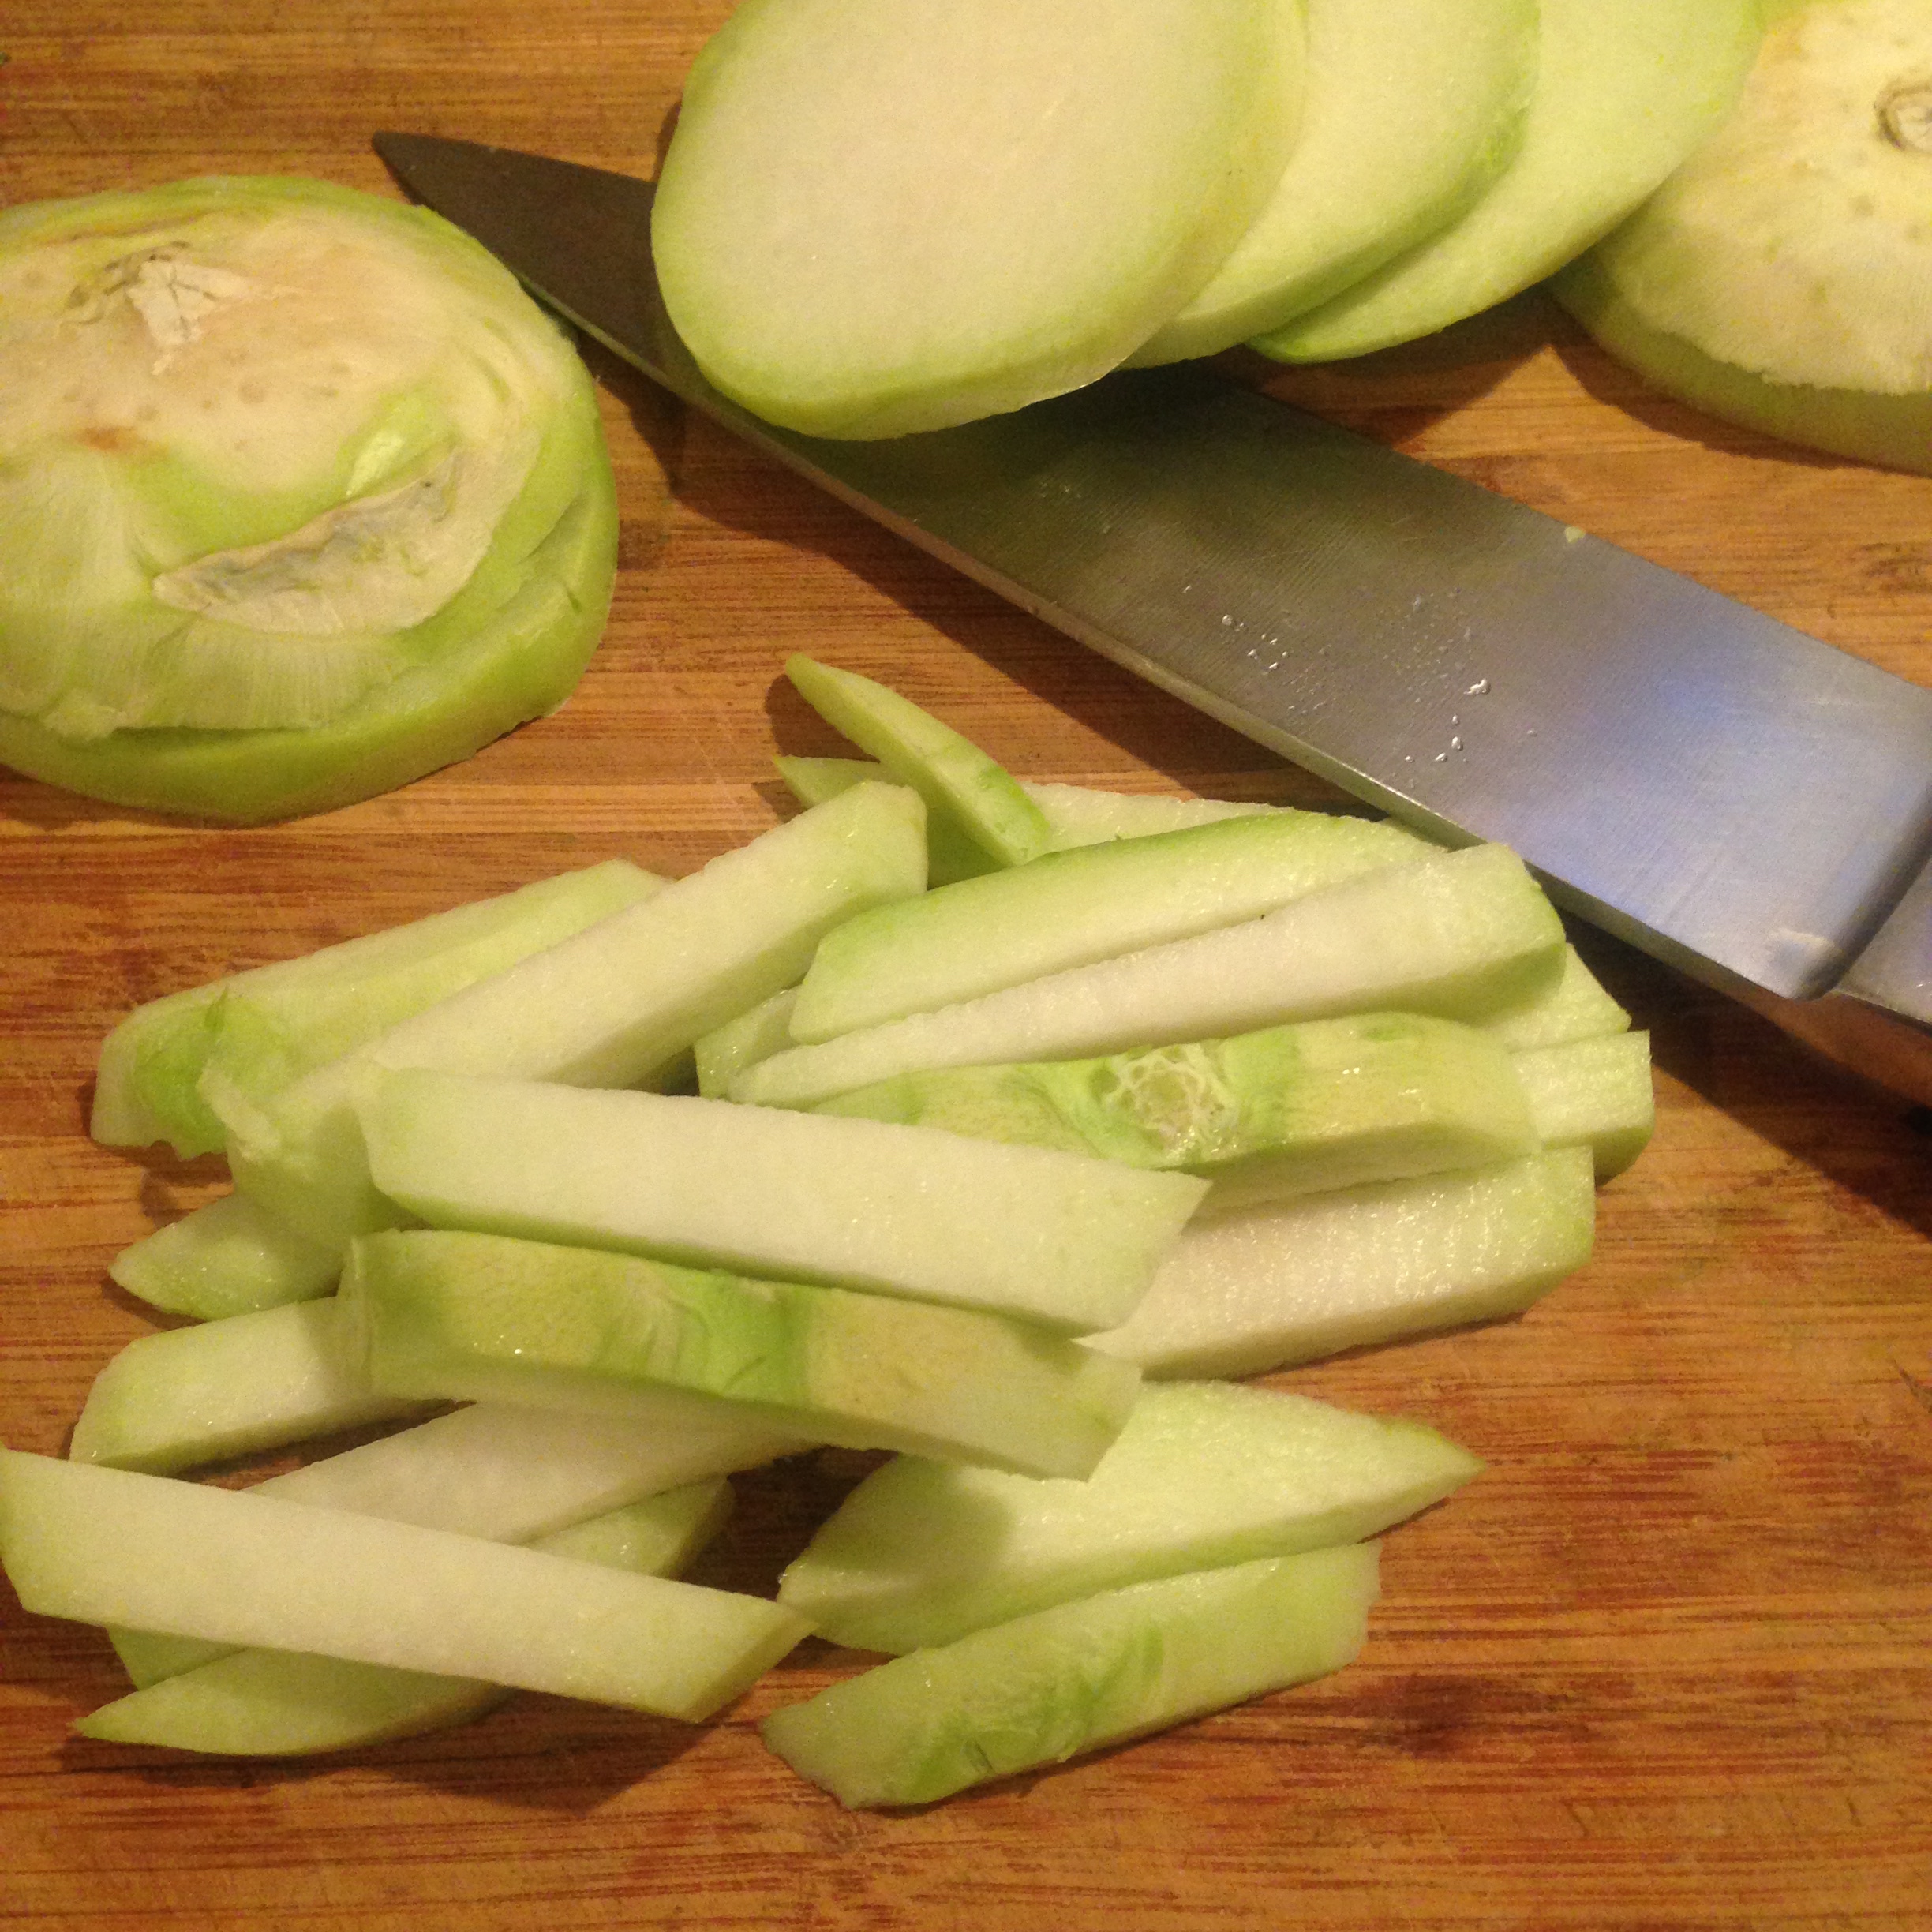
Slice into shreds / julienne with a mandoline or knife :

1 lb. daikon radish or other large asian radish

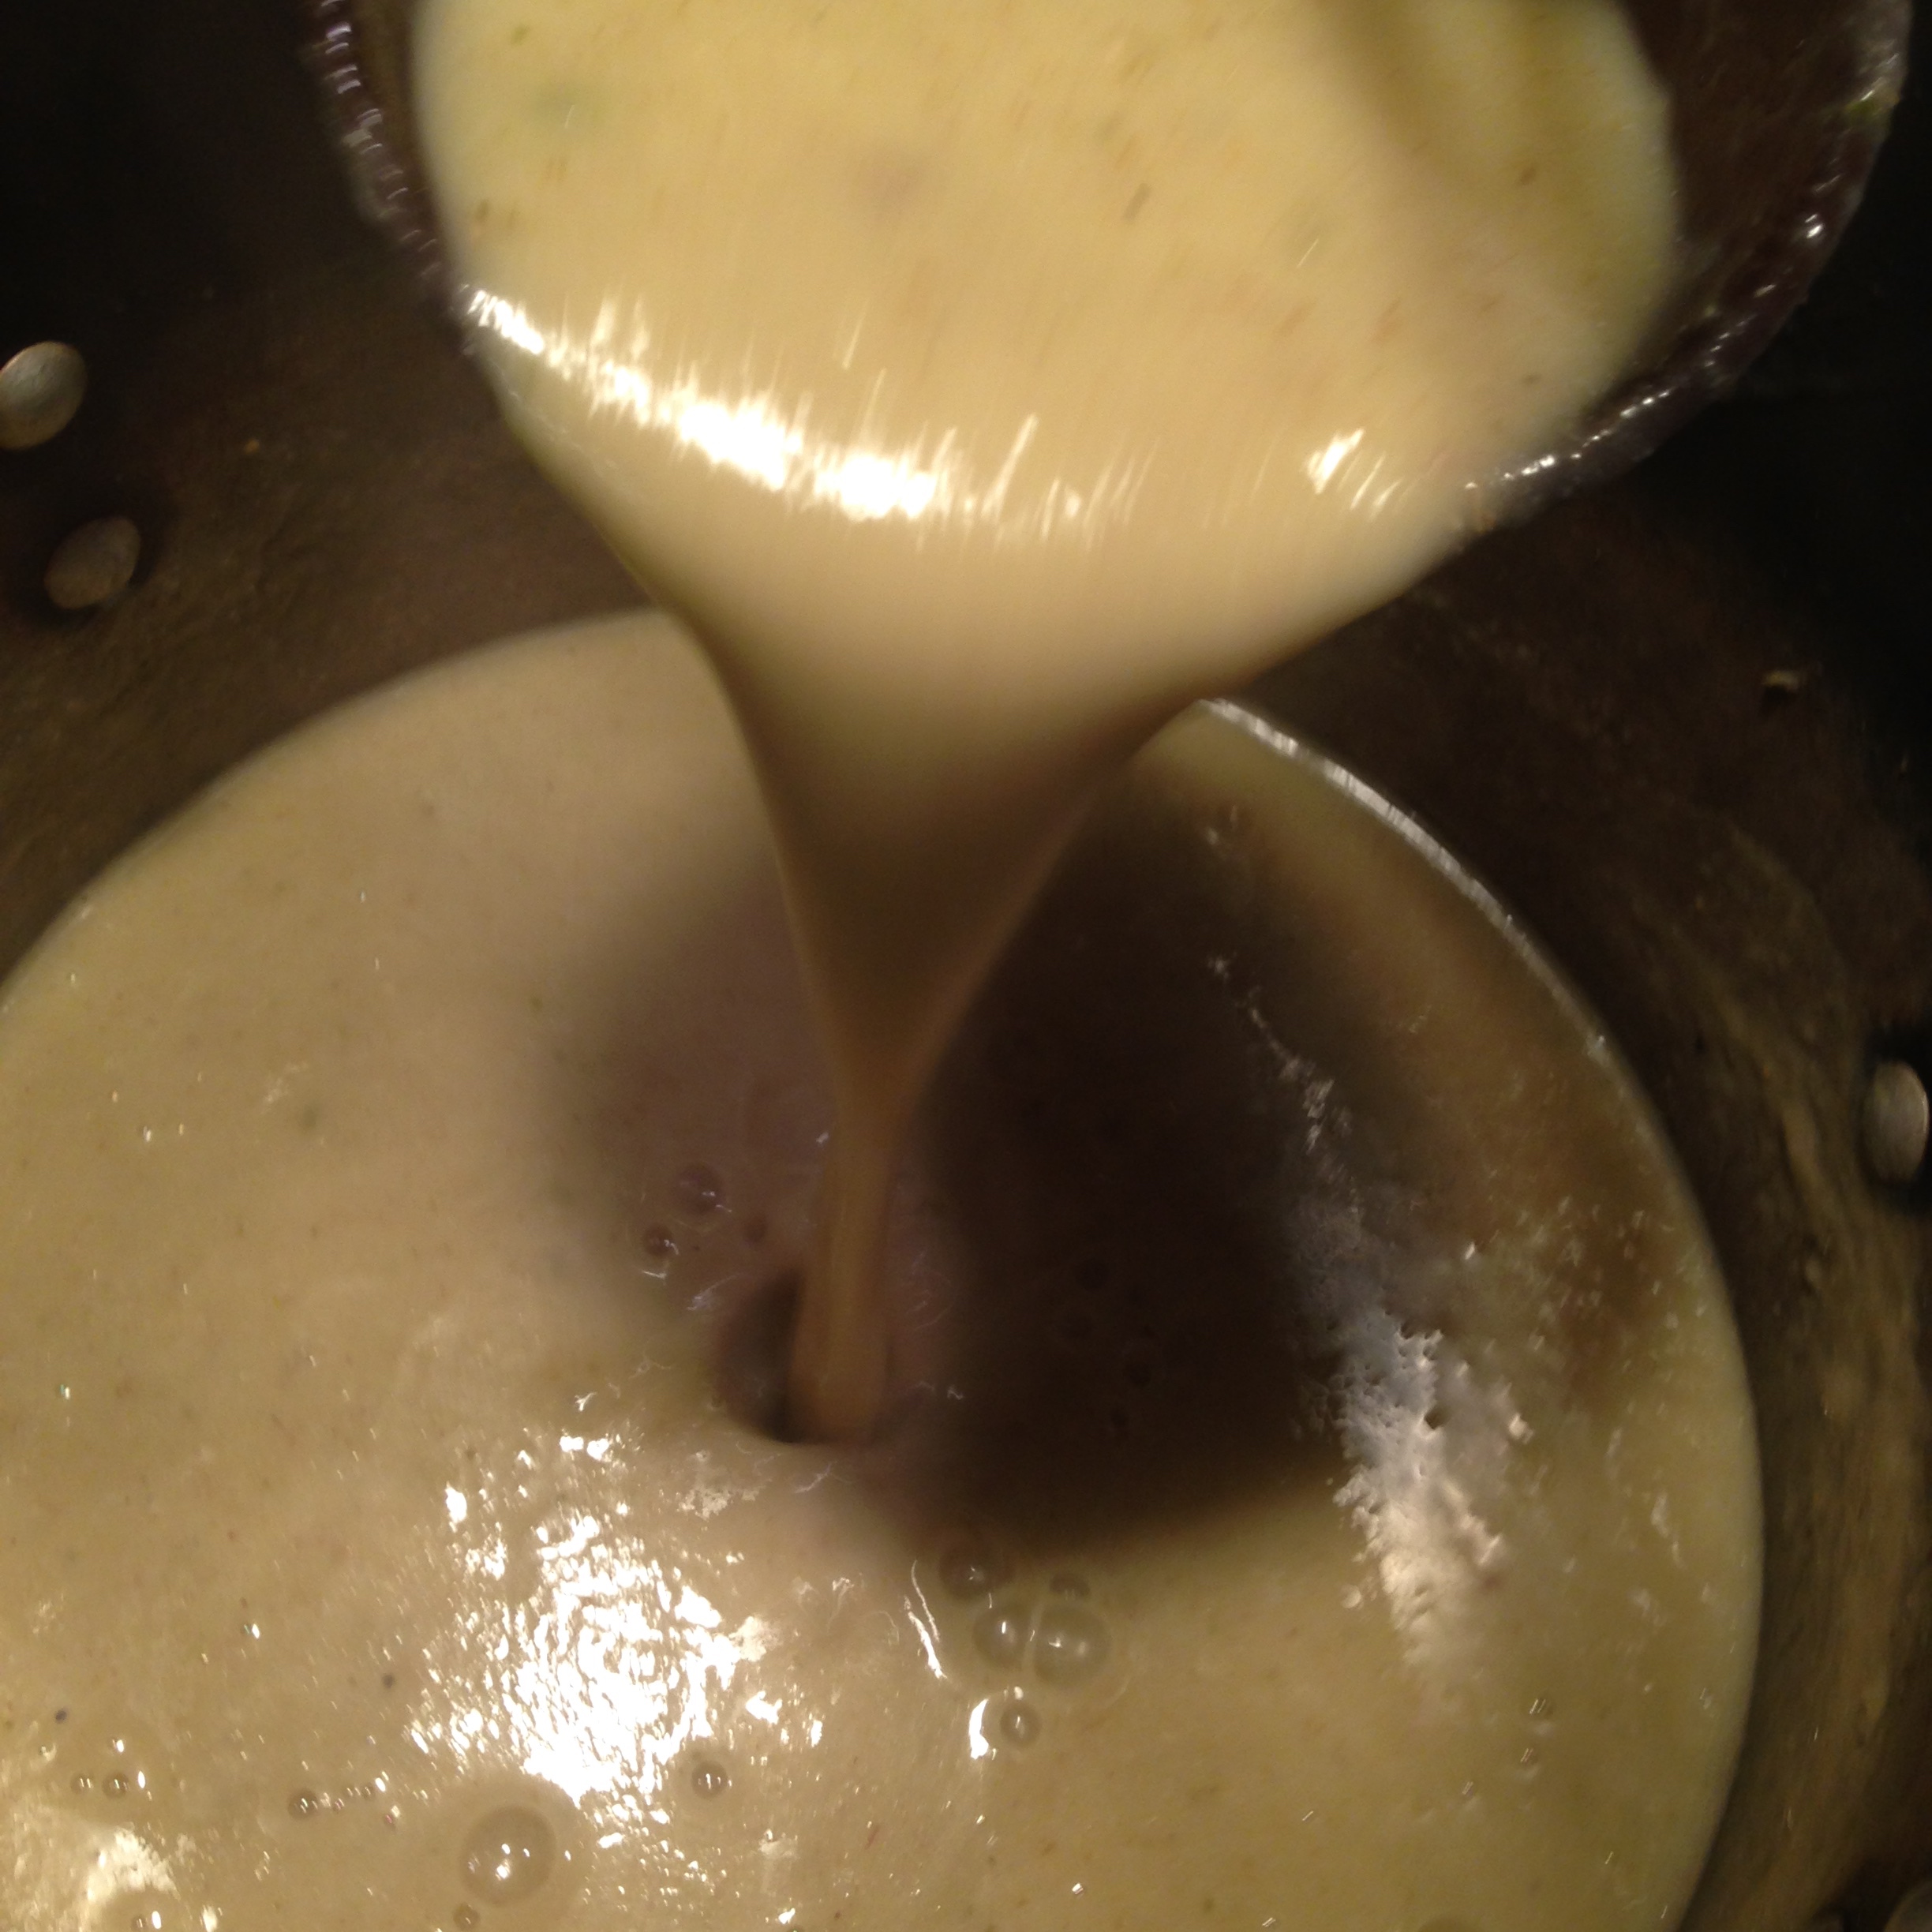
Heat in a small saucepan, stirring until the sugar and salt are dissolved :

2 cups white vinegar, brewing vinegar or other mild vinegar

3 slices of ginger, about 1-2″ inches long and wide

2 tbs sugar

1 tsp salt

Place the shredded radish into the quart jar with the spices, then pour in the seasoned vinegar while it is still hot.

Allow to cool to room temperature, then refrigerate.

IMG_0531

This is another fairly straightforward quick pickle, once which will be ready to eat once it cools, slightly more flavorful after 24 hours, and which will develop in flavor over time and last at least a month or two.

It does, however, come with a warning. Pickled radish has a very strong odor. When I serve this pickle for a buffet of noodles or banh mi, or any other occasion, I always make sure to open the jar a couple of hours before the guests arrive. Another option is to place a serving of the pickle in a small bowl and return it to the fridge, uncovered, which will keep the pickle cool and let it air out. Once you make this pickle, you will quickly understand how important a step this can be. It doesn’t bother me much, but for some the smell will permeate the pickle board and inhibit their appetites. None of the odor really permeates the flavor of the dish, which is spicy and mildly sweet.

Excellent served with sandwiches, salads, noodle bowls and so on, either as a component of the dish or an optional garnish. Because of the complex, savory spices used this pickle doesn’t necessarily register as specifically “asian” in flavor and can be used to accompany a wide variety of dishes and cuisines. An especially enjoyable use of them that might not be readily obvious is to pair them with hard cheeses such as gruyere, cheddar or gouda. They also make an excellent foil for sweet or spicy cold meats and sausages.

Crispy Mac & Cheese With Artichokes, Fried Shallots & Panko

IMG_0306

Macaroni and cheese is an iconic dish, indelibly associated in most peoples’ minds with American Southern or comfort cooking. Like many classic American dishes, its’ origins lie elsewhere–in this case Italy and France, via England. Leaving aside powdered and boxed versions, the idea of binding cooked pasta with a Mornay sauce (essentially a Bechamel with cheese) and baking it in the oven is at least a couple hundred years old.

To my mind there are exactly two kinds of macaroni and cheese : crispy and creamy. Endless additions and variations on these themes are all well and good as long as the results play out as either something crusty and crunchy and cheesy and dry or something thick and creamy and cheesy and soft. Inbetween measures are to be despised, as are most attempts to capture the best of both worlds by having a crusty top and soft interior. In my experience, such efforts are either doomed to end in failure or dissatisfaction.

There are no shortcuts to a proper mac & cheese of either variety. Here we have the crusty, crispy kind. The kind that, when reheated, is dry (but in a good way) and chewy (but in a good way), bound with just enough sauce to keep everything toothsome but not to detract from the tactile pleasures of a proper crunchy mac.

The first thing to do is cook your pasta. You will want to make a pound of pasta, boiled until al dente or perhaps slightly stiffer than that. As for choice of pasta, I like to use a long pasta like thin ziti or cavatappi or penne in this type of mac & cheese. For the creamy variety, I would choose traditional elbows or small shells or orecchiette. These considerations have more to do with surface area than anything else. Boil the pasta, drain it and cool by washing it with cold running water. Then toss the pasta with :

2 tbs butter or 1 tbs butter and 1 tbs shallot oil

This is the only step that can reliably be done ahead of time in my mind. Some may disagree, but I find that a cooked and cooled bechamel or mornay becomes a bit stodgy and doesn’t integrate with the pasta very well. You can use pre-cooked pasta but from this point on the results will be most delectable if everything is composed and integrated at once. This mac and cheese is truly superior when first pulled from the oven, but also makes an excellent dish to be reheated and served again.

IMG_0280

Next you will want to make the mornay sauce, and get the oven preheated to 425°. An excellent creamy mac can be made on a stovetop, but for this variety a nicely hot oven is required.

For the Mornay sauce :

Warm in a small saucepan :

2 cups milk, whole preferred

Melt in a medium saucepan :

2 tbs butter

Add to the butter :

2 tbs all purpose flour

Cook, stirring or whisking, for two minutes or more (this goes a long way towards removing the raw flour taste)

Slowly incorporate the warm milk into the sauce, a quarter cup at a time. You may whisk if you like, I usually use a flat-ended wooden spoon and then move to a whisk once about half of the milk has been added.

Once all the milk has been added, cook the sauce over a low heat for about 15 or 20 minutes. This will remove the rest of the floury taste from the sauce, as well as thickening it a bit.

Add, stirring :

4 oz. medium sharp cheddar cheese, grated

2 tsp hot paprika (smoked if possible) (optional)

2 tsp sweet paprika (optional)

2 tsp dry mustard powder (optional)

salt to taste

freshly ground black pepper to taste (optional)

Once all these ingredients are incorporated, toss with the cooked pasta, and add :

1 cup of cooked artichoke hearts or drained marinated artichoke hearts, roughly chopped

1/2 cup fried shallots, roughly chopped

Toss until well combined.

In a small skillet, heat :

1 tbs butter or shallot oil

Add :

1/2 cup panko breadcrumbs

Toast, stirring, for a few minutes.

Place the cooked, sauced pasta in an oven-safe casserole dish. I like to use a natural stoneware dish for this.

IMG_0282

On top of the pasta, spread out thinly :

2 oz grated cheese of your choice (parmesan, a sharper cheddar or cheese with jalapenos or habaneros are all good choices. You may use the same variety used in the mornay sauce, but I find it is more interesting to add some variety here.)

A further 1/4 cup or so of fried shallots

The toasted panko

Place the dish in the oven. Bake, uncovered, for 15 minutes, then remove the pan and lightly press down on the surface of the mac & cheese with a wooden spoon, allowing air to escape from the dish, which should be bubbling and hot. Return the pan to the oven and bake for another 15-20 minutes, until the surface is crispy and browned. You may wish to add a tablespoon or two of butter, thinly sliced and dotted on the surface of the dish.

Once the dish is browned to your satisfaction, remove it from the oven and serve.

This dish will reheat well, but you will most likely want to cover it with foil during most of the reheating process, only removing the foil for a few minutes of baking. Otherwise the mac & cheese will become too dry.

Key : The key to this recipe is in the texture, the crispy and crusty tactile taste of panko and thick, heavy-cut macaroni tossed with just enough sauce to bind the ingredients. The artichokes and shallots are added primarily for sweetness and texture.

Fermented Sriracha (Tuong Ot Sriracha)

IMG_9620_2

Making a homemade version of the popular sriracha hot sauce couldn’t be any easier : a simple fermented version can be made that is far more flavorful than any commercially available one. You could also make this sauce fresh, simply omitting the fermentation stage, but I think you will find that the extra time really adds a strong depth of flavor not present in the fresh version. For such a simple preparation, this sauce has a zesty, complex taste that far outstrips the somewhat one-note heat of Huy Fong and other store-bought brands.

I like to make two versions of this sauce : one red, one green. They have quite different characteristics from each other, the red one possessing a much deeper, more complex heat and the green one a sharp, fresh heat. Neither is really superior to the other, and both are worth trying. I use the green one more often with salads and raw preparations, the red in soups and hot noodle dishes. Both are outstanding in cold noodle bowls, with the green getting the nod if I am using a lot of raw vegetables and herbs and the red if the majority of accompaniments are pickled or preserved. Fish? Green. Pork? Red. Tofu dishes? Both harmonize quite capably.

IMG_9613_2

First, you will need to choose appropriate chiles. I would avoid extremely fire-y chiles like Thai bird or habanero chiles, as they tend to be somewhat overpowering in a sriracha. Remember, this sauce is almost entirely chiles with only a smattering of other seasonings. What is wanted here is a deep, resonant, complex heat, not a pain-inducing power sauce. For a green sauce, jalapenos are completely appropriate. With red, look for either fresno chiles (sometimes erroneously called red jalapenos) or hot red cherry peppers. Cherries are my favorite, they have a perfect balance of hot and sweet that shines in both this sauce and the related chile-garlic sauce known as tuong ot toi. In fact, I have grown these chiles in the past couple of years explicitly for the purpose of making these particular sauces. You will want to experiment with this recipe, using the chiles you can grow or buy locally and that suit your particular taste. My only word of advice would be to avoid being overly macho the first time you make this. Use jalapenos or medium-heat red chiles and see how you like it before stepping up the heat.

Roughly chop :

1 lb medium-hot chiles, green or red (but NOT a mix of the two), de-stemmed and NOT de-seeded

.5 oz crushed, peeled garlic (a few cloves)

Combine in a food processor with :

1 1/2 tsp kosher salt

1.5 oz palm sugar (regular white sugar can be substituted but the taste is inferior as well as less authentic)

Pulse until well-chopped but not liquified.

Place into a glass or plastic container, cover with a towel and allow to sit at room temperature for several days.

When the sauce begins to take on a fermented smell and begins to bubble ever so slightly (you may find this is easier to SMELL and HEAR than SEE), usually about 3 or 4 days (less in hot weather, perhaps more in cold), place in a saucepan with :

1/3 cup vinegar (I use Korean brewing vinegar for this, but white vinegar is also good. Seasoned rice vinegar and apple cider vinegar CAN be used but they impart more sweetness to the finished product.)

Bring to a low simmer and cook for five minutes or so.

Puree in a blender or food processor. If the mixture seems to thick add a spoonful or two of water, but be conservative.

Strain through a wire mesh sieve into a squeeze bottle or jar.

Use with, on and in everything.

IMG_0407_2

N.B. : You may find that you have quite a lot of seeds and pulp that will not fit through the strainer. I strongly encourage you to make a fermented salsa or sambal from this remainder, you will not find that it lacks heat or flavor.

Fried Shallots & Shallot Oil

IMG_9988

I am a tremendous fan of any kitchen process that yields more than one useful pantry item, not to mention any recipe in which there is no waste. Fried shallots and shallot oil are a perfect example, creating two delicious products that can be used independently or together.

A common preparation in Vietnamese cuisine, this is simple and delicious enough to be used with any kind of cooking. Fried shallots are an even more delicious variant on fried onions, and homemade ones knock the socks off of those horrible dehydrated bits in the supermarket that often appear in 50’s style casserole recipes, usually alongside canned cream of mushroom soup. Shallots in general do not get enough love–this deeply-flavored allium can be used as a substitute for onions in sauces and many other dishes where a touch of sophistication is needed. They have a raw flavor that may be a bit intense for some, but become much more mellow and deep in taste when cooked.

Fried shallots can be used as a garnish or addition to all kinds of dishes cold or hot. They are used most extensively in Vietnamese cooking as additions to noodle bowls and soups, but will add a great flavor and texture to sandwiches, omelettes, spring and summer rolls, raw salads, cold composed salads (such as egg or potato salad), and so on. Heck, you can even use them to top that casserole–best to leave the cream of mushroom soup at the supermarket, though. One of my absolute favorite things to do with them is to lay them out with or without breadcrumbs on top of a pan of macaroni and cheese. Best of all is to serve the shallots and shallot oil as accompaniments to a large or festive meal, and allow your guests to experiment.

Shallot oil has as many uses as fried shallots, perhaps even more since it can be used as a cooking oil as well as a dressing or garnish. I enjoy the oil most as a part of a vinaigrette or dressing, as a last-minute flavor booster for soups or cooked vegetable dishes. It works wonders drizzled onto grilled vegetables, fish and meat. It can be substituted for olive oil or butter in cooked or cold dishes such as pasta salads, egg dishes, bean and grain salads, and so on. One of my favorite things to do is to add it to mashed potatoes instead of butter, and then garnish those potatoes with some of the fried shallots as well.

IMG_9991

To make fried shallots and shallot oil, peel and slice 8 oz (1/2 lb) of shallots into slices about 1/8th of an inch thick. You can go a bit thicker, but be careful not to slice them too much thinner or they will burn up in the oil. Measure out a cup and a half of oil and pour into a wok, deep skillet or wide saucepan. I use a pan called a sauteuse for this and many other preparations. It’s flat like a saucepan, wide like a skillet and very deep with raised sides. An ordinary skillet with work fine provided it’s not super shallow. Peanut oil is most traditional, but a neutral oil such as sunflower or vegetable will work as well. Often I will use a mixture of half peanut and half vegetable for a well-rounded flavor.

Heat the oil over medium-high heat until it is quite hot. Test the heat by dropping a cube of stale bread in–if it sizzles up right away your oil is ready. Add the shallots and fry for a minute or two. Then reduce the heat to medium-low. There is no pre-set or perfect time for frying the shallots. They are done when they are nicely browned but not burned. A good rule is to remove them from the oil before you think they are finished. They will cook a bit more after being removed from the oil, and a little bit undercooked is far preferable to burnt. Overcooked shallots have a strong, bitter flavor that is unpleasant. They will also impart a bitterness to the oil if burned.

To remove the shallots, I use a spider or metal spatula with drainage holes. Tongs will also work, but may damage the crispy texture of the shallots. Place the fried shallots on a paper or kitchen towel placed on top of a plate. Allow to cool, and store at room temperature in plastic or ceramic with a plastic wrap covering. Allow the oil to cool and strain through wire mesh or cheesecloth into a jar. This can also be kept at room temperature, but will eventually become rancid. You may of course refrigerate it, but of course allow for some time to sit out at room temperature before using. The fried shallots may be refrigerated but I find this destroys their texture. They usually don’t last long enough in my house to spoil, even when stored at room temperature. They should last at least a week if covered loosely with plastic wrap.

This procedure can also be used to create other fried garnishes and flavored oils. A very good one is made of spring onions, perhaps with ginger or garlic added. Thin slivers of garlic are also popular, and traditionally used as a garnish for fish and seafood soups as well as salads and noodle dishes.

A final word of caution : the oil will become rancid over time, so always make sure to taste it before bringing it to the table.

Cream of Roasted Cauliflower Soup

IMG_9718
Cream of roasted cauliflower soup, garnished with roasted cauliflower florets, cilantro and scallion greens.

This is relatively complicated soup to prepare, but well worth the effort. It basically consists of three separate procedures : roasting the cauliflower, toasting and grinding the spices, and composing and pureeing the soup. You could just as well serve this soup rustic-style (without pureeing), but I think its’ worth the extra time and energy to puree for a more elegant soup, one that would happily grace the most sophisticated table. The fact that it is so simple, rich and creamy and also vegan may come as a surprise to some–it’s a great dish to introduce to people who may be skeptical about how deep a flavor one can get from healthy, vegetable-based cuisine.

First, prepare Roasted Cauliflower & Cauliflower Greens using a 2 pound head of cauliflower. This can be done ahead of time, as far in advance as a couple of days. You may try that, I usually can’t resist gobbling up the roast cauliflower as is, so I have to move quickly if I’m making the soup!

Second, make the spice mix.

IMG_9708
Spice mix for cream of roasted cauliflower soup : coriander, fennel, cumin, urad dal.

Place in a small skillet over medium-low heat :

1 tsp whole fennel seed

2 tsp whole cumin seed

1 tsp whole coriander seed

1 tsp urad dal (white gram bean) (optional)

Toast the spices until slightly colored and aromatic. Whole spice seeds burn easily, so keep a close eye on them and shake the pan occasionally. Allow to cool and then grind in a mortar and pestle or spice grinder.

Thirdly, assemble the soup.

In a large saucepan or deep sautée pan with raised sides, bring to heat over medium heat :

2-3 tbs olive oil

Add :

5 oz celery, chopped fine

6 oz onion, chopped fine

2 oz scallions (white parts only), chopped fine

(You could just as easily use another mix of onions here, providing they come out to about the same weight. A good option would be a mix of shallots and spanish onions, or mix of leeks and onions, or ramps and scallions, etc. Look for a total of 8-10 oz. for best flavor)

Sautée, stirring occasionally, for 5 minutes or so, then add :

2 oz chiles, chopped fine

Sautée, stirring occasionally, for another ten minutes or so, or until all the vegetables are tender.

Add and quickly stir in :

2 tbs flour

Cook for one or two minutes to remove the raw flour taste.

Add, slowly, one half cup at a time, stirring all the while :

8 cups of vegetable stock (or whatever stock is handy/preferred)

Bring the soup to a simmer.

Add the ground spice mix to the soup. Add salt and freshly ground black pepper (optional) to taste.

Chop the roasted cauliflower and greens into small pieces, reserving any if desired to use as a garnish. Add to the soup.

Simmer at a low to medium simmer for 30 minutes or so, until all the vegetables are nicely tender and the liquid has reduced a bit.

Allow to cool.

Puree the soup in small batches. If a completely emulsified soup is desired, pass the soup through a metal strainer or cheesecloth.

Return the pureed soup to heat before serving. Adjust for seasonings. If the soup is too thin, cook to reduce to the desired consistency.

IMG_9715

Serve this soup as hot as possible. It can be prepared in advance and served days later if desired.

The spices used give this soup a mellow, complex flavor that accentuates the natural taste of the cauliflower. When serving, choose garnishes that add an element of sharpness or freshness to the soup. Of course, if you have reserved any small florets of roasted cauliflower, you can add those. I usually heap them in the center of the bowl and then add greenery around them. Thinly-sliced scallion greens or field garlic, cilantro or another fresh green herb, raw or prepared chiles are all excellent choices. A dusting of paprika or fresh ground chile powder will show up nicely against the creamy beige of the soup, as will black sesame or nigella seeds.

Though it seems deceptively simple (if somewhat elaborate in preparation) in terms of ingredients, this is really a very rich and hearty soup perfect for the end of winter. One can prepare many delicious “cream of” vegetable soups in a similar fashion, choosing spices and seasonings most appropriate to the vegetables involved, without ever desiring to add actual cream to the dish.

Horseradish Syrup and Candied Horseradish

IMG_9334

Whatever my reasoning might have been the first time I made this, I certainly did not expect it to be something I would enjoy quite so much. I certainly never imagined it was going to end up being something of a classic in my kitchen.

Whatever you might be thinking when you read the words “Horseradish Syrup and Candied Horseradish,” I encourage you to try this the next time you have a horseradish root in the house. You don’t even need to procure extra : this uses a part that you would ordinarily compost or throw away : the peel.

Place in a small saucepan :

1 oz horseradish peel or thinly sliced horseradish, in large, thin strips if candying

2 cups of sugar

2 cups of water

Heat over medium heat until the sugar is completely dissolved.

Bring up to a slow simmer and simmer for 10 minutes.

Allow to sit overnight or for at least a few hours, if possible.

Strain and separate peels and syrup.

Pass syrup through cheesecloth and store in refrigerator. Should last at least one month.

To make the candied horseradish :

Preheat oven to 275°.

Toss peels in more sugar to coat. Place on a cookie sheet. Do not use wax paper.

Bake peels for 10 minutes, then rotate and bake for 10 minutes more.

Allow to cool, serve as candy or use as garnish.

IMG_9305

I first made this in a moment of whimsy. I’ve gotten fairly proficient at making homemade syrups over the past couple of years, and some of the ones that seemed most unlikely at the time I made them (knotweed flower, celery root, shiso flower) ended up being the tastiest. So whatever odd notion I had in my head that first night, I was peeling some horseradish for a roasted potato dish and I began to wonder what type of taste and use a horseradish syrup would have. I made it in a similar fashion to that detailed above, and sampled it the next day. I couldn’t believe how it tasted.

There is nothing sharp, hot or sinus-provoking about horseradish syrup. It is a sweet product with a distinctive savory flavor. It will not add heat or pungency to drinks or dishes. It will definitely add a certain je ne sais quoi. The best way to describe the flavor is to say that it tastes deeply of horseradish but not in any way you thought horseradish could taste. The candied peel tastes like caramel with a mild horseradish undertone. Rooty. It tastes rooty.

So now that you’ve braved strange new waters of taste perception with your horseradish syrup and candy what the hell do you do with them? To be fair, I’m not 100% sure yet.

I find myself nibbling in odd moments at the candy. It satisfies my interest in curiosities as well as my occasional sweet tooth. It is also visually and texturally interesting, so makes an interesting garnish for a dip with horseradish. Physically it is quite like very crisp bacon, and can be broken up and added to a dish in the same fashion–although obviously with a different flavor result. It seems to enjoy the company of gooey melted cheese.

The syrup I have mainly enjoyed medicinally, as a slowly-sipped shot when I’m feeling under the weather, especially if I have a sore throat or cough. It seems to do most of the same things that Robotussin does, meaning it masks the symptoms for a little while but isn’t quite as effective as remedies made from coltsfoot (which we will talk about in the spring). Horseradish has long been prized as a medicinal herb and vegetable, known to Egyptians, Greeks and Romans alike. Whatever heath benefits it may or may not possess, it certainly won’t do you any harm. If, like me, you enjoy the taste than it brings pleasure on its own.

Accordingly, you may use this syrup anywhere you would employ a syrup in the kitchen. Glazed carrots and potatoes, glazed pork chops, as a sweetener for a dish of greens, to make a vinaigrette for raw chicories, in sweet-savory cocktails, and so on. I’m hoping to experiment more with this syrups’ use in cooking during the upcoming year, I’ll be sure to post any interesting results. And if you’re intrepid enough to prepare this, please let me know how you find it and what interesting things you do with it.

For now though, I’m feeling a bit of a cough coming on… time for a little more medicine.

Pickled Burdock Root

2014-09-25_1411681264

Place in the bottom of a glass pint jar :

1/2 oz turmeric root, peeled and sliced into a few long strips (optional, can use turmeric powder instead)

1 tsp whole black peppercorns

1 tsp whole yellow or black mustard seed

1/2 tsp whole pieces of vietnamese cinnamon

1 star anise, broken up

Fill with peeled burdock batons : cut batons to the height of the jar (allowing room for the spices and headspace) and about half as thick around as a pencil. Pack batons into jar until you cannot fit any more. Keep all the batons vertical. Trim any that stick out too far. This should require around 3/4 of a pound to a pound of burdock root.

Heat in a small saucepan until the sugar and salt are dissolved :

1/2 cup seasoned rice vinegar

2 tsp sugar

1 tsp salt

When dissolved and the vinegar is still hot, pour into the filled jar. Allow to cool, then cover and refrigerate. Add more seasoned rice vinegar as needed to cover the batons.

This will be ready to eat when cool, but tastiest after at least 24 hours. It should last several weeks.

This can be made with either wild burdock root or the cultivated kind sometimes found in asian markets.

Pickled Kohlrabi

IMG_9836

Assemble in a clean glass quart jar :

1 lb kohlrabi bulbs, peeled and cut into batons (as pictured below) or shreds

4 oz onion, peeled and cut into thick slices

1 star anise, whole

2-3 hot chinese dried chiles or 2 tsp red pepper flakes

1 tsp whole mustard seed

1/2 tsp whole sichuan peppercorns

Heat in a small saucepan until sugar and salt are dissolved :

2 cups vinegar (see notes below, a mix of vinegars is best)

1/4 cup sugar

1/2 tsp salt

While still hot, pour the vinegar-sugar-salt solution into the glass jar. Allow to sit until cool, then cover with a cap and refrigerate. Ready to eat in 24 hours, best after three or more days.

IMG_9014

Roasted Cauliflower and Cauliflower Greens

IMG_9707_2

Cauliflower is a delicious vegetable that is too often ill-served by the the one preparing it. The major culprits are boiling (which accentuates its’ heaviness and high water content) and pairing with cream and/or cheese (which accentuate its’ blandness). Prepared with some attention to its’ particular nature, cauliflower need be neither heavy nor bland. The high water content is a problem best handled with high heat and a bit of special attention.

This simple dish is one of my favorites to make, one I could happily eat any day. It can be endlessly improvised upon in terms of seasoning, but an even better idea is to prepare it and turn it into something else. Chop some up with olives and pickled onions and peppers and add more oil for a tapenade. Puree it with cooked onions and celery to make a delicious, creamy soup. Add large chunks of pickled vegetables and cooked potatoes and spices and make a potato salad version of aloo gobi. Or simply chop up the cauliflower and greens and use in a flatbread or omelette.

IMG_9700

Preheat oven to 450°

Remove the greens of the cauliflower. Chop these into pieces no larger than an inch and a half. Wash and pat dry.

Core the cauliflower. Cut away the base of the stem and any dirty bits. Chop the core into cubes of about one inch square.

Separate the cauliflower into florets. If the florets are large, slice them in half. If the florets are exceptionally large, cut them into thirds. You want large, flat-ish pieces for this recipe, so cut lengthwise and try to maximize surface area. Very small florets should be avoided, they will just burn up.

Toss the florets, greens and stem pieces together with olive oil to cover. Make sure that the cauliflower is well-coated but don’t worry about getting every inch. Resist the urge to use too much oil, it will impeded the roasting process.

Lay the coated cauliflower and greens in a large, heavy, deep roasting pan. Allow for space between each piece (as pictured above). If you feel like you are overcrowding the pan, roast in multiple batches.

Place the pan in the oven.

After five minutes, remove the pan and shake it a few times, tossing the cauliflower as much as possible but making sure that it is all still flat in one layer. Return to oven.

After five minutes (ten minutes total), remove the pan and place it on a trivet. Using tongs or careful fingers, turn the florets. Sprinkle with kosher salt, taking care not to use too much. Return to oven.

After five minutes (fifteen minutes total), remove the pan and place it on a trivet. Turn pieces if necessary. Add freshly ground black pepper to taste. Adjust for salt if necessary. Return to oven.

After five minutes (twenty minutes total), remove the pan and place it on a trivet. Test for doneness by cutting into one of the thickest florets. Taste if necessary. If it seems thick and stodgy, return to the oven for another few minutes.

At this stage you may add oil, if you feel that the cauliflower is too dry. I haven’t found it to be necessary. The cauliflower usually emerges tender inside from the combination of high water content and high heat, while the surface areas have a fine crispness that would be blunted if extra oil were added.

Serve this immediately or at room temperature. Hell, it’s good cold. Four ingredients, people.

As previously mentioned, this can be endlessly varied in terms of seasoning. One of my favorite things to add is paprika, especially a strong characterful Spanish or Hungarian paprika, hot or sweet, smoked or not. I would add any powdered spice ingredient with the salt, and make sure to give a more vigorous shake. One could also add powdered spices or dry herbs to the oil that the cauliflower is tossed with. I would add dry herbs in the last five minutes of cooking, fresh herbs only when the cooking was finished.

This is a dish exceptionally suited to buffets, meals of many small dishes, or meze / tapas / antipasto type spreads. Since it is still excellent at room temperature, it’s perfect for longer parties and more relaxed occasions. It also pairs well with a hearty, complex main course, and can stand up to many a sauce. It is also a great alternative to starchier sides such as roast potatoes, and makes an excellent second vegetable alongside anything green.

You will notice that the greens and stem of the cauliflower are used in this recipe. Don’t discard them, they are quite tasty and mild. All Brassica plants (cabbage, kale, mustards, broccoli, etc.) are edible from root to seed. Some parts of some plants are too bitter to be palatable, but most simply require the proper preparation.

Tomato Sauce with Winter Vegetables

IMG_9330

Another extremely simple winter tomato sauce recipe, in which you can use whatever winter vegetables you might have around and canned tomatoes to make a sauce that can be served either thick and chunky or pureed.

The first thing to do is strain the tomatoes, reserving the liquid. You will want to use about 2 cups / 1 L. of tomatoes and juice, or the contents of a 35 oz can. I usually also squeeze or cut open the tomatoes to let the juice inside them out, but this isn’t strictly necessary. Keep the juice and drained tomatoes separate until needed.

Next, prepare your vegetables. I use between 4 and 5 ounces each of three different vegetables. You should shoot for roughly equal amounts of each vegetable. First I use either celery or onion, chopped into medium size dice. Then I peel and cut into medium dice either carrots or parsnips. Lastly I prepare either kohlrabi, turnip, long radish or celery root in pieces of the same size as the other ingredients. If you like garlic in this, add an ounce or so chopped very fine. Remember to keep all your vegetables separated, as they require different cooking times.

Add two to three tablespoons of olive oil to a wide sautée pan, preferably one with deep sides. Bring the oil to heat over medium heat. Add the vegetables one at a time and cook each until softened. The best order is onions or celery to start, then carrot or parsnip, then the last. Cook each vegetable just until softened, about 5-10 minutes for each. Add the garlic last of all, and cook for only a few minutes before proceeding. You may also wish to add bay or bayberry leaf or whole sprigs of thyme or rosemary at this point, taking care to remove them before pureeing or serving the sauce.

Once the garlic has been cooked, add the whole tomatoes to the pan, breaking them into chunks with a flat-ended wooden or plastic spatula. You may chop them prior to adding to the pan, but I always find that such a mess and prefer to simply break them into pieces while they sautée. Cook the tomatoes for at least five minutes, keeping the heat around medium.

IMG_9325

Add the reserved tomato juices to the sautée pan. At this point, you may wish to add stock or water to thin the sauce out. I would only recommend this if it is your intent to puree the sauce. With about 5 oz of each vegetable, this makes a substantial quantity of sauce, enough for more than one pound of pasta. I will often serve the sauce thick with some pasta, then puree whatever is leftover with added stock to make a sauce that I can put on eggs or a half-pound of spaghetti. One could also add chiles or cream or another ingredient to this newly-pureed sauce for the sake of variety.

Whether you add tomato juice with stock or water or nothing else, the liquids must be cooked down slightly. I usually leave the pan at a slow, steady simmer for about 45 minutes to an hour, stirring occasionally. Less can be fine, but the flavor will not be as rich. In any event, make sure before serving that all the vegetables are cooked through and as tender as you would like them. Finally, add salt, freshly ground black pepper, and dried or fresh herbs to taste. With a winter sauce like this I will often add a quick crumble of marjoram or oregano or sage, depending on what herbs I’ve added during the cooking stage.

Serve as-is or puree and serve over pasta, with or without cheese.