Wild Bark Teas

In the throes of winter, gathering wild food often takes a backseat to using up what we have dried, fermented, frozen, or preserved. On the other hand, for those who hunt, the season has the added dynamic of being far more active. Shellfish, too, are at their prime. For freaks like me there is always the lure of ingredients transformed by the extremes of the season–conifer needles seem especially aromatic. The residual fruits that linger have been bletted to the point that deep, resonant flavors emerge.

But no matter what your winter kicks are, there are still a number of ingredients that have particular resonance in the fourth season. Prime among these are the sapling twigs of various edible / useful trees, which have a haunting aroma and deep flavor, and can be used not just as hot cuppa refreshers, but also as brines and pickling mediums, or infused into stored up goodies like honey, alcohol, wine, salt or sugar.

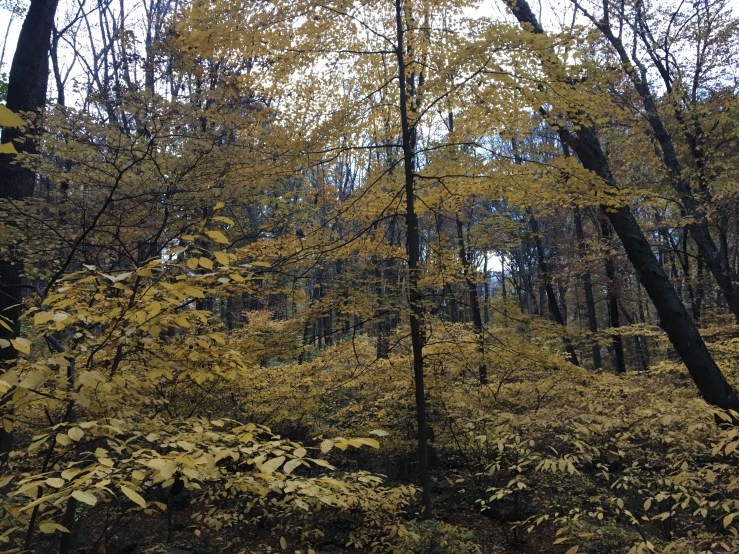
In winter, the energy of most herbaceous plants is tied up in their roots. But saplings and trees focus on creating buds and new growth, in order to prepare for spring. This makes for a period in which whole new categories of identifying and appreciating the trees of your area become available. It also means that some of these bits are full of flavor and aroma, especially amongst the thickets of saplings one finds with certain native trees, as well as those that are setting buds to flower in early spring, such as spicebush.

IMG_1704.jpg
A mature sassafras tree with its warm, lightly reddish bark
IMG_0187.jpg
Mature sweet birch tree, with its characteristic grey-black bark.

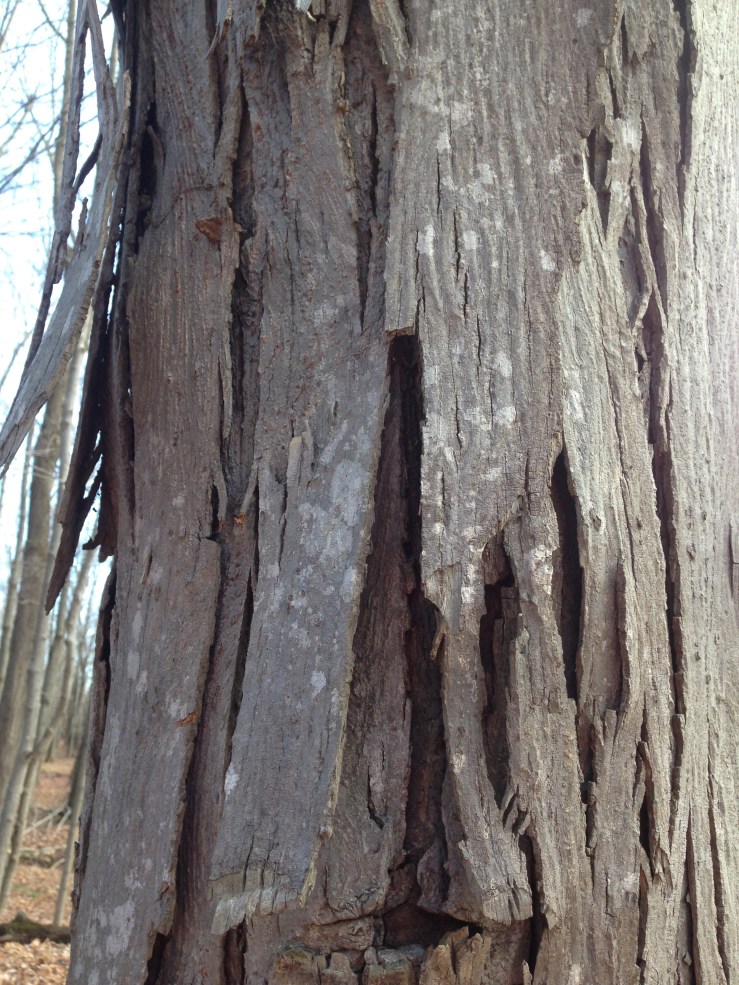
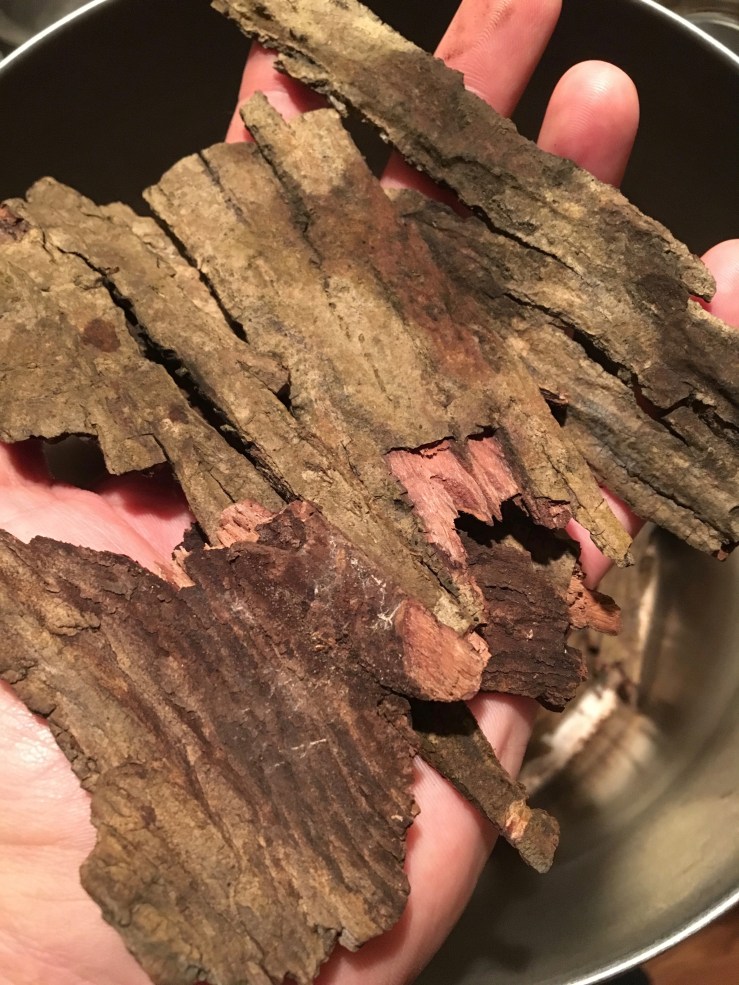
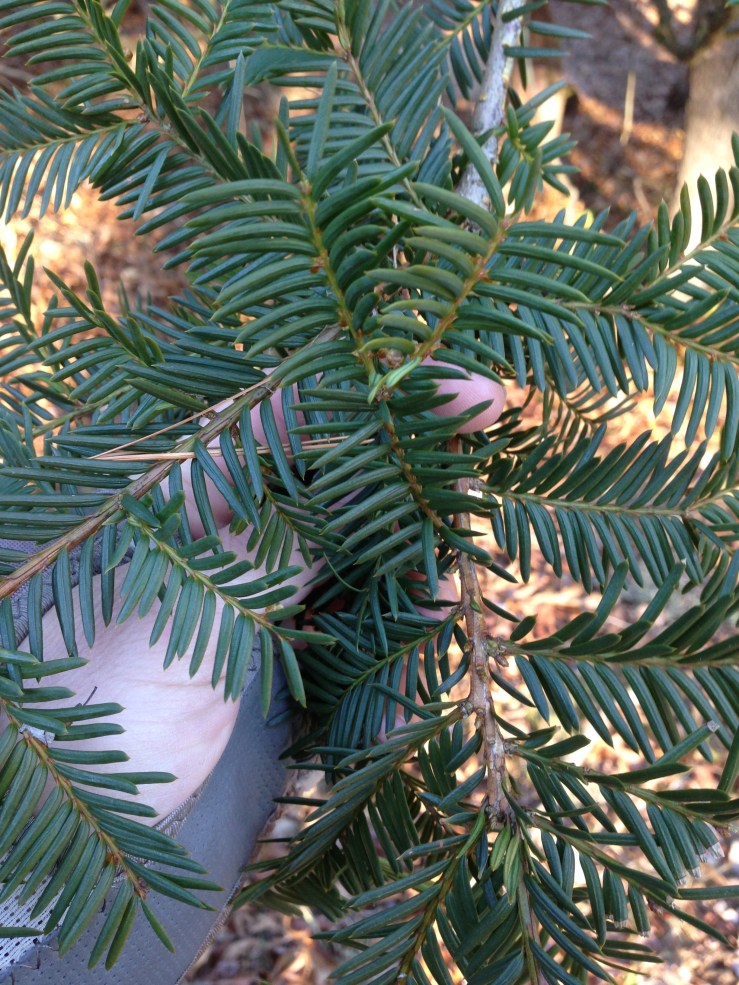
We won’t go hog wild here, but focus on three trees that I use extensively in the winter, all of whom have very distinct aromas which once you have become accustomed to are unmistakable for any other plant or tree. Patches of these trees are best located during the growing season when you can confirm their identity based on other characteristics such as leaves, fruit, flowers or catkins. Of course, there is also no reason one can’t use the bark year-round, but it is an especially welcome addition to the basket in winter. To check your saplings for smell, crack a fresh bit of new growth so the inner bark is exposed and get a strong whiff of it. If you have a lack of scent, you may have the wrong tree, or perhaps one which is weak and not worth collecting. This is especially the case with lower-hanging branches of older sassafras trees, which often become brittle and weak in flavor as they die off.

IMG_2291.jpg
Young, vigorous saplings of sassafras often have a green, bright brown or reddish cast to them. The outer bark slowly begins to become more knotty and textured as well.

Sassafras (Sassafras albidium)

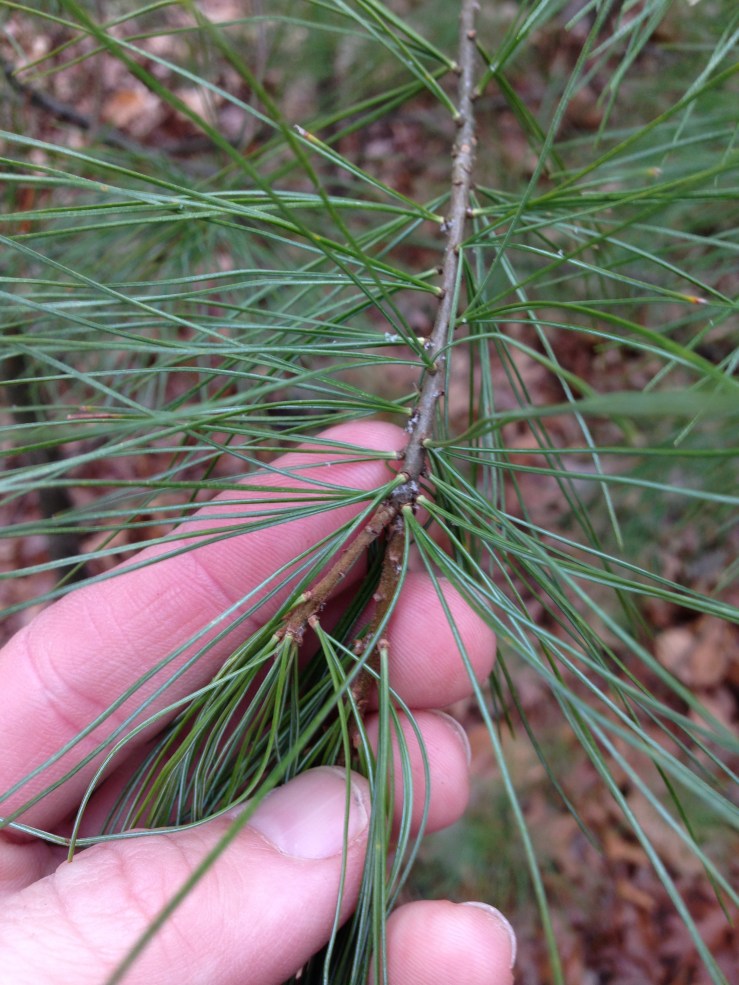
Many foragers know of the incredible taste of sassafras roots, and some will have used the leaves for a seasoning and thickener (known as filé gumbo to Creole cooks), but the vigorous young growth of saplings and twigs have garnered little attention. One is able to approximate the flavor of the root-based tea in a more sustainable fashion by collecting twigs instead of digging up plants, an activity which is also often difficult in the winter months. When gathering sassafras twigs, I look for cleared or semi-maintained areas near a line of mature trees, where one can often find small clumps of young sassafrases growing almost on top of each other. This strategy can be extended to the sweet birch as well, which I tend to collect only when I can find a thicket of them. Sassafras are notoriously weak-rooted trees as well, and one can often find larger specimens toppled after intense storms. In all cases one wants the green or red new growth which is flexible rather than brittle (you will want a pair of bypass pruners to cut these branches, don’t attempt to tear them), and which carries a strong and unmistakeable scent of sassafras. Many compare it to root beer, but I find it a bit more mellow and earthy, less cloyingly sweet than commercially produced soda drinks.


IMG_9598.jpg
Sweet birch branches range from light brown to almost silvery-black, but all will have narrow leaf buds and an aromatic fragrance like wintergreen.

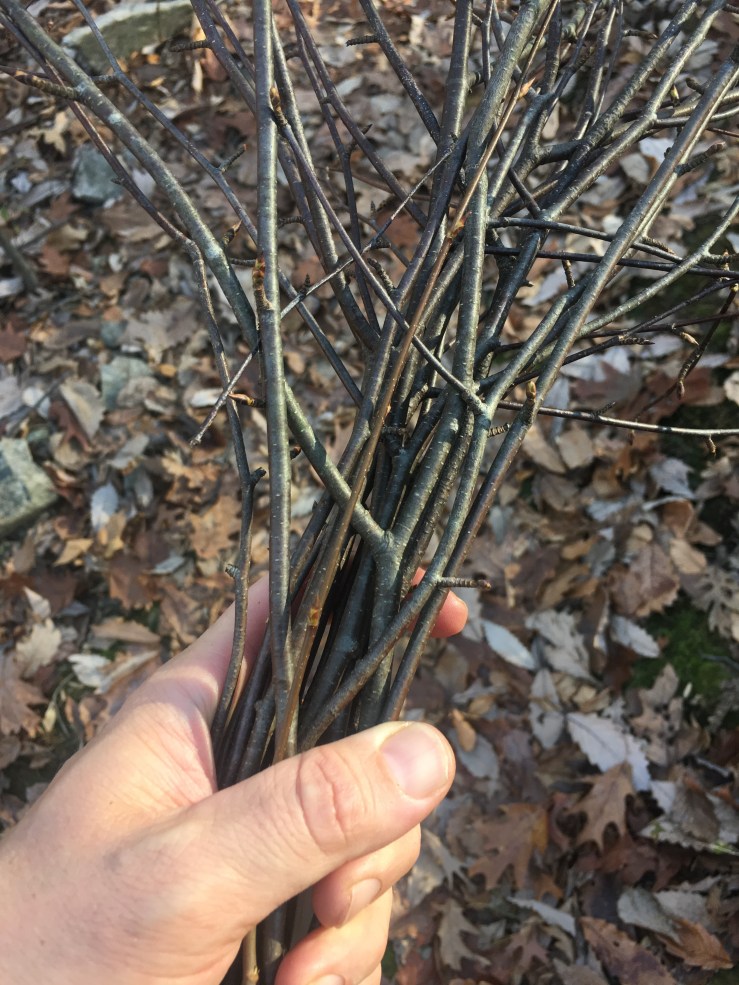
Sweet Birch (Betula lenta)

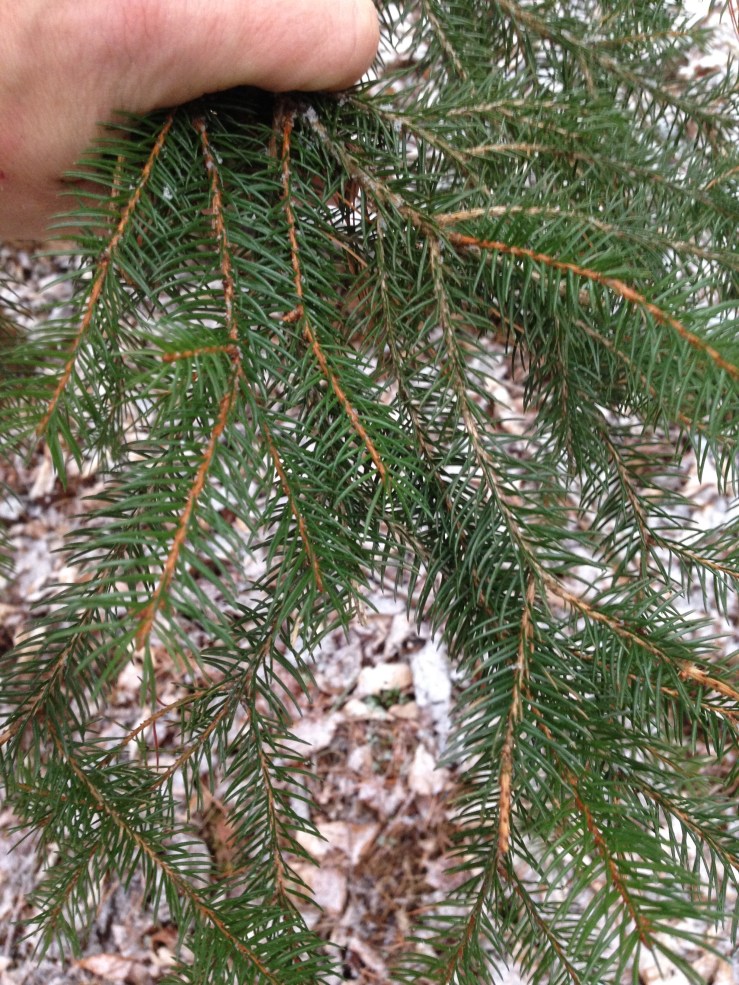
Sweet birch trees tend to grow very tall and narrow, seldom having any branches within easy reach. It is best with this tree to locate the small thickets of saplings which will grow, often clustered on sloping ground, near more mature trees. While the adult trees have bark that is almost black, the saplings will be a chocolatey brown to dark grey color, with leaf buds forming in fall and persisting over winter. These buds can be used to make a seasoning salt (as can those of sassafras, or the flower buds of spicebush), but they are also a good indicator of the identity of sweet birch. The saplings tend to grow very straight and upright, with few side branches, never becoming bushy or densely-limbed like spicebush. The scent of the broken twigs is quite similar to wintergreen, and will remind old-timers of traditional birch beer. The taste when brewed is not exactly that of wintergreen, but has a more well-rounded flavor, making for a surprisingly good brine as well as tea. The yellow or golden birch (Betula alleghaniensis) has a similar smell to the snapped twig, but I find its’ flavor to be more on the bitter side when brewed. You may wish to experiment more than I if this tree is common in your area, I have very little of it so tend to leave it alone.

IMG_0861.jpg
Female spicebush branch-notice the golden buds which will become yellow flowers in early spring. Spicebush bark is grey, with characteristic “dots” on the bark and an unmistakeable fragrance of resinous, spicy goodness.

Spicebush (Lindera benzoin)

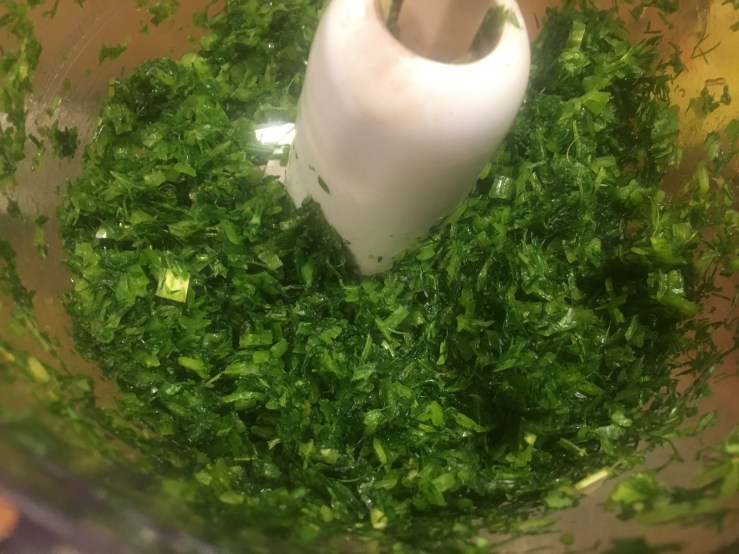
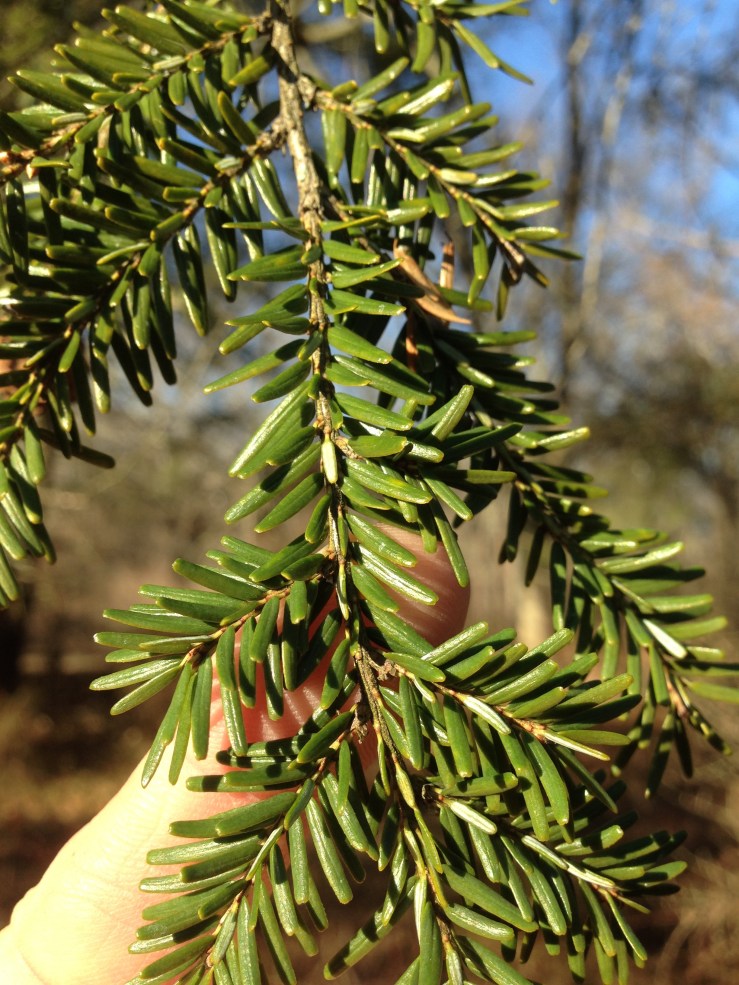
Those who know me know spicebush is a plant I am an insane raving lunatic advocate for. In my area it is most abundant, one of the few natives to have survived the onslaught of invasive plants, canes and shrubs that have slowly taken over our hardwood understory. It is a four-season edible, and probably bears a lot of the responsibility for why I am an advocate of winter foraging. It has a completely distinct scent, but you have to smell it to know it. The most common use by foragers for this bushy shrub has been the ripe fruit, collected and dried in fall to make a kind of “allspice” type seasoning. There are many more ways to use it. In winter, I mostly collect the branches from public parks and maintained trails–spicebush will grow in abundance along the edges of biking and hiking trails, so I try to keep my branch collection to the spots where these bushes will inevitably have to be trimmed and truncated by park officials. I like to think that some of them wonder why their job has already been done, but more likely than not they don’t give it a second thought. If you are wanting to collect flowers of spicebush in the spring, or fruits in summer and fall, I recommend collecting only limbs of male trees, which do not have visible flowerbuds developing. If you do collect female limbs, consider stripping the tiny spherical flowerbuds to make capers or a seasoning salt.

IMG_1724.jpg
Sweet birch branch brewing up into an excellent winter tea.

Wild Bark Teas and Brines

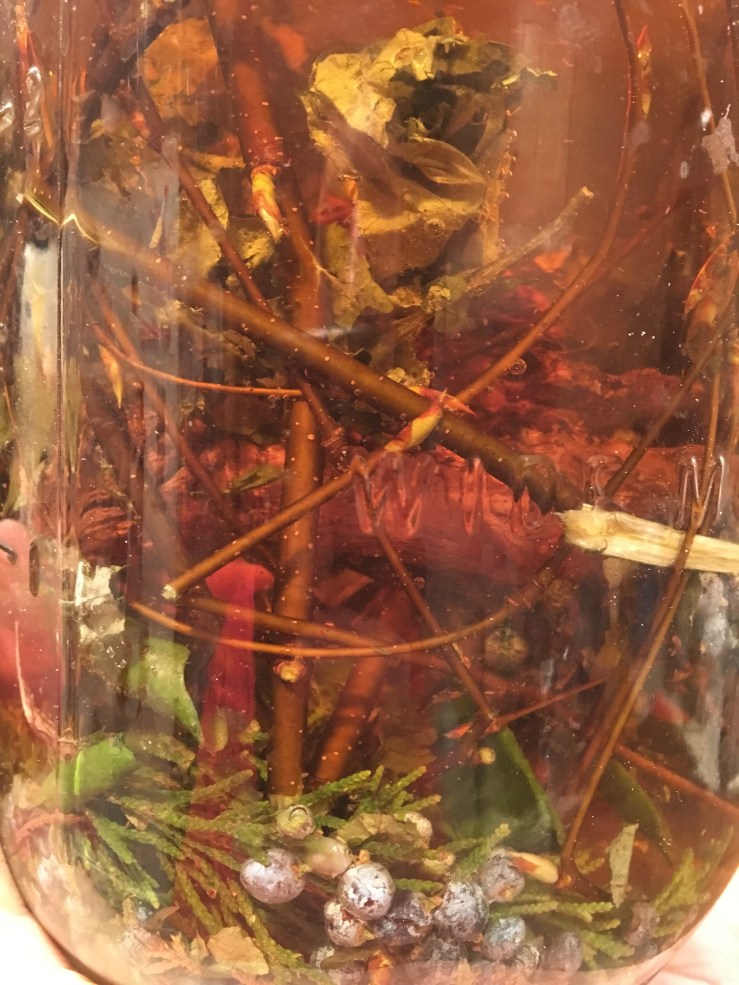
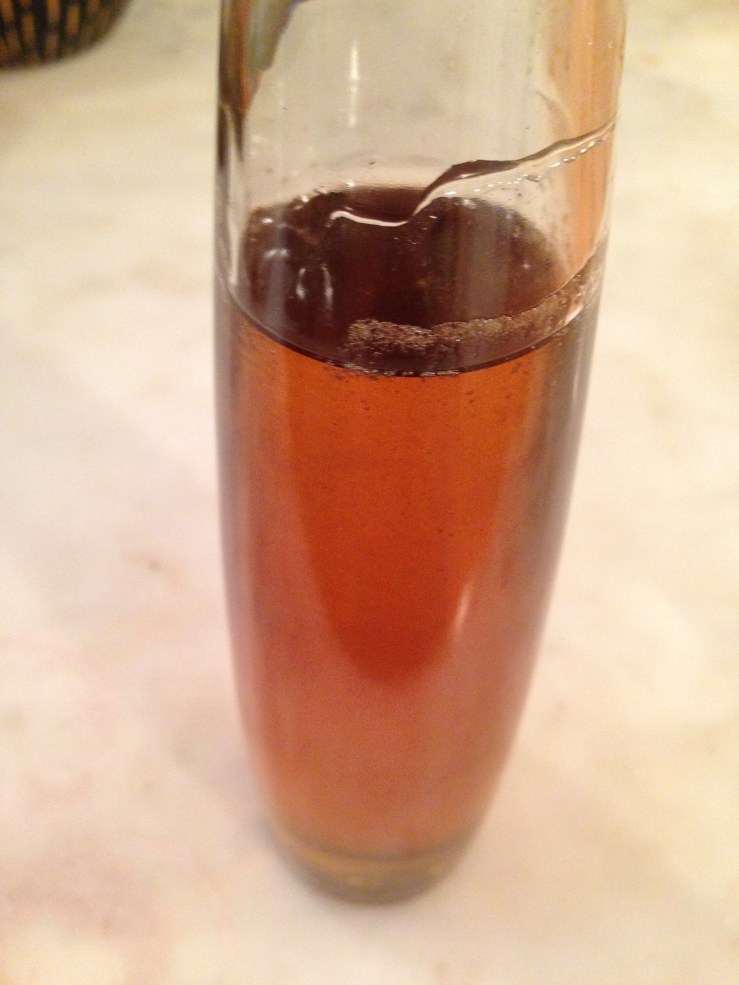
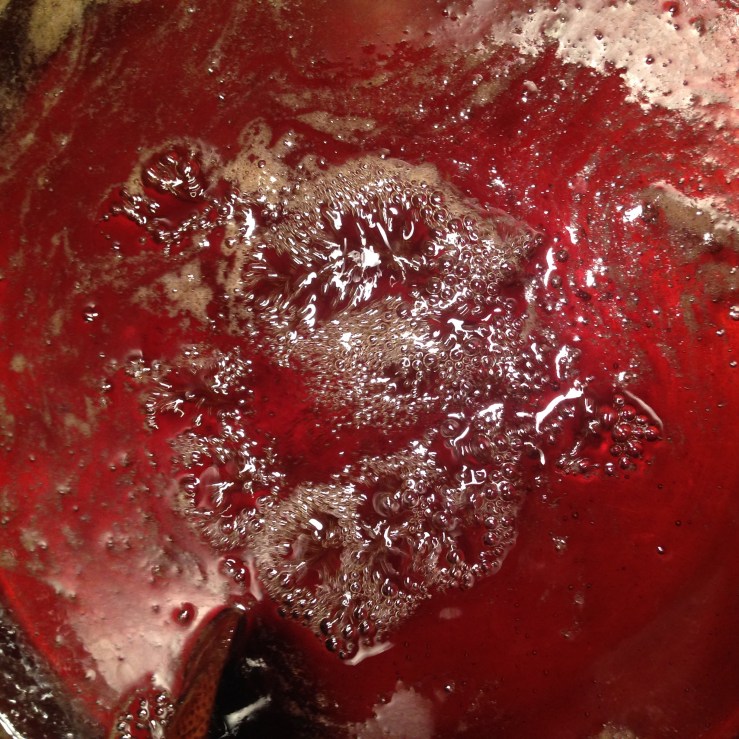
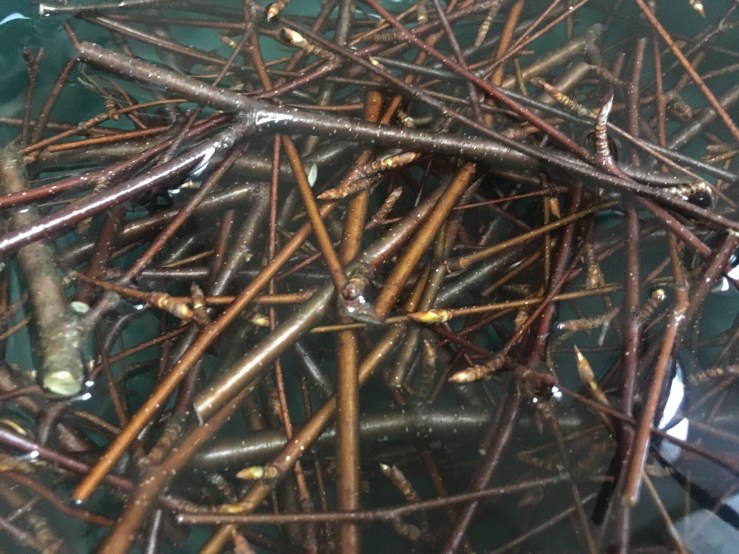
Any of these three trees will make an excellent tea, a process best done in either a stockpot held at very low heat or a slow-cooker on warm or low setting. I greatly prefer the slow-cooker method. It is easy, stress and attention-free, and I never have to worry about the process boiling over. While I don’t think any real damage is done to the nutrition of the tea by boiling (unlike conifer needle teas, which lose their Vitamin C content), it does no favor to the flavor, and generally increases the bitterness of the end product. One thing that certainly must be done, whether making this tea in a slow-cooker or on a stovetop, is to strain the finished tea through cheesecloth or clean kitchen towels. Wild barks tend to have saponins in them which will concentrate on the surface of the tea (they will look like small amoebas or spots of fat), but these are easily removed by straining through cloth. I use the same ratio of liquid to twigs/bark that I use when making coniferous trees, about 1 oz. of material for every 3 cups of water. The same 1:3 ratio applies naturally for a metric measure, I tend to use 200 g for every 600 g of liquid. Note that this is weight of dry ingredients vs. liquid measure for water.

The resulting tea can be drunk as is, chilled or mixed with sugar and chilled, salted and turned into a pickle brine (use 3-5% salinitiy depending on your ingredients to be fermented), or salted and used to brine meats (especially good with pork) or other ingredients for cooking (usually you will want more like 8% salinity, with the amount of time resting in the brine depending on the weight and muscle density of the product being brined). They make excellent kombuchas, either combined 50/50 with tea or raspberry/blackberry leaf Kombucha, or in their own right with a SCOBY and a bit of active kombucha simply added to the wild bark tea. I have enjoyed single flavor teas and brines made with only one of the above mentioned teas, and I have also used two or all of the barks combined to make a complex, multiple bark tea.

If you have a slow-cooker with a warm setting or a clippable thermometer you can also create a basis for a wild yeast beer or mead by making this tea, just be sure to keep the temperature below 140 degrees F, at which point the wild yeast which is abundant in the bark will be killed off. Another option is to replace water in a brew boil with wild bark tea, and then cool before pitching with conventional brewing yeast.

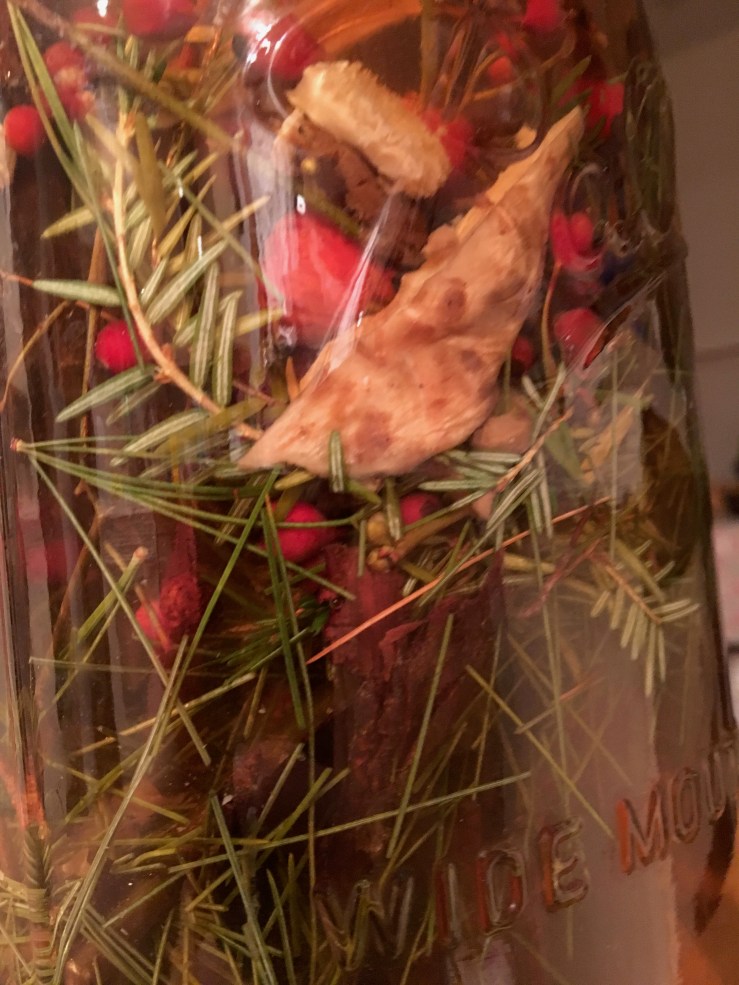
All three of these wild barks also make excellent syrups, individually or combined, which can be started as a simple syrup (1:1 sugar to bark tea or 2:1 sugar to bark tea), but which can also become sorbets or granitas, or indeed the branches may be infused in milk for ice creams or gelati. Infusions in wine or spirits also produce strong results, although for sassafras extract (comparable to a vanilla extract) I tend to prefer the roots for maximum concentration of flavor.

Cold brewing and infusing with these barks is also an option, but I have had much more success with them used as aromatic components in a botanical mix (for vermouth, bitters, or honey-based infusions) as opposed to a “sun tea” or cold-brewed tea which I do not think extracts enough flavor and is certainly more dicey health-wise. I suggest a hot brew to create a liquid base and then proceeding from there in all applications using wild bark.

Perhaps obvious to some, but certainly worth mentioning : since all these thin saplings and twigs are harmless in every way for food use, so they also make excellent kebab skewers! As a child, I used to gnaw on sweet birch sticks and even today a little nibble of sassafras or spicebush bark can provide stimulation on a long winters hike.

Wild & Conventional Herbs Preserved in Salt

IMG_0048.jpg
Picking lovely field garlic in mid-winter to add to herbs preserved in salt.

The harvest and use of herbs and greens is a year-round process in my kitchen. Generally, I use wild herbs and seasonings or those grown in my garden, but of course many fine farms and friends grow herbs as well, so there is plenty of bounty to preserve, even in the off-season. I am always looking to explore ways to keep the ingredients seasonal, but extend their life by various preservation methods, so that I can have my cilantro in winter and not feel too guilty about it. One of the best ways to do this is to employ a bit of salt. Indeed, quite a bit of salt. By chopping fresh herbs (augmented if you desire with a little vegetable material such as leek, celery or carrot) and combining with salt you can keep some of the bright intensity of fresh aromatics from decaying.

Our culinary herbs, especially those that dominate the cooking of the Mediterranean basin, are nearly all drawn from two plant families. The majority of plants that most cooks from that tradition (and indeed, many others) will recognize as herbs are either a member of the Lamiaceae (Mint Family) or Apiaceae (Carrot Family). The first includes the obvious “true” mints such as spearmint and peppermint, but also widely-used seasonings such as thyme, oregano, rosemary, basil, shiso, savory, lavender, etc. The second contains cilantro and parsely, alongside dill, fennel, caraway, chervil, anise, angelica, and many more. In addition to aromatic herbs, the carrot family has a number of vegetables (celery, carrot, parsnip, fennel) and plants whose seeds are used as spices (cumin, coriander, ajwain, caraway, alexanders). It might come as no surprise that a number of the wild plants we can use as herbs also come from these same families.

There are a number of methods available to preserve the flavor of fresh herbs when they are in season. The one most people will be familiar with is drying, I have found this to be a particularly excellent method to use when dealing with the mint family. Indeed, many of the mints which we collect as wild plants or grow have a marked flavor improvement when dried. Oregano, for instance, or the plant Monarda fistulosa (Wild Bergamot) are herbs I don’t use great amounts of fresh, finding them a bit too intense for most things. However, when dried they are huge staples of my kitchen year-round. But while dehydration is effective for the mints, it tends to make the more subtle flavors of the carrot family disappear. Anyone who has used dried parsley will discover pretty quickly that it tastes precisely like nothing. Again, this extends to the wild members of the family–my attempts to dry pushki (Heracleum maximum) leaves without treating them first has invariably resulted in a tasteless product. Drying of aromatic members of the genus Allium (Onions, Chives, Leeks, etc) is also sometimes fraught with difficulty. Leek greens hold up fairly well, and sometimes chives, but the wild members tend to lose their more ephemeral flavors.

My preferred methods to preserve both Alliums and Apiaceae are to use brine or vinegar, infusion or lacto-fermentation, and very occasionally freezing. But the best technique is the one detailed here. What you are creating will be high enough in salt that it becomes a substitute for that when used in a dish. In much the same way that one would use a seasoned salt, or a curry paste, or a pickled or fermented ingredient high in salt, you will want to taste your dish before adding any additional salt or salty ingredients like soy sauce to it. But a small amount of herbs preserved in salt can be used as the base for a vinaigrette or soup, added to a sauce, stirred in with dressing for a composed salad, added to the salt bill for curing meat or fish, stirred into a pasta with a bit of the cooking water, or used as the basis for a fresh salsa. Of course one could get even more creative than this, and luckily there will be plenty of time to–my herbs in salt mixes tend to last at least one year, some may linger even longer.

The recipe I use originated in a book called The Mediterranean Pantry by Aglaia Kremezi, and she uses US/Imperial measurements, always at a ratio of 6 ounces of vegetables for every 1.25 ounces of salt. This works out at a ratio of 4.8:1. For more precise measurement, I tend to use grams, and simplify the ratio to 5:1, but of course you can do as fits your kitchen and scale best. No matter what vegetable and herb components are used, however, the ratio should stay the same. This makes for 20% salinity, which means these herbs will likely stay fresh a lot longer than you. It is quite likely that a lower salinity would work fairly well too, but I tend to stick with this recipe as the color and taste stay so bright and fresh that I simply use the herbs as a salt substitute, and especially when added as the base for soups or stews the intensity of flavor is such that I feel I end up actually using less salt in the long run.

Absolutely any combination of herbs and vegetables is viable and I encourage you to experiment widely with this recipe, but I’ve included a few different iterations of it just as basic models. I always use a fine sea or other natural salt for this, such as Himalayan pink salt. Never use industrial salts like iodized table salt or kosher salt, and never use large crystals or rock salt unless you grind them first. Do not make the mistake either of combining the salt and the herbs and then processing, or you will wind up with more of a slurry than a condiment. In all cases, pack the herbs in salt well into 4 or 8 oz jelly jars (each recipe makes two of the former or one of the latter) and keep refrigerated. Should last at least one year, and often longer. Make sure that you integrate the salt well into the chopped herbs, tossing in a bowl several times before packing into the jars.

IMG_1901.jpg
almost, but not completely done pulsing cilantro, wild chervil and leeks

Cilantro & Leek

chop extremely fine by hand or pulse in a food processor:

160 g chopped cilantro

40 g chopped leeks

mix in:

40 g fine sea or other natural salt

Parsley & Dill or Fennel Frond & Leek

hop extremely fine by hand or pulse in a food processor:

100 g chopped parsley

60 g dill or fennel fronds

40 g chopped leeks

mix in:

40 g fine sea or other natural salt

IMG_1902.jpg
herbs combined with salt, ready to pack into jars

Bittercress, Dandelion & Field Garlic

I make this in spring when all three herbs are at their finest and I can collect them from my yard. This combination of herbs also makes an excellent base for pesto. Make sure that you use a food processor if using field garlic, and that you snip it very fine first as it is quite fibrous. The same can be said of chives

chop extremely fine by hand or pulse in a food processor:

100 g bittercress (Cardamine species)

60 g dandelion greens

40 g field garlic greens or chives

mix in:

40 g fine sea or other natural salt

Waterpepper & Shiso

The sharp intensity of waterpepper (one of the flavorful smartweeds will work too) is balanced by the distinctive herbaceous flavor of shiso. Both grow abundantly in my area as invasives, and I make this in mid-summer before both plants begin to flower.

chop extremely fine by hand or pulse in a food processor:

80 g shiso (Perilla frutascens) or thai basil

80 g waterpepper (Persicaria hydropiper), smartweed or rau ram (Vietnamese coriander)

40 g field garlic bulbils or leeks

mix in:

40 g fine sea or other natural salt

A Broth of Fallen Leaves

IMG_9756
A typical basket of fallen leaves and pine needles, circa late October

This is that rare preparation that sounds as poetic as it tastes. But between making a success out of it and a shambles there lies a very thin line.

If you just grab a bunch of random leaves from the forest floor and bring to the boil (Latin bullire, hence “bouillon”), you will certainly achieve some kind of a broth from them. But its flavor will be questionable. At best, it’s a roll of the dice that might make you lucky. At worst, it’s your stomach that is tumbling.

Leaves fall at different times. They contain many different flavors and elements that age and decay in different fashion. They aren’t all “edible,” but the ones you use should all be non-toxic. A handful of trees bear leaves that should be avoided (eucalyptus, yew, certain fabaceae family trees). Every leaf that makes its way into my broths is non-toxic, and every tree type mentioned below is broadly “edible” in my area. As always, your local species are the ones you need to look into.

I eat a lot of tree leaves. They don’t remain edible for very long, usually only a couple of weeks, but within that time frame things like beech and basswood leaves have become some of my favorite spring greens. The leaves of fruiting and non-fruiting Morus alba (White Mulberry) are another favorite, a sweet leaf more mild than cultivated lettuce once briefly boiled. Maple leaves can be or become bitter quite quickly but in their earliest incarnations most are mild enough to make a tempura or mead from, or boil and add to a salad.

I also use a lot of tree leaves. Oak leaves in particular, both for their tannins to stiffen a pickle a la grape leaves, and for their bite in brews and forest infusions. Those maple leaves that have become sharper are fine in small quantities in these same preparations. Dried black walnut (and by extension hickory and walnut leaves) are a traditional bittering agent, adding astringency and woody richness to alcohol, honey, or vinegar. As they age, edible or non-toxic tree leaves change in character, appearance and flavor. These intriguing elements can be used in the kitchen, but only once you have ascertained which leaves are safe to experiment with.

IMG_9688.jpg
Its more complicated than throwing a bunch of leaves in some water and boiling, but not that much more.

There is no substitution here, not for ingredients and not for experience. Learn which trees grow locally, and learn which ones are generally safe for food use. Taste and use the ones that are safe. Experiment with them – whether it be in a salad or a vinegar. Roll the dice, but set your own limits. Nibble before you bite, and bite before you swallow.

To make a broth of fallen leaves, you should worry more about proportion than volume. A good place to start is a few handfuls in the bottom of your stock pot, maybe about 6-8 cups of loosely packed leaves to about 4 quarts of water. Start small at first–what do you have to lose? My first broths of fallen leaves were a handful in a saucepan, filled with water and just simmered until flavorful, then drained and immediately used in miso soup, or a noodle dish, or mushroom soup. Or simply drunk, almost like tea, or better yet bone broth, with perhaps a pinch or three of sea or seasoned salt.

While I approached it very tentatively at first, you can be a bit bolder. I would suggest that for starters you can make a stock pot full of this broth, as long as you follow three simple rules :

1) pick clean, newly fallen leaves or tug leaves which are nearly ready to fall from the lower branches. its more poetic to gather the cast off leaves, but rule no.2 is more important than poetry – generally the milder leaves (mulberry, beech, linden) are later to fall. Carefully wash and sort your leaves, and strain the finished broth through a clean dishtowel or cheesecloth to filter out any noise, including the resinous issue which exudes from all the conifers.

2) use the proportions listed below to keep your broth within the bounds of reason. Feel free to deviate from them, but at your own peril. Adding a few more oak leaves can mean a wide shift in the dryness, aroma, and taste of your final broth.

OF THESE LEAVES, USE

50 % mild, edible leaves (beech, linden/basswood, white mulberry, birch, sumac, some viburnums)

10 % bitter, astringent or strong leaves (oak, hickory, black walnut)

20 % aromatic, seasoning leaves (spicebush, sassafras, maple)

20 % coniferous needles or branches (pine, spruce, hemlock, fir)

3) taste your broth, and pull it when it is to your liking. Don’t allow the leaves to sit and linger once you’ve achieved the flavor you want, or it will become much more woody and bitter. Of course, this can work too–and is a great basis for beers or vinegars. But we will discuss that elsewhere. Before all else, a broth should be sippable, soothing, nourishing. Something you can reach for when at your worst. Remember, this is a base. It should be flavorful but restrained enough to be a background for other flavors.

IMG_9679.jpg
A broth of fallen leaves that is on its way to becoming a tea, with sweet birch bark and a larger handful of white pine needles.

It occurs to me that this is essentially a very open-ended recipe, not only in terms of how it is described here, but in how it could mutate or evolve. I have made over the years many things that exist somewhere in-between this “broth” and a wild tea, concoctions which have been not only cooking medium or tea but also brine for marinating or pickling other foods, and so on. To cut off at the pass the most obvious notions, I would suggest that any wild tea plant could be added, along with such as rosehips, wild spices such as pushki, juniper or spicebush, spicebush or sweet birch bark, rubus spp. leaves, goldenrod flowers, bayberry leaf, und so weiter.

As for using this, I have found broth of fallen leaves to be very versatile, I have made everything from strong, pho-style noodle dishes to delicate sipping, restorative broths with just a few dried mushrooms or seaweed strips, to hearty minestrone and creamy turkey stews with it. In the end, the flavor of the final product will dictate its use best. This isn’t a broth patched from scraps, but a good reason to go out in the woods in itself. And let the results of your careful experimentation be your guide.


Forest Vinegar

IMG_9408.jpg
A late October scene in the Oak-Hickory Forest

Even for those of us who visit the woods nearly every day, there is something undeniably enchanting about a forest on a warm, clear day in autumn. I notice too, when I am in state and national parks that other people feel the same way. At no other time of the year are the woods so crowded. The aroma of the forest at this time of year is something truly special, the scent of fallen leaves and fungi, of pine needles and juniper branches filtering the autumn winds.

There are a number of excellent ways to capture this flavor, from pine family teas to juniper berry-laden pickles, bark and twig beers and wild sodas, and jams and sauces made from late-season fruit. The autumn is prime harvest time, with drying racks laid on every surface to preserve mushrooms and herbs, fruits and nuts. One of the best ways to incorporate this pantry of wild foods into everyday-use items is to make an infused vinegar. Single-ingredient vinegars are of course a perfectly fine way to experiment with flavors, but to me nothing beats an complex medley of seasonal flavors infused into a good cider, apple scrap or wine vinegar. At its’ best a forest vinegar is nuanced and sophisticated, and can lend a unique flavor and touch of personality to foods as diverse as your everyday salad, a jar of pickles, a marinade, or a finishing sauce.

I am going to present this recipe in two ways, first as an example of one of the forest vinegars I have made, second as a simple list of seasonal ingredients to experiment with, with a number of suggestions as to bases. You should feel free to experiment pretty widely with infused vinegars, just remember a few basic rules :

1. Sterilize your infusing vessel, and keep everything submerged while the flavors are infusing.

2. You may find a mother forming on the vinegar, like a kombucha SCOBY. This is natural and even desirable. You may also notice fermentation activity if you use ingredients that have wild yeast, such as juniper berries. This is fine, and generally dies off after a bit. I would suggest not overloading a vinegar with too many yeast-bearing ingredients to avoid an excess of activity.

3. Don’t overload the infusion with ingredients, allow for some space for the liquid to circulate and the flavors to mix thoroughly. I have tried using large quantities and shorter infusing times and the flavors come out strong but less-integrated. The longer these very disparate materials spend in each others company, the more they will rub off on each other and create a complex harmony of flavor.

4. Know when to strain. Strain when your tastebuds tell you to strain. Don’t hold out for the promise of more flavor, especially if you have a concentration of bitter ingredients. Bitterness develops over time–a good example would be the chinese bitter orange (Poincirus trifoliata), which makes an excellent vinegar but will turn quite bitter if the oranges are left in for more than a few days. If you find the infusion beginning to taste too bitter for you, strain it immediately. Better to have a weak forest vinegar than one that is unusable.

5. Know the flavors of what you are using – don’t just chuck something in because it is cool and you know it to be edible. This is especially true of ingredients with strong or bitter flavors–a heavy concentration of things like turkey tails or juniper berries may overpower a subtle blend of other less assertive flavors.

The following recipe makes a great batch of vinegar, and is a good starting point to experiment with. If you’re a total novice but can assemble the ingredients, it’s a safe and stable recipe to use as is. As you become more familiar with ingredients, and fine the ones that grow locally to you, it’s a good basis from which to add or remove ingredients as whim and season dictate. Because I am posting this in Winter, I’ve chosen a recipe which uses only ingredients which are still fairly available or were dried in late autumn (the mushrooms). The oyster mushrooms can be store-bought or you could even use conventional mushrooms, they are present mainly to round out the flavor of the stronger turkeys tail.

IMG_0997.jpg

Forest Vinegar #3

Combine in a large jar :

2 oz toasted hickory bark, broken into pieces

1 oz pine needles, cut into pieces

1 oz spicebush twig, broken into pieces

1 oz hemlock branches, cut into pieces

1/2 oz dried oyster mushrooms

1 oz dried turkey tail or dryads saddle mushrooms

1 1/2 oz rosehips from Rosa multiflora or cultivated rose

6 cups apple cider or apple scraps vinegar, homemade or good quality (look for brands with “the mother” like Bragg’s)

Cover and keep ingredients submerged, shake or stir regularly and allow to infuse until the flavor is to your liking. I usually allow at least three weeks to infuse this combination, you may also find that it infuses faster or slower depending on ambient temperature.

There is really no limit to what can be added to these vinegars, and below I’ve included two lists of seasonal ingredients that are often available in my location (Northeast US). Obviously some of these may not persist in winter in some locations, but in general even faded or dormant edible plants can provide useful flavors. A handful of worn and weathered mugwort flowerheads in December or some brick cap mushrooms past their prime can often bring a subtle flavor to infusions that might be overwhelming were the parts used when in the full bloom of their season. The key here is to work with small amounts of various ingredients to create subtle effects, never allowing one flavor to dominate the proceedings. Remember that strong-flavored ingredients create strong-flavored results. This list is by no means exhaustive, just a jumping-off point really.

IMG_1002.jpg
Another late-autumn Forest Vinegar, with bayberry leaf, juniper cone, sweet birch twig, sassafras root and birch polypore fungus with other aromatics.

Winter ingredients for Forest Vinegar

Roots (sassafras, wild carrot and parsnip, burdock, pushki, smilax)

Needles & Branches (pine, spruce, fir, hemlock, arbor vitae)

Twigs (sassafras, spicebush, sweet birch)

Fungi (turkey tail, birch polypore, oyster mushroom, wood ear, brick cap, velvet foot, chaga)

Fruits (LInden viburnum, blackhaws, juniper, crabapples, persimmons, cranberries, Highbush cranberries)

Leaves (wild chervil, garlic mustard, northern bayberry, deadnettle, ground ivy, bittercress, wintergreen)

Persistent dried tops of autumn-flowering aromatic plants (mugwort, wild carrot, goldenrod)

Autumn ingredients for Forest Vinegar

Including most of the above, plus :

Fallen Leaves (beech, maple, mulberry, oak, black walnut)

Fungi (too many and varied to list, but boletes, oysters, dryads saddle, and resinous polypore are all good for flavoring vinegars)

Fruits (apples, pears, silverberries, paw paw, persimmon, bitter orange, quince, spicebush)

Leaves (wild bergamot, northern bayberry, mugwort, wild carrot, pushki, dandelion, asiatic dayflower, quickweed)

Flowers (goldenrod, evening primrose, chicory, wild mustards, new england aster)

Seeds (pushki, wild carrot, nettle, evening primrose, wild mustards)

The Best Way to Pine

IMG_4548.JPG

My apologies for the pun, but this is seriously the best way to make a Pine Needle tea, or for that matter a tea from any member of the Pine Family. After many long and frustratingly-erratic results making a pine tea on the stovetop, I began to use my slow-cooker to optimize results. This recipe relies on a larger quantity of needles that usually called for in pine tea recipes, which means you needn’t spend a lot of time cutting them into tiny pieces.

I STRONGLY recommend you use a crock pot or slow-cooker for this, if you have one. It more or less eliminates the chance of human error and more importantly it ensures you don’t lose an ounce of Vitamin C from the preparation. The flavor is deep, strong, and naturally sweet and can be not only drunk as a tea but used in secondary ferments of kombucha, turned into a syrup or sorbetto, or made into a brine in which to ferment vegetables. Since first using the slow-cooker for pine needle tea I now use it exclusively.

Place in slow cooker or stock pot :

200 g or 6 oz pine needles or fir or spruce or hemlock (Tsuga) branches (a small basketful)

3 L or 12 cups water

Set heat to High if using slow cooker. Bring to just short of a boil if using a stock pot. DO NOT BOIL.

Cover and maintain over as high a heat as possible without boiling for 4-8 hours in a slow cooker, 1-2 hours on stovetop. Shut off the slow cooker or remove the pot from the heat and allow the needles to rest in the tea for several hours or overnight. Strain the tea through a cheesecloth.

You may notice that if the mixture has rested overnight there is some small level of fermentation activity. This is ideal if adding the mixture to a kombucha secondary ferment, using as a pickling medium, or turning it into wine. Simply refrigerate the tea in order to keep fermentation from proceeding any further.

To make a pickling brine from this tea, simply add salt in a ratio of 50 g / Liter of finished tea, bring the mixture to a low heat and stir the salt until dissolved. To make a syrup, do the same but using a ratio of either 1:1 or 1/2:1 sugar to tea.

Oyster Mushroom “Meatballs”

IMG_2923.jpg
Oyster Mushroom “Meatballs” with Acorn & Potato “Burgers” – two winter favorites

I love the humble Oyster Mushroom (Pleuratus ostreatus and others) : it appears in our area, in one incarnation or another, in almost every season. It’s dependability reduces it to a minor note in the logs of mushroom collectors – it can often assuage the hurt of not finding more esteemed mushrooms, such as morels in spring or maitake in fall, but few people seem to get excited about it. Some mushroom hunters seem to dismiss or even despise it, but I adore it. While it may not have the deep, rich flavor of a porcini it is a reliable workhorse mushroom and can stand in for more exotic or laudable fungi in spare seasons. More importantly for my needs, it serves admirably as the basis for rich stocks and essences, dries well, and appears in such quantity that it can be used to make mushroom ketchup or soy sauce or put up as mushroom pickles.

Beyond all these virtues, it has a quality that isn’t often celebrated even by its’ enthusiasts, at least not in Western food culture : oysters have a firm, dense texture. While they can be reduced down, or even rendered crisp or dry with enough cooking, the better option is to use them in recipes that celebrate this texture. This is just one such recipe, operating on the principle that finely chopped oysters resemble meat when cooked quickly, allowing their natural texture and moisture-retention to become a quality that assists in a dish with an excellent flavor and a remarkable similarity to meat-based polpette.

Conventionally-grown or home-grown oyster mushrooms can of course be substituted in this dish, you may also find it works with the conventional button mushroom of the supermarket. I recommend using the brown variety, often labelled “Cremini” as they have a bit more structure. If collecting wild oyster mushrooms or harvesting home-grown ones, you will want to collect them when they are firm and have attained at least most of their full growth, but before they become very dry, yellow, and fragile. You will also want to avoid collecting water-logged specimens, or if you do being sure to dry them and squeeze them of excess moisture first.

Combine in a mixing bowl :

5 oz oyster mushrooms, very finely chopped or pulsed in a food processor

3-4 oz onion, grated and squeezed free of liquid or pulsed in a food processor

1/2 cup breadcrumbs, preferably homemade

2 tbs mushroom powder or “bouillon of the woods” (see note)

1-2 eggs or equivalent egg substitute

salt to taste

dashes of mushroom soy, soy, maggi seasoning, or worchestershire sauce

herbs or dried herbs, if desired

freshly ground black pepper or american juniper, if desired

Mix the ingredients with your hands and shape into golf ball-sized “meatballs.” There should be about 12. This recipe can be doubled, tripled, etc. I have deliberately kept the size of the batch in this recipe small, so that you can experiment with the preparation of it and determine how best to process and cook the meatballs. I personally favor chopping the oyster mushrooms by hand, finding that the food processor renders far too uniform a product. If resemblance to meat is your goal with this recipe, however, that may be the route you want to go. I also recommend using both mushroom soy and a dash or two of maggi or worchestershire.

“Bouillon of the woods” is a simple preparation that I make as often as I find chicken of the woods fungi (Laetiporus spp.) that are just a bit too far gone to serve as is. A simple dried mushroom powder can be substituted – for which all you need to do is to grind dried mushrooms in a spice grinder. You may use wild mushrooms you have collected and dehydrated yourself, or dried mushrooms from the fancy or conventional supermarket (it’s actually a fantastic use for the dust or shake found in the bottom of bags of purchased dried mushrooms). For the preparation of my “bouillon of the woods,” I add a pinch or two of salt and a little crumbled wild bergamot, with perhaps another spice or two if desired, to a base of dried and ground chicken of the woods. It is meant to resemble the bouillon cubes found in supermarkets, but in a powder form and with much less salt. Another possible substitute if you don’t have any dried or powdered mushrooms is to use a purchased mushroom bouillon cube, such as the Telma brand from Israel. If a commercial product is used, you will likely want to reduce the amount of salt added.

Once assembled, these can be baked in hot oven, grilled or fried in vegetable oil or other fat. I prefer the latter two options, which tend to keep the insides moist while browning the outside nicely. You can also cook them in a sauce, but I would recommend rolling the shaped meatballs in either a little flour or extra breadcrumbs and then frying first before doing so. If you encounter difficulty in keeping the meatballs together, you may have had too much moisture in your mushrooms. I find that even conventionally-grown mushrooms require a little bit of drying before incorporating into polpette.

While these are quite tasty on their own, especially with a nice sauce for dipping as an appetizer (I love them with blackhaw ketchup), they can also be substituted for pork, beef, or veal meatballs in classic Italian, European, or Asian cuisine dishes. One of my personal favorite ways to serve them is in a dish inspired by Marcella Hazan’s recipe for winter pork meatballs smothered in savoy cabbage.

IMG_3182.jpg
the below recipe made with kale and cabbage greens and romaine lettuce

After cooking the meatballs, I cover them to keep them warm and then in a sautée pan heat a little oil or butter. To this I add whatever greens I have available, whether wild or conventionally cultivated, adding the firmer or denser greens first and the more fragile ones later. Cauliflower greens, cabbage, kale, collards and the like are cooked a bit longer, and then blanched wild mustards, wintercress, dandelion greens or even raw watercress or lettuce are added with minced garlic once the firmer greens have softened. A minute or two later, the “meatballs” are then returned to the pan with a little white wine, and perhaps a splash of balsamic or blackhaw vinegar, and the whole is covered until heated all the way through.

This is of course, just one way to do it…

Hickory Syrup

IMG_6322.jpg
Hickory syrup is golden, smoky, beautiful and has legs for days…

The Hickory is a characteristically American tree, an irreplaceable member of the great deciduous forests of our continent. It is most known to those with only a casual interest in native trees as the genus which contains the Pecan (Carya illinoinensis), but there are a number of species of Hickory tree which are found, not commonly, but regularly in the woodlands of the Eastern half of the US. The mature stage of eastern hardwood forests is commonly referred to as the “oak-hickory forest,” underscoring the importance of this native tree.

Wild food gatherers will of course be familiar with the Hickory in the form of its edible nutmeats, gathered in the autumn as the nuts drop in their (usually) smooth green and segmented outer shells. While all hickory nuts are technically edible, not all species conform to what we would consider palatable. Within that window of taste, there are also variances from tree to tree. One of the most widely distributed and appreciated for both beauty and flavor is the Shagbark Hickory, Carya ovata.

IMG_3961.jpg
Mature shagbark hickory with its characteristic “shaggy” strips of exfoliated bark.

In addition to providing delicious nuts, the shagbark hickory has a bark which can be used to add flavor to smoked or grilled foods, in the fashion of other hardwoods such as apple, cherry and mesquite. Excitingly for our purposes here, it can also be used more directly, in the form of a tea which can be turned into a sugar syrup. This product of the hickory is often likened to maple syrup, but it is different in some fundamental ways. First of all, maple syrup is a natural product which is extracted from the natural sap of trees by a somewhat laborious process. Second of all, maple syrup tastes quite different from hickory syrup. So perhaps not such a great comparison. In terms of use, however, there is a certain similarity – hickory syrup can be substituted for maple syrup in both direct use and in recipes, with of course the knowledge that the flavor will be that of hickory, not maple.

I quite like maple syrup. I don’t wish to demean it in any way. But, to me, hickory syrup tastes better, and is far more interesting culinarily. Those who find maple syrup good but somewhat cloying may agree with me. Hickory syrup has an incomparable smoky, woodsy flavor that is a more complex than maple syrup, something which to my tastes makes it more useful for both sweet and savory recipes. Maple syrup is delicious, but hickory syrup is adventurous. The only flaw that I see is that the manufacture of hickory syrup relies on an outside product to sweeten it, in most cases cane sugar, which is of course an industrialized, tropical plant and carries with it a cost in terms of ecological impact. In its defense I will say that making hickory syrup is one of the best ways to use sugar, a product I generally avoid. And while the amount required is no more or less than one would use to make a simple syrup, the product is one that carries a huge amount of flavor in even small doses, especially when used in cooking and baked goods. Maple syrup is also quite expensive in terms of money if one buys it, and time if one makes it. Making hickory syrup is quick, simple and costs nothing more than the price of whatever amount of sugar one uses.

To produce hickory syrup, one first needs to locate a shagbark hickory tree. The shagbark is quite distinctive, having naturally exfoliated bark which hangs “shaggily” off the tree in large, easy to remove pieces (pictured above). This bark can be collected in any season, but I usually gather it in winter when other wild food options are reduced. First, I scout around the base of the trees I find to see if any strips have fallen to the ground. There is no direct harm done to the tree by removing its bark, but one does run the risk of exposing the inner bark to attack from insects (another reason to collect in winter). It also reduces the natural beauty of the tree, so I try always to take only a few strips from each tree and minimize the impact both ecologically and visually. It does not require a great quantity of bark to make a rich syrup, so I would recommend starting with just a few ounces and seeing how well you like it.

IMG_0512.jpg
Toasted shagbark hickory bark, ready to be made into a syrup.

To prepare the syrup, you will want first to toast the bark in a low oven. This works on the same principle as dry-roasting spices before using them in a curry. The heat brings out flavors and aromas in the bark which would be less intense if the bark were not treated in this way. I have made hickory syrup without toasting it first, and it is perfectly serviceable, but not as deep in flavor. To toast the bark, place on a baking sheet in a low (under 200°) oven for 1-2 hours or a slightly hotter one (325°) for a half-hour or so. When I use the higher heat method I turn the bark halfway through. I’m not entirely sure that this is necessary, I am likely just being fussy.

Once the bark is toasted, allow it to cool and then prepare a tea from it. I generally use a ratio of 4-5 ounces of dry bark to 6 cups of water. Bring close to a boil, then cut the heat and allow the bark and water to simmer until the amount of water (now dark and flavorful) has been reduced to a third of its original amount. The amount of time this takes will vary greatly, so the best way to proceed is simply by measuring, reducing, and measuring again until one gets the liquid down to a third. I have prepared this tea with amounts as small as 2 oz of bark and as high as 1.5 lbs and found the general ratios to be effective in both small and large recipes. To make a practical, easily bottle-able amount the most usual proportion that I prepare is 8-10 oz. of bark to 12 cups of water, reduced down to 4 cups of tea. Avoid boiling, which will result in bitterness. It is perfectly acceptable (and perhaps beneficial) to allow the mixture to sit until cool, for several hours, or even overnight before straining the bark. When done, do not discard the strained bark. Instead, save it and use for additional flavor when grilling or smoking foods with hardwoods.

IMG_7879.jpg
Hickory syrup being reduced. The color will vary from pale gold to reddish amber.

Next, you will want to add sugar. I prefer to use a proportion of 1 : 1 to make the basic hickory syrup, and then reduce it if I want a more concentrated and thick product (I usually refer to this as hickory glaze).

To make a hickory simple syrup, rather than a glaze, all one has to do is combine the sugar and tea over a low heat until the sugar dissolves. It is best to avoid stirring this mixture as it begins to get warm, as this will cause crystallization. This syrup will not be as thick as maple syrup, but is perfectly fine for most applications and is actually much better if you are going to add hickory syrup to drinks or use it in a recipe that will be cooked for any length of time.

Reducing the syrup to a glaze is more useful if it will be used to make salad dressings, added to dishes as a finishing touch, or poured over pancakes like maple syrup. I tend to reduce the syrup by anywhere from a quarter to a third, so going from a cup of hickory syrup to 2/3-3/4 cup of hickory glaze. I have found that reducing it much further results in a product that solidifies at room temperature. There is nothing much wrong with this thick syrup, it just requires heating in a water bath to become fluid again.

As to the uses of either hickory syrup or glaze, the only limit is one’s imagination. Of course it works wonderfully as a substitute for maple syrup, but don’t let your experimentation end there. Hickory syrup makes an amazing addition to various mixed drinks and cocktails, alcoholic or not, and is an ideal sweetener for lemonade or sumac-ade, adding its characteristic smoky flavor to the mix. It’s fantastic when substituted for honey or maple syrup in baked goods, makes a great base for vinaigrettes and yogurt dressings, and is inspiring drizzled on homemade ice creams and frozen yogurts. The combination of smokiness and sweetness means it pairs excellently with meats, especially pork sausages, bacon, and fried chicken. My favorite way to use it may be as a finishing touch to bitter greens, of which I eat quite a lot. And it almost goes without saying that it is an awesome pancake syrup.

It’s extraordinarily easy to identify shagbark hickory and make this syrup – there is an added bonus to collecting this bark in the winter, as well. Identifying hickory trees now means one can be there in the fall, when their nuts are available, for the shagbark hickory is one of the consummate wild foods, under appreciated in our area where they are so naturally abundant.


Winter Teas from Pine Family Trees

IMG_5493.jpg

The Pine family (Pinaceae) is likely one of the first groups of plants that our ancestors recognized as broadly edible and safe. As human beings made their way further into colder climates, it would have become essential for life. Pines, spruces, firs, hemlocks, arbor vitae – all rated quite highly to pre-Industrial Europeans and Native Americans. Not simply for their timber, but their edible and medicinal uses as well. Above all else, the Pinaceae represented a crucial and easily available source of Vitamin C during the winter, sorely needed when diets were strictly seasonal.

While we now have a wide access to various supplements and pills to ensure that we don’t succumb to scurvy, some of the products made from the Pine family are still quite interesting from a perspective of taste and culinary curiosity. In particular, simple teas made from the needles of most conifers are an extremely healthy alternative to tannin-rich coffees and teas. In addition, those products are generally made quite far away. Your nearest Pine family member is probably in your front yard. They are available year-round, but I usually enjoy them most in the winter, both for their warming quality and their strong, seasonal flavor.

In the spring, the newly-emerging needles of conifers are soft, and can be eaten raw. Many wild food gatherers consider them a delicacy, and some only eat them raw, as a trailside nibble. The needles are gathered together at first in a tight cluster, usually referred to as a “tip,” as in “spruce tips.” While a tea can certainly be made from them, they are much finer used in prepared salts and sugars, infused in vinegars or alcohol, or added to other prepared dishes. As the seasons progress, these tips unfurl and harden off and become the years fresh set of needles. These are the needles you will collect for tea, and they are available any season of the year. Theoretically, one could use older growth just as well but the most recent sets will have more of the energy of the tree, and therefore more flavor.

All Pine family needle teas are prepared in the same fashion. Clip the freshest growth from the tree (see pictures and descriptions below for each genus), then wash the needles. Cover the needles with water (they should all be floating) and bring to just shy of a boil. If possible, do not allow the water to actually boil, as this will result in loss of Vitamin C. Instead, maintain a simmer and a careful eye on the pot, and allow it to simmer until you have enough depth of flavor. In practice, the amount of time this takes will vary radically, depending on volume involved, but the same procedure applies whether you’re making a cupful or a gallon. You will simply have to allow your taste to tell you when you have made a good tea. I prefer to simmer mine until its a little shy of what I’m looking for, then allow it to sit and steep until it cools, overnight if possible. I’m convinced this provides not only a fuller flavor than straining the needles immediately, but also a rounder and more complex one.

As to the flavor? Well, Pine family products are strong. Spruce in particular is a very robust flavor. Your appreciation of each of them may vary, and indeed you may despise them all. What they probably won’t remind you of is cleaning products, a common fear. Here are three that I particularly enjoy, two of which are made from native trees in my area, the other from a very popular import.

Eastern White Pine Tea (Pinus strobus)

IMG_5460.jpg
Needles of the Eastern White Pine, with new growth visible at the bottom.

To collect pine needles, it’s best to look for a small colony of trees, and select from the younger members. I often select the needles from small trees growing along the perimeter of a hiking trail, since those trees are generally slated to be trimmed by the park workers anyway. Pull the freshest growth at the ends of the branches, concentrating on the lowest branches. You won’t need many pine needles to try a tea – a half-pound of them makes almost two gallons of tea.

This is my go-to Pine family tea, the most broadly palatable and subtle in flavor, and drinkable cold as well as warm. Some will likely disagree, indeed I have often read of people finding Pine products stronger than those of Spruce. Perhaps they use another Pine – I have always used Pinus strobus, since it is locally abundant. In addition, the needles are softer than other Pines, which always suggests to me greater palatability. In any case, tea from Eastern White Pine is citrusy, warming and somewhat mellow at first, but quickly following is a spicy and slightly resinous aftertaste. It’s “strong” in flavor to many, pleasant to some, and certainly beneficial to all. Pine tea has the most flexibility of these three in terms of being used for other applications, such as making a syrup, vinegar, or kombucha. It combines well with sugar, which tends to accentuate the citrusy taste, and makes a fine granita or sorbet.

Norway Spruce Tea (Picea abies)

IMG_5504.jpg
Freshest growth of Norway Spruce is generally more reddish, the older more grey.

To collect spruce needles, look for the most outward-branching lengths on the lower part of the tree and bend them backwards, then tear from the older growth. The newer growth on Norway Spruce will be more reddish and less grey.

This is not a native tree, but one widely planted in my area and in many other parts of the world. The original Christmas tree, the Norway produces strong, citrusy tips in the spring. They are large, plentiful and a natural choice for infusion or making spruce sugar. The tips are the true delicacy, but the tea is tasty as well. Strong, spicy and buttery, very rich in color and flavor. The woodsy, resiny taste is more pronounced in spruce tea than in pine, and unlike pine I don’t find it palatable cold. Spruce is the more natural partner to savory cooking applications, and has been used in sauces and glazes for meats, strong fish and hearty winter vegetables.

Eastern Hemlock Tea (Tsuga canadensis)

IMG_5691.jpg
Fresh growth of Eastern Hemlock – the new growth will softer and less rigid.

To collect Hemlock needles, look for fresh growth at the tips of lower branches, from juvenile trees if possible. Bend them back to tear, in the same manner as spruce. If you tear downwards you will just end up with a shower of needles.

Eastern hemlock is the only one of the three species mentioned here that comes with not one, but several caveats. The first is not to confuse it with the highly poisonous, herbaceous plant in the carrot family that is also called Hemlock. Europeans who first encountered the tree in the Americas thought the freshly crushed needles smelled like that plant. The second is not to confuse it with the highly poisonous Yew, which it does somewhat look like (pictured below). In the Eastern US, yew is very rarely grown as a tree, but very often grown as a shrub. Hemlock has cones, usually always persistent, Yew does not. If you are in any doubt as to whether or not you have a Tsuga canadensis, then by all means do not collect it. The third (and thankfully, final) caveat is that T. canadensis in our area is often parasitized by the wooly adelgid, a kind of aphid. Adelgid damage on hemlocks is usually easy to spot – the trees generally look unhealthy and the branches will be dotted with white egg sacs, which are soft and look a bit like cotton or spit has gotten on the plant. While I’m not sure that one would be made sick by adelgid-infested hemlock tea, I wouldn’t care to find out.

IMG_5694.jpg
This is a yew / don’t confuse the two!

In taste, the hemlock tea is somewhere inbetween spruce and pine, perhaps more complex and nuanced than either. As a consequence, I enjoy it the most as a pure drinking tea, usually with just a dab of sugar to mellow it out. It has the spicy and smoky notes of spruce, but isnt quite as bitter. I have yet to experiment much with hemlock tea beyond drinking it, but I can imagine it has other culinary uses. The tips in spring are the tastiest of all the Pine family I have tried, although they do tend to be on the small side.

All three of these teas are fine, healthy drinks, which can be made from a locally abundant resource and which have minimal impact on our environment. They represent a forgotten flavor, one which we have learned to dislike or distrust in our post-Industrial diet. Many other members of the Pine family can be used in the same fashion, and indeed all of these trees produce other useful and edible products, some of which we will hopefully discuss as winter turns into spring.

Note :  

To make a greater quantity of any of these needle teas I usually follow a basic ratio of 1 oz of dry needles to 1 quart of water.

The Fourth Season

IMG_0618.jpg
A typical January scene

Wild food gathering in the temperate parts of the world inevitably means coping with the problem of winter. What do you do? Can you do anything?

Yes, you can. Actually, there’s quite a bit going on out there. You just can’t see it. The earth and (eventually, often) the snow conceal most of it from view. The rest is made invisible by our long conditioning that “nothing happens in the winter” when it comes to plants.

The foraging literature itself is faintly discouraging when it comes to winter. They don’t tell you not to do it, but the implication is that it isn’t particularly worthwhile. Emphasis tends to be placed since the Gibbons era on enjoying the fruits of the other seasons of harvest, sitting back in your chair with a seed catalog, shelling hickory nuts and sipping on persimmon wine. The winter section of every foraging book is like an afterthought, usually accompanied by a list of plants so desultory that it squashes the imagination, rather than firing it.

Yet, we all know this is precisely what is needed in the winter. A spark, a kick, especially after the holiday madness/joy (or forced madness/joy) is over and our bodies start to go into hibernation mode. The key is in viewing winter as not a dead time or a rest time but as just another time, simply another season. The activity of plants and trees and fungi around you hasn’t stopped, it’s just different. Which means we need to learn to look differently, to reassess our environment with fresh eyes.

More than just being a neglected time of year to gather wild foods, winter is also overlooked when it comes to studying wild plants and fungi. But if our knowledge of nature is to expand alongside our use of its’ resources, then winter is an ideal time to study as well as collect. Not only will our attention be drawn to interesting things we normally overlook, like mosses and bracket fungi, but towards the familiar things that have changed in aspect. And while the idea of looking at a bunch of dried twigs and seeds might not seem as romantic or appealing as trekking through a spring woods, in reality it can tell us quite a bit about the life cycle of these plants. Ultimately, knowledge of a wild food resource through all of its seasons, all of its changes, is really what we are after : comprehension of the patterns of its growth and how it deploys its energy in order to make our best use of it.

IMG_4368.jpg
Uncharacteristic, but possible in a mild winter : Wild mustard forming its broccoli-like flowering head around Christmas time.

Over the course of the next few weeks I will be discussing in some detail how best to take advantage of the undervalued resource of wild food in winter, including profiles of specific plants and accompanying recipes. I hope to be able by springtime to have made my point that winter isn’t an “off” or “dead” season but simply the fourth season. Perhaps it’s a bit more humble than the others, but one well worth getting outside for, and certainly no occasion to hang up the basket. For now, as an antidote to all those discouraging lists of winter wild foods in foraging books here is one with just some of the things I have either gathered or noted as available in the past few winters :

Acorns

Sow Thistle

Cranberries

Juniper “Berries”

Chaga

Watercress

Maple – Sap / Syrup

Rosehips

Pine Needles

Oyster Mushrooms

Blackhaw / Nannyberry

Dandelions – Greens and Root

Daylily Bulbs

Crabapple (hardy species)

Chickweed

Wild Parsnip

Spicebush – Twig

Henbit

Marsh Yellowcress

Chicory

Evening Primrose – Greens and Root

Bittercress

Velvet Shank Mushroom (Enokitake)

Highbush Cranberry

Yarrow

False Strawberry – Greens

Sunchoke / Jerusalem Artichoke

Persimmon

Cleavers / edible Bedstraw

Wild Carrot

Hawthorn – Berries

Pennycress

Plantain

Wintergreen – Leaves and Berries

Ground Ivy

Northern Bayberry

Nettles

Common Mallow

Spruce – Tips

Hickory Nuts

Cattail – Root

Birch – Twig

Turkey Tail Fungus

Wild Radish – Greens and Root

Thistle Root

Wild Chervil

Teasel

Wapato

Hemlock Tips

Sumac Fruit

Linden Viburnum

Garlic Mustard

Wood Ear Fungus

Purple Deadnettle

Birch Polypore Fungus

Winter cress

Wild Mustard

and, of course, everyones favorite :

Field Garlic !!!