Forest Vinegar

IMG_9408.jpg
A late October scene in the Oak-Hickory Forest

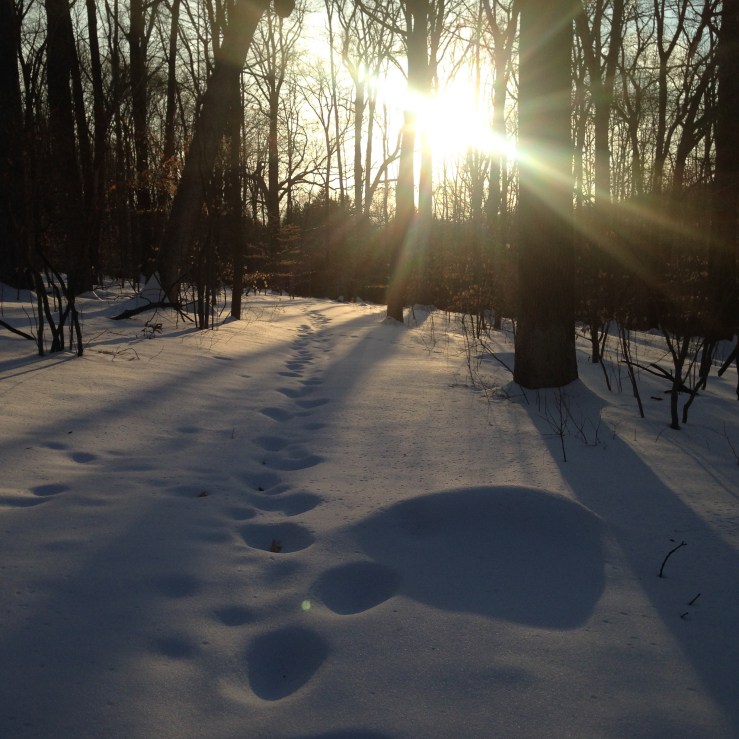
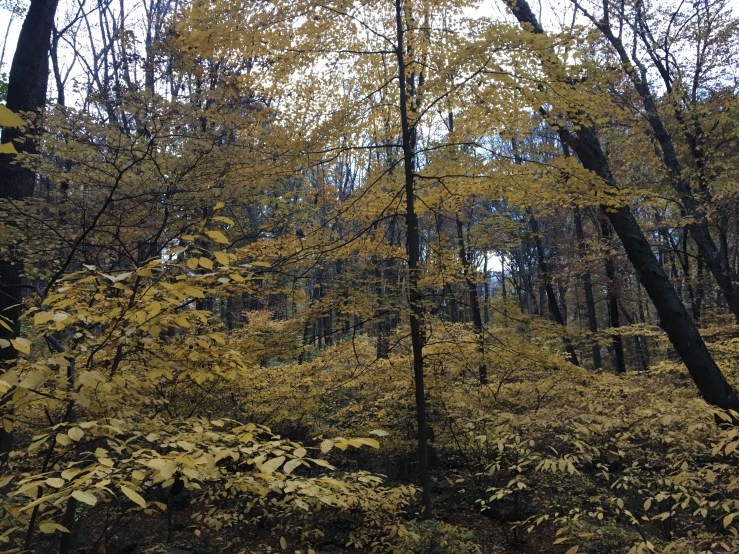
Even for those of us who visit the woods nearly every day, there is something undeniably enchanting about a forest on a warm, clear day in autumn. I notice too, when I am in state and national parks that other people feel the same way. At no other time of the year are the woods so crowded. The aroma of the forest at this time of year is something truly special, the scent of fallen leaves and fungi, of pine needles and juniper branches filtering the autumn winds.

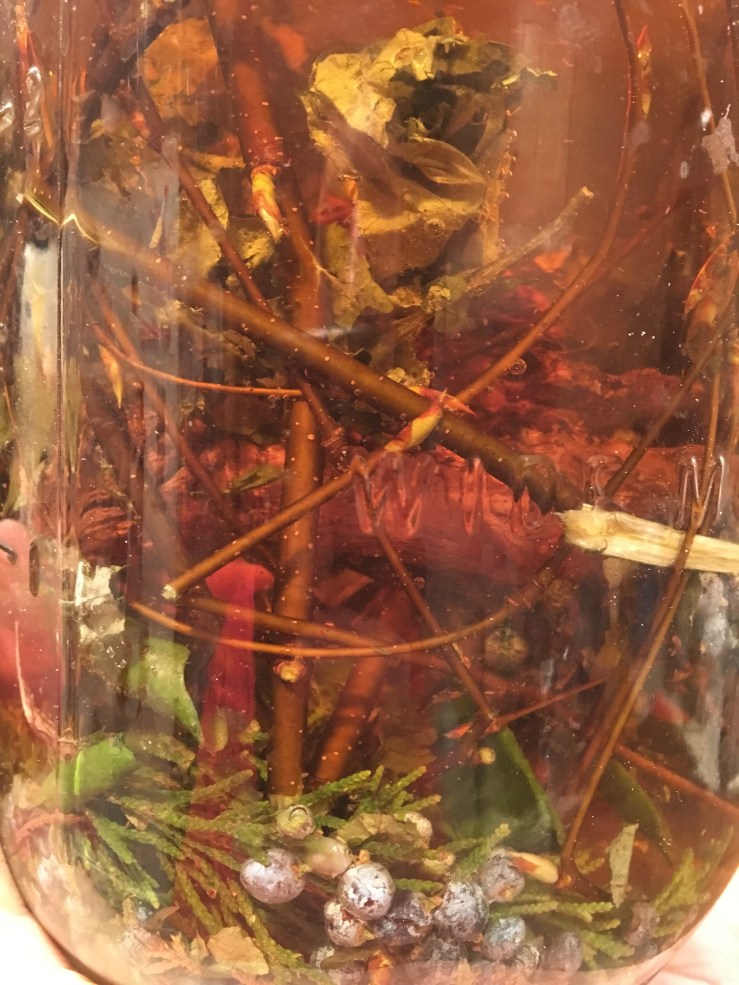
There are a number of excellent ways to capture this flavor, from pine family teas to juniper berry-laden pickles, bark and twig beers and wild sodas, and jams and sauces made from late-season fruit. The autumn is prime harvest time, with drying racks laid on every surface to preserve mushrooms and herbs, fruits and nuts. One of the best ways to incorporate this pantry of wild foods into everyday-use items is to make an infused vinegar. Single-ingredient vinegars are of course a perfectly fine way to experiment with flavors, but to me nothing beats an complex medley of seasonal flavors infused into a good cider, apple scrap or wine vinegar. At its’ best a forest vinegar is nuanced and sophisticated, and can lend a unique flavor and touch of personality to foods as diverse as your everyday salad, a jar of pickles, a marinade, or a finishing sauce.

I am going to present this recipe in two ways, first as an example of one of the forest vinegars I have made, second as a simple list of seasonal ingredients to experiment with, with a number of suggestions as to bases. You should feel free to experiment pretty widely with infused vinegars, just remember a few basic rules :

1. Sterilize your infusing vessel, and keep everything submerged while the flavors are infusing.

2. You may find a mother forming on the vinegar, like a kombucha SCOBY. This is natural and even desirable. You may also notice fermentation activity if you use ingredients that have wild yeast, such as juniper berries. This is fine, and generally dies off after a bit. I would suggest not overloading a vinegar with too many yeast-bearing ingredients to avoid an excess of activity.

3. Don’t overload the infusion with ingredients, allow for some space for the liquid to circulate and the flavors to mix thoroughly. I have tried using large quantities and shorter infusing times and the flavors come out strong but less-integrated. The longer these very disparate materials spend in each others company, the more they will rub off on each other and create a complex harmony of flavor.

4. Know when to strain. Strain when your tastebuds tell you to strain. Don’t hold out for the promise of more flavor, especially if you have a concentration of bitter ingredients. Bitterness develops over time–a good example would be the chinese bitter orange (Poincirus trifoliata), which makes an excellent vinegar but will turn quite bitter if the oranges are left in for more than a few days. If you find the infusion beginning to taste too bitter for you, strain it immediately. Better to have a weak forest vinegar than one that is unusable.

5. Know the flavors of what you are using – don’t just chuck something in because it is cool and you know it to be edible. This is especially true of ingredients with strong or bitter flavors–a heavy concentration of things like turkey tails or juniper berries may overpower a subtle blend of other less assertive flavors.

The following recipe makes a great batch of vinegar, and is a good starting point to experiment with. If you’re a total novice but can assemble the ingredients, it’s a safe and stable recipe to use as is. As you become more familiar with ingredients, and fine the ones that grow locally to you, it’s a good basis from which to add or remove ingredients as whim and season dictate. Because I am posting this in Winter, I’ve chosen a recipe which uses only ingredients which are still fairly available or were dried in late autumn (the mushrooms). The oyster mushrooms can be store-bought or you could even use conventional mushrooms, they are present mainly to round out the flavor of the stronger turkeys tail.
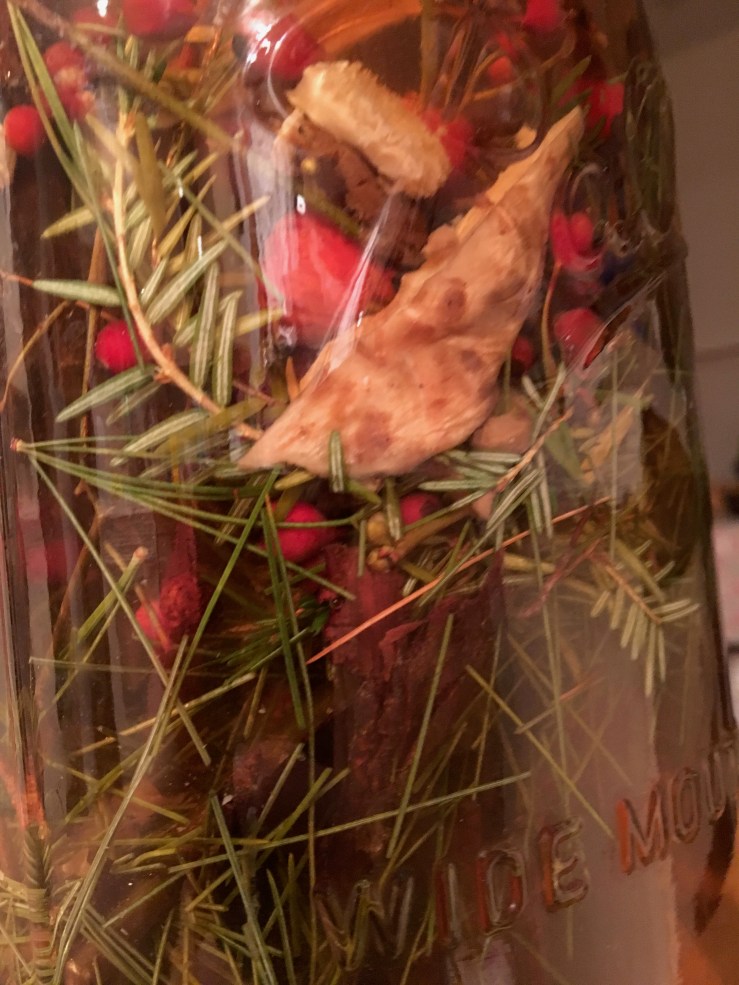
IMG_0997.jpg

Forest Vinegar #3

Combine in a large jar :

2 oz toasted hickory bark, broken into pieces

1 oz pine needles, cut into pieces

1 oz spicebush twig, broken into pieces

1 oz hemlock branches, cut into pieces

1/2 oz dried oyster mushrooms

1 oz dried turkey tail or dryads saddle mushrooms

1 1/2 oz rosehips from Rosa multiflora or cultivated rose

6 cups apple cider or apple scraps vinegar, homemade or good quality (look for brands with “the mother” like Bragg’s)

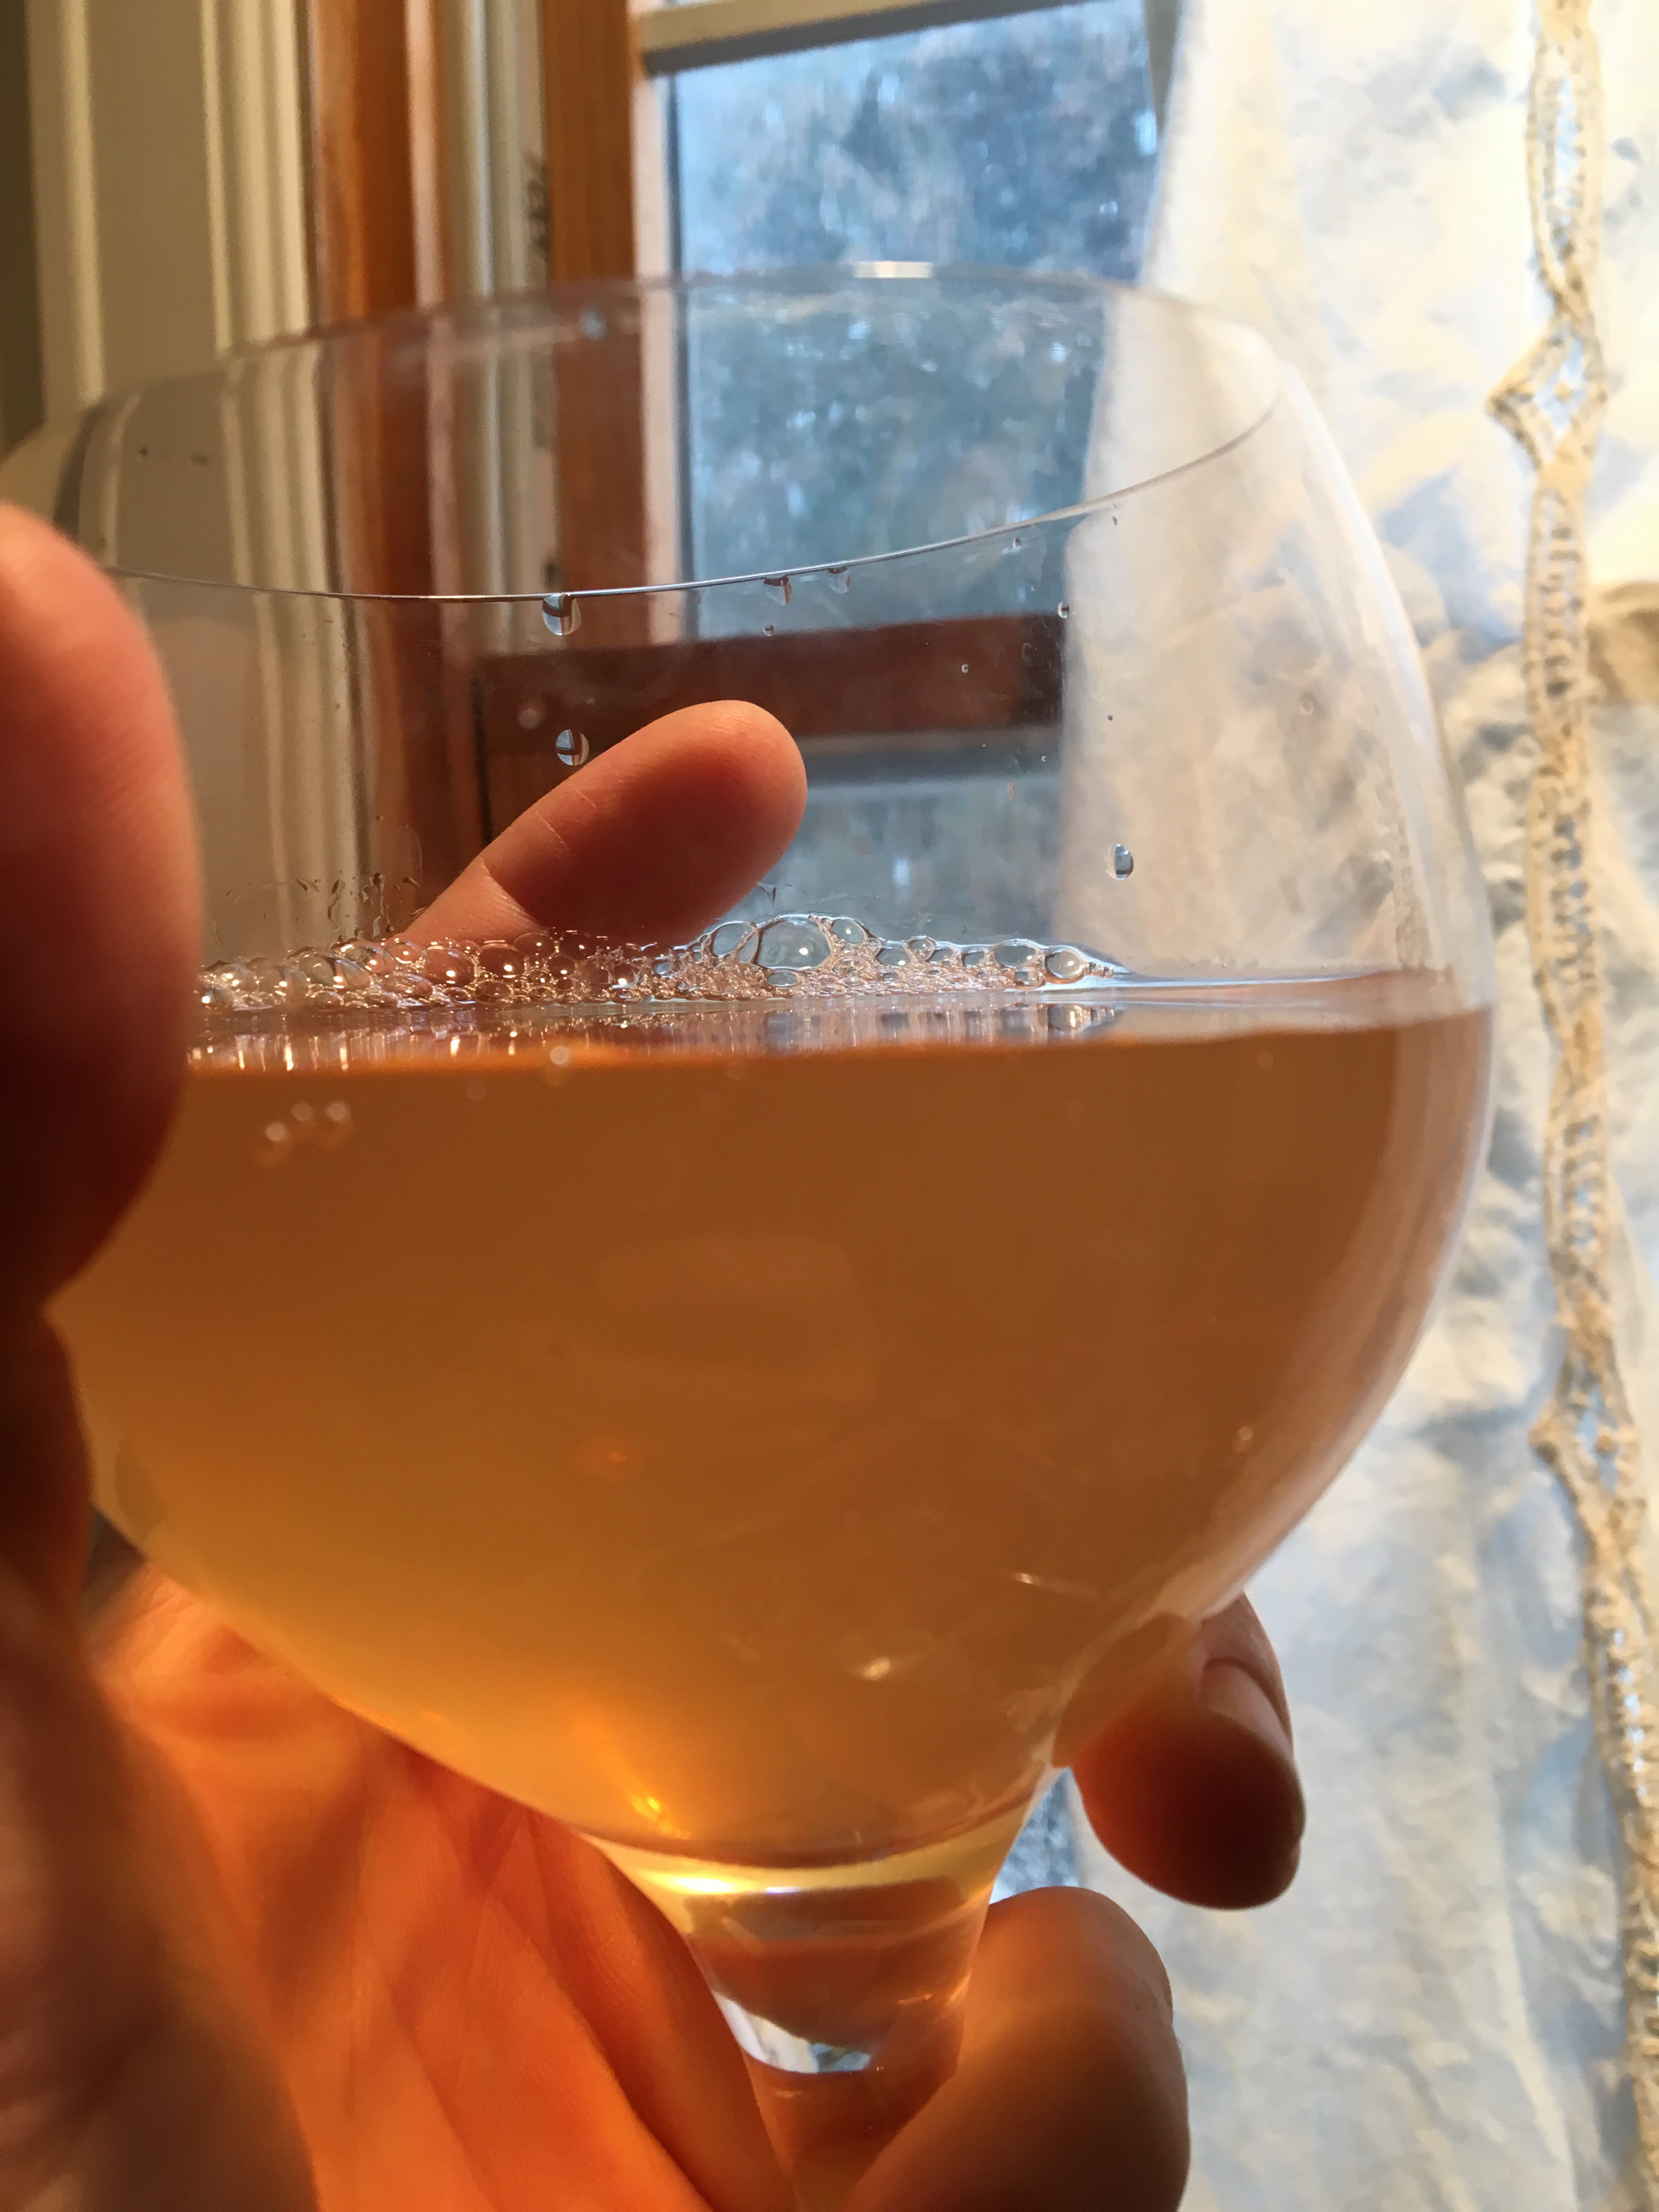
Cover and keep ingredients submerged, shake or stir regularly and allow to infuse until the flavor is to your liking. I usually allow at least three weeks to infuse this combination, you may also find that it infuses faster or slower depending on ambient temperature.

There is really no limit to what can be added to these vinegars, and below I’ve included two lists of seasonal ingredients that are often available in my location (Northeast US). Obviously some of these may not persist in winter in some locations, but in general even faded or dormant edible plants can provide useful flavors. A handful of worn and weathered mugwort flowerheads in December or some brick cap mushrooms past their prime can often bring a subtle flavor to infusions that might be overwhelming were the parts used when in the full bloom of their season. The key here is to work with small amounts of various ingredients to create subtle effects, never allowing one flavor to dominate the proceedings. Remember that strong-flavored ingredients create strong-flavored results. This list is by no means exhaustive, just a jumping-off point really.

IMG_1002.jpg
Another late-autumn Forest Vinegar, with bayberry leaf, juniper cone, sweet birch twig, sassafras root and birch polypore fungus with other aromatics.

Winter ingredients for Forest Vinegar

Roots (sassafras, wild carrot and parsnip, burdock, pushki, smilax)

Needles & Branches (pine, spruce, fir, hemlock, arbor vitae)

Twigs (sassafras, spicebush, sweet birch)

Fungi (turkey tail, birch polypore, oyster mushroom, wood ear, brick cap, velvet foot, chaga)

Fruits (LInden viburnum, blackhaws, juniper, crabapples, persimmons, cranberries, Highbush cranberries)

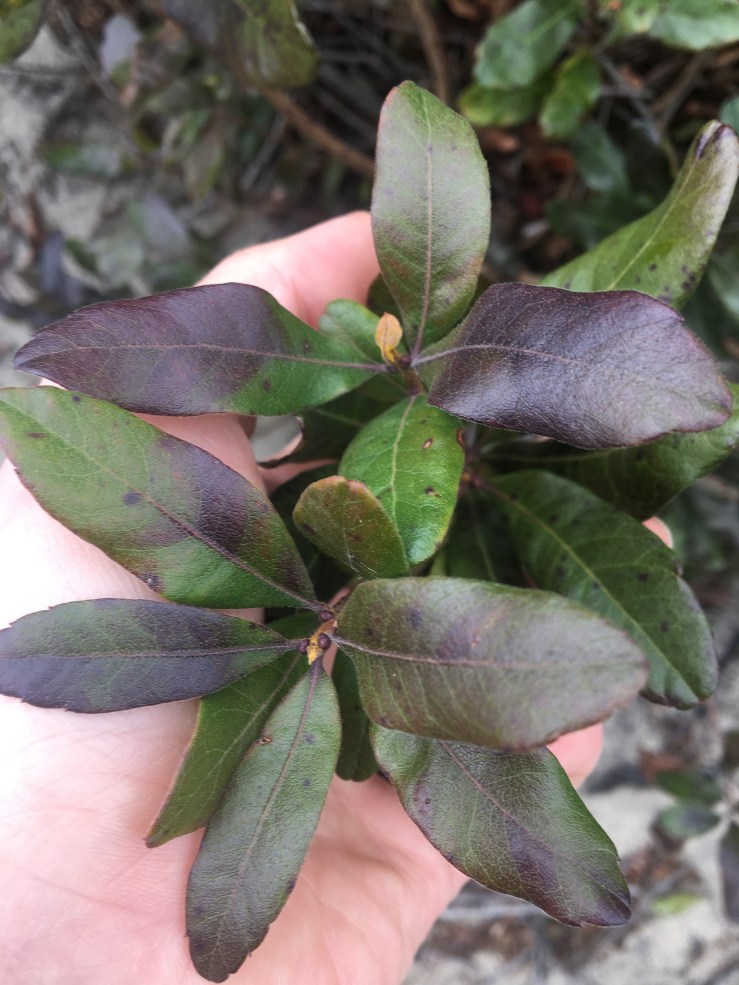
Leaves (wild chervil, garlic mustard, northern bayberry, deadnettle, ground ivy, bittercress, wintergreen)

Persistent dried tops of autumn-flowering aromatic plants (mugwort, wild carrot, goldenrod)

Autumn ingredients for Forest Vinegar

Including most of the above, plus :

Fallen Leaves (beech, maple, mulberry, oak, black walnut)

Fungi (too many and varied to list, but boletes, oysters, dryads saddle, and resinous polypore are all good for flavoring vinegars)

Fruits (apples, pears, silverberries, paw paw, persimmon, bitter orange, quince, spicebush)

Leaves (wild bergamot, northern bayberry, mugwort, wild carrot, pushki, dandelion, asiatic dayflower, quickweed)

Flowers (goldenrod, evening primrose, chicory, wild mustards, new england aster)

Seeds (pushki, wild carrot, nettle, evening primrose, wild mustards)

Bayberry Salt

Flavored salts are an excellent way to make use of some of the wild spices that are available to intrepid gatherers. Various fruits, cones, nuts, mushrooms and leaves can be used, anything that can be dehydrated and combined with salt. This often helps preserve more unstable wild spices, and prolongs the life of their flavor beyond the season of their emergence. A good example of this would be hemlock salt, in which the green cones of Eastern Hemlock are combined with salt to preserve the unique, robust, citrus-y flavor they possess in their green state.

Bayberry leaves are available almost year-round, so preserving them isn’t at a premium. The leaves do tend to grow dark and unappealing in winter, although they may linger on late in warm winters or coastal locations (see photo below). The leaves of Myrica pensylvanica and other Myrica species are often mentioned in field guides and foraging books as a substitute for bay leaves (i.e. the Laurel Bay, Laurus nobilis). While this is certainly an option, I’m not a huge fan of “substitution” as a principle for utilizing wild food. I would prefer to exploit the flavors of the ingredient itself and craft recipes that reflect that flavor.

To my taste buds, Myrica leaves have a more complex and “bright” flavor than Laurel bay, with a less pronounced potency. In other words, if you’re substituting for Laurel leaf in a recipe, double up the amount of Myrica leaves used. If you are just enjoying them on their own merits, the following seasoning salt is a far more effective method. This is one of my go-to salts, perhaps the go-to salt, although juniper, black trumpet, roasted tomato and hemlock salts all get an enthusiastic nod for adding to dishes in lieu of ordinary sea or kosher salt. But bayberry leaf salt seems to be the crown prince of them all, serving as a final sprinkle to dishes instead of salt and pepper, but also being used in recipes themselves. In spring I roast whole chickens sprinkled with bayberry salt, after slipping pushki leaves under the skin. In the fall, grilled mushrooms and onions explode with flavor given a simple dusting of the stuff. You get the picture.

Grind together in a food processor :

6 cups bayberry leaves, dried

1 cup salt, preferably sea salt

Store in a well-sealed glass jar at room temperature. Lasts at least one year.

IMG_2978.jpg
Some Northern Bayberry still clinging on in a coastal location in January.

The Best Way to Pine

IMG_4548.JPG

My apologies for the pun, but this is seriously the best way to make a Pine Needle tea, or for that matter a tea from any member of the Pine Family. After many long and frustratingly-erratic results making a pine tea on the stovetop, I began to use my slow-cooker to optimize results. This recipe relies on a larger quantity of needles that usually called for in pine tea recipes, which means you needn’t spend a lot of time cutting them into tiny pieces.

I STRONGLY recommend you use a crock pot or slow-cooker for this, if you have one. It more or less eliminates the chance of human error and more importantly it ensures you don’t lose an ounce of Vitamin C from the preparation. The flavor is deep, strong, and naturally sweet and can be not only drunk as a tea but used in secondary ferments of kombucha, turned into a syrup or sorbetto, or made into a brine in which to ferment vegetables. Since first using the slow-cooker for pine needle tea I now use it exclusively.

Place in slow cooker or stock pot :

200 g or 6 oz pine needles or fir or spruce or hemlock (Tsuga) branches (a small basketful)

3 L or 12 cups water

Set heat to High if using slow cooker. Bring to just short of a boil if using a stock pot. DO NOT BOIL.

Cover and maintain over as high a heat as possible without boiling for 4-8 hours in a slow cooker, 1-2 hours on stovetop. Shut off the slow cooker or remove the pot from the heat and allow the needles to rest in the tea for several hours or overnight. Strain the tea through a cheesecloth.

You may notice that if the mixture has rested overnight there is some small level of fermentation activity. This is ideal if adding the mixture to a kombucha secondary ferment, using as a pickling medium, or turning it into wine. Simply refrigerate the tea in order to keep fermentation from proceeding any further.

To make a pickling brine from this tea, simply add salt in a ratio of 50 g / Liter of finished tea, bring the mixture to a low heat and stir the salt until dissolved. To make a syrup, do the same but using a ratio of either 1:1 or 1/2:1 sugar to tea.

Nearly Wild Curry Mix

IMG_0914.jpg

Curry powder always seemed to me a shabby thing to buy, it being so much more interesting to work with the whole spices themselves. I was spurred on by one of the first cookbooks I ever bought, a collection of recipes and information about spices published to sell the goods of a local spice importer. By understanding the spices individually, I was able to experiment with them culinarily, adding more or less to a mix depending on what I intended to do with them. Cardamom and cloves, for instance, could be added if I was using a mix to spice tea or desserts with. I would add more dried curry leaves and turmeric when making a mix for fish.

When I began to seriously incorporate more of the native and invasive wild spices of the world of wild food, it wasn’t a great stretch of the imagination to start to envision a masala or curry mix made entirely of foraged aromatics. And while an excellent entirely wild curry mix can be made, I usually find that I miss the cumin acutely. For day to day use and especially when replacing imported curry powder in traditional recipes, I have settled on a curry mix that is “nearly wild,” relying only mainly on foraged ingredients. It is also quite flexible, and may be adapted, altered or expanded by anyone who uses it, with many replacements or omissions possible. I believe it can be used in most temperate climates without too much trouble, assuming the availability of traditional imported spices to replace what cannot be foraged.

I have omitted any turmeric or substitute for turmeric in this recipe. To many, the taste and color of curries cannot be separated from that spice. Now that organic fresh turmeric is much more widely available, I use it in these curries, when it can be added at the time of cooking. You may wish to add that or the powdered form to affect a more traditional coloration. I sometimes add annatto seed instead for “local color,” but of course the color is a different one. Below is the recipe, see notes after the recipe for information on substitutions. I have deliberately split the list of ingredients into three groups.


Combine :


1 ) essential bases

1 tbs. black mustard seed (wild or domestic)

1 tbs. cumin seed

1 tbs. wild parsnip or pushki or coriander seed

1-2 tsp wild carrot seed (optional, omit if using coriander seed)


2) optional aromatics

2-3 northern bayberry leaves or 1-2 bay leaves or 8 curry (kari) leaves

1-2 tsp ripened (red) spicebush berries, dried or 1/2-1 tsp allspice

1-2 magnolia buds, dried or pinches of magnolia leaf or 1 clove

1 tsp american juniper berries or 1/4 tsp european juniper

1-3 eastern hemlock cones


3) “hot” or piquant aromatics

1-2 tsp prickly ash berry or sichuan peppercorn

1-3 tsp waterpepper seeds (or 1/2-1 tsp black peppercorns)

1-2 tsp chile flakes or 1-3 small dried hot chiles


Combine all the above in a heavy pan and heat over low to medium heat, tossing every thirty seconds or so, until the spices are toasted and fragrant. You can also store the mix, combined and use as whole spices in pickles or broths, or toast and grind it to order, which will give the best flavor. My only advice would be to use the whole recipe when grinding or using to infuse, as the many different-sized and shaped ingredients tend to separate themselves in the jar.

The trinity of mustard-cumin-wild parsnip is essential to this mix, nearly everything else can be omitted or varied. If using domesticated mustard seed, the variety to use is the brown or black mustard seeds preferred in Indian cuisine. Wild mustard genera which produce seeds that can be used for this include Brassica, Lepidium, Barbarea, Thlaspi, etc. Wild parsnip or pushki (Heracleum maximum, other edible Heracleum species can be substituted) seed, along with wild carrot seed all bear some resemblance to family member coriander. Pushki and wild parsnip have a drier, earthier flavor to them while wild carrot is spicier and lightly citrus-y. Always remember to avoid wild carrot seed if pregnant or desiring to become so–while I doubt that the small amount involved would have much effect unless consumed in massive quantities, wild carrot seed is traditionally considered an abortifacient.

The second group of aromatics are all wild but any can be omitted or substituted with the imported spices listed, with the exception of hemlock cones, which really have no parallel. If there is one wild spice in this group that I would strongly recommend investigating (and not replacing with allspice, which is a paltry substitute), it is spicebush. Native to the eastern US, it is a native understory tree which produces a green berry in summer that matures to a deep red in autumn. It is resinous and pungent and can be used ripe or unripe, fresh or dried. It has become inseparable from various curry mixes and is the most distinctive background player in this recipe, in my opinion.

Heat can be regulated by adjusting the last group of ingredients, which is in part why I have left a range for those items. I would describe this mix as moderately spicy, but not extremely so, even if using the larger numbers and including all three hot items. For a heavier spice, simply add more of whichever piquant aromatic you prefer.

The Fourth Season

IMG_0618.jpg
A typical January scene

Wild food gathering in the temperate parts of the world inevitably means coping with the problem of winter. What do you do? Can you do anything?

Yes, you can. Actually, there’s quite a bit going on out there. You just can’t see it. The earth and (eventually, often) the snow conceal most of it from view. The rest is made invisible by our long conditioning that “nothing happens in the winter” when it comes to plants.

The foraging literature itself is faintly discouraging when it comes to winter. They don’t tell you not to do it, but the implication is that it isn’t particularly worthwhile. Emphasis tends to be placed since the Gibbons era on enjoying the fruits of the other seasons of harvest, sitting back in your chair with a seed catalog, shelling hickory nuts and sipping on persimmon wine. The winter section of every foraging book is like an afterthought, usually accompanied by a list of plants so desultory that it squashes the imagination, rather than firing it.

Yet, we all know this is precisely what is needed in the winter. A spark, a kick, especially after the holiday madness/joy (or forced madness/joy) is over and our bodies start to go into hibernation mode. The key is in viewing winter as not a dead time or a rest time but as just another time, simply another season. The activity of plants and trees and fungi around you hasn’t stopped, it’s just different. Which means we need to learn to look differently, to reassess our environment with fresh eyes.

More than just being a neglected time of year to gather wild foods, winter is also overlooked when it comes to studying wild plants and fungi. But if our knowledge of nature is to expand alongside our use of its’ resources, then winter is an ideal time to study as well as collect. Not only will our attention be drawn to interesting things we normally overlook, like mosses and bracket fungi, but towards the familiar things that have changed in aspect. And while the idea of looking at a bunch of dried twigs and seeds might not seem as romantic or appealing as trekking through a spring woods, in reality it can tell us quite a bit about the life cycle of these plants. Ultimately, knowledge of a wild food resource through all of its seasons, all of its changes, is really what we are after : comprehension of the patterns of its growth and how it deploys its energy in order to make our best use of it.

IMG_4368.jpg
Uncharacteristic, but possible in a mild winter : Wild mustard forming its broccoli-like flowering head around Christmas time.

Over the course of the next few weeks I will be discussing in some detail how best to take advantage of the undervalued resource of wild food in winter, including profiles of specific plants and accompanying recipes. I hope to be able by springtime to have made my point that winter isn’t an “off” or “dead” season but simply the fourth season. Perhaps it’s a bit more humble than the others, but one well worth getting outside for, and certainly no occasion to hang up the basket. For now, as an antidote to all those discouraging lists of winter wild foods in foraging books here is one with just some of the things I have either gathered or noted as available in the past few winters :

Acorns

Sow Thistle

Cranberries

Juniper “Berries”

Chaga

Watercress

Maple – Sap / Syrup

Rosehips

Pine Needles

Oyster Mushrooms

Blackhaw / Nannyberry

Dandelions – Greens and Root

Daylily Bulbs

Crabapple (hardy species)

Chickweed

Wild Parsnip

Spicebush – Twig

Henbit

Marsh Yellowcress

Chicory

Evening Primrose – Greens and Root

Bittercress

Velvet Shank Mushroom (Enokitake)

Highbush Cranberry

Yarrow

False Strawberry – Greens

Sunchoke / Jerusalem Artichoke

Persimmon

Cleavers / edible Bedstraw

Wild Carrot

Hawthorn – Berries

Pennycress

Plantain

Wintergreen – Leaves and Berries

Ground Ivy

Northern Bayberry

Nettles

Common Mallow

Spruce – Tips

Hickory Nuts

Cattail – Root

Birch – Twig

Turkey Tail Fungus

Wild Radish – Greens and Root

Thistle Root

Wild Chervil

Teasel

Wapato

Hemlock Tips

Sumac Fruit

Linden Viburnum

Garlic Mustard

Wood Ear Fungus

Purple Deadnettle

Birch Polypore Fungus

Winter cress

Wild Mustard

and, of course, everyones favorite :

Field Garlic !!!

Milkweed Stew

image1 (1)

This is a very simple vegetable stew, perfect for a summer evening when a hot meal that isn’t too heavy or complicated is needed. The milkweed can be either added to the stew as is (perhaps chopped into pieces if the pods are large) or briefly blanched first. The flavor of the stew will be perhaps a bit better if the pods are added without preparation, but the cooking time will be longer. Foraging books abound with instructions to boil milkweed in multiple changes of water for lengthy periods of time but all of that is really unnecessary, and usually serves only to ruin the taste and nutritional value of this delicious, wholesome vegetable.

When selecting milkweed pods for this dish, avoid any longer than 2 inches or so and any ones that have particularly tough exteriors. The pods should be firm but not rubbery. Avoid pods that are soft or have obvious slits or discolorations, as the material inside will be dark and bitter.

In a wide, deep sauté pan heat :

2 tbs vegetable oil or other neutral oil or fat

Add and cook until tender and slightly browned :

5 oz onions, diced

Add and cook for one minute or so :

2 tbs field garlic or minced garlic

Add and cook until tender :

2 oz celery, sliced thin

Add and cook until tender :

5 oz bell or sweet pepper, diced

1 chile, diced fine

Add and cook until juices are released :

5 oz tomato, chopped

Add :

1 tsp fennel seeds, toasted

1 tsp cumin seeds, toasted

1 tsp wild parsnip seeds, toasted (optional)

5 oz milkweed pods (see introductory note)

Cook for several minutes, then deglaze with :

1-2 tbs sherry, shao xing wine or cooking wine

Add :

1 cup stock or water

3/4 cup sweetcorn, raw or fermented

Lower heat to simmer and cook until done. Add thickeners or more liquid as necessary.

Garnish with a bit of chopped fresh herb such as parsley, cilantro, basil or monarda.

This is an extremely simple recipe, and benefits from the addition of a dash of this or that as befits your taste and pantry. A little bit of nice olive oil added to the finished dish is quite lovely, as is a little soy or other seasoning sauce drizzled in as the stew thickens. The delicate flavor of milkweed pods (think okra combined with green beans) is best enjoyed in such simple preparations, but can be ruined if too many seasonings are added, so taste before tampering!