Fried Shallots & Shallot Oil

IMG_9988

I am a tremendous fan of any kitchen process that yields more than one useful pantry item, not to mention any recipe in which there is no waste. Fried shallots and shallot oil are a perfect example, creating two delicious products that can be used independently or together.

A common preparation in Vietnamese cuisine, this is simple and delicious enough to be used with any kind of cooking. Fried shallots are an even more delicious variant on fried onions, and homemade ones knock the socks off of those horrible dehydrated bits in the supermarket that often appear in 50’s style casserole recipes, usually alongside canned cream of mushroom soup. Shallots in general do not get enough love–this deeply-flavored allium can be used as a substitute for onions in sauces and many other dishes where a touch of sophistication is needed. They have a raw flavor that may be a bit intense for some, but become much more mellow and deep in taste when cooked.

Fried shallots can be used as a garnish or addition to all kinds of dishes cold or hot. They are used most extensively in Vietnamese cooking as additions to noodle bowls and soups, but will add a great flavor and texture to sandwiches, omelettes, spring and summer rolls, raw salads, cold composed salads (such as egg or potato salad), and so on. Heck, you can even use them to top that casserole–best to leave the cream of mushroom soup at the supermarket, though. One of my absolute favorite things to do with them is to lay them out with or without breadcrumbs on top of a pan of macaroni and cheese. Best of all is to serve the shallots and shallot oil as accompaniments to a large or festive meal, and allow your guests to experiment.

Shallot oil has as many uses as fried shallots, perhaps even more since it can be used as a cooking oil as well as a dressing or garnish. I enjoy the oil most as a part of a vinaigrette or dressing, as a last-minute flavor booster for soups or cooked vegetable dishes. It works wonders drizzled onto grilled vegetables, fish and meat. It can be substituted for olive oil or butter in cooked or cold dishes such as pasta salads, egg dishes, bean and grain salads, and so on. One of my favorite things to do is to add it to mashed potatoes instead of butter, and then garnish those potatoes with some of the fried shallots as well.

IMG_9991

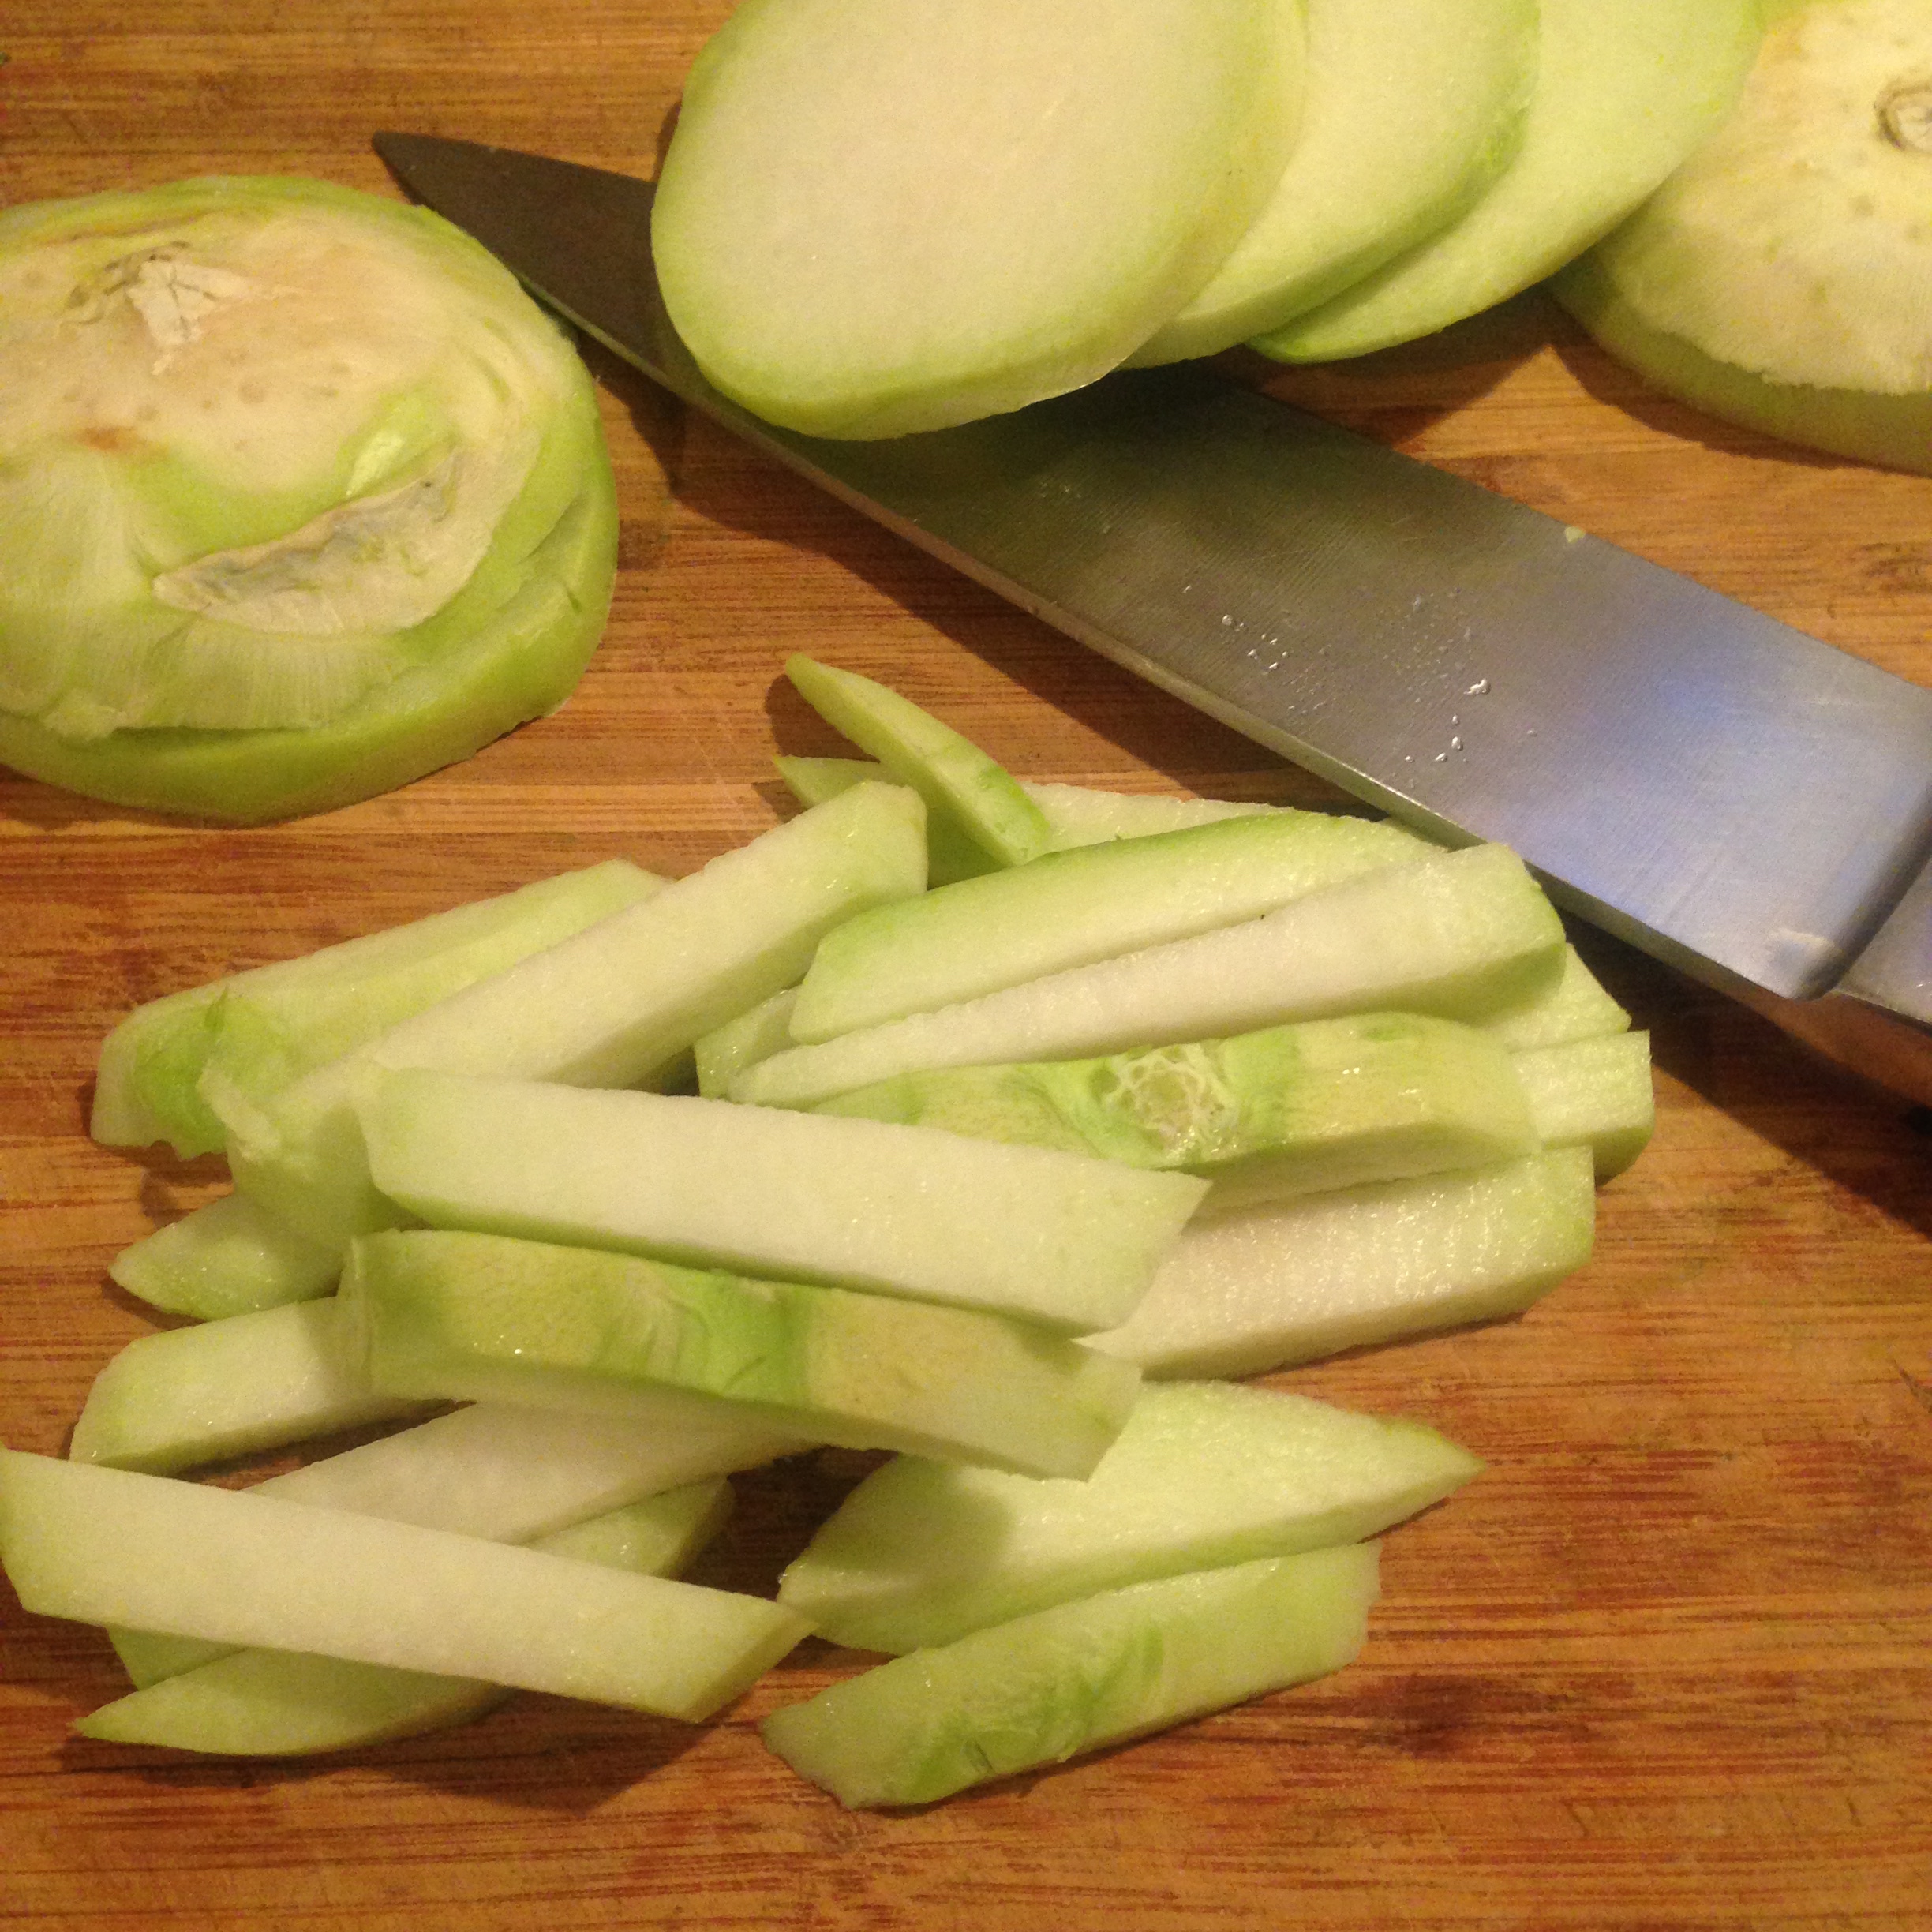
To make fried shallots and shallot oil, peel and slice 8 oz (1/2 lb) of shallots into slices about 1/8th of an inch thick. You can go a bit thicker, but be careful not to slice them too much thinner or they will burn up in the oil. Measure out a cup and a half of oil and pour into a wok, deep skillet or wide saucepan. I use a pan called a sauteuse for this and many other preparations. It’s flat like a saucepan, wide like a skillet and very deep with raised sides. An ordinary skillet with work fine provided it’s not super shallow. Peanut oil is most traditional, but a neutral oil such as sunflower or vegetable will work as well. Often I will use a mixture of half peanut and half vegetable for a well-rounded flavor.

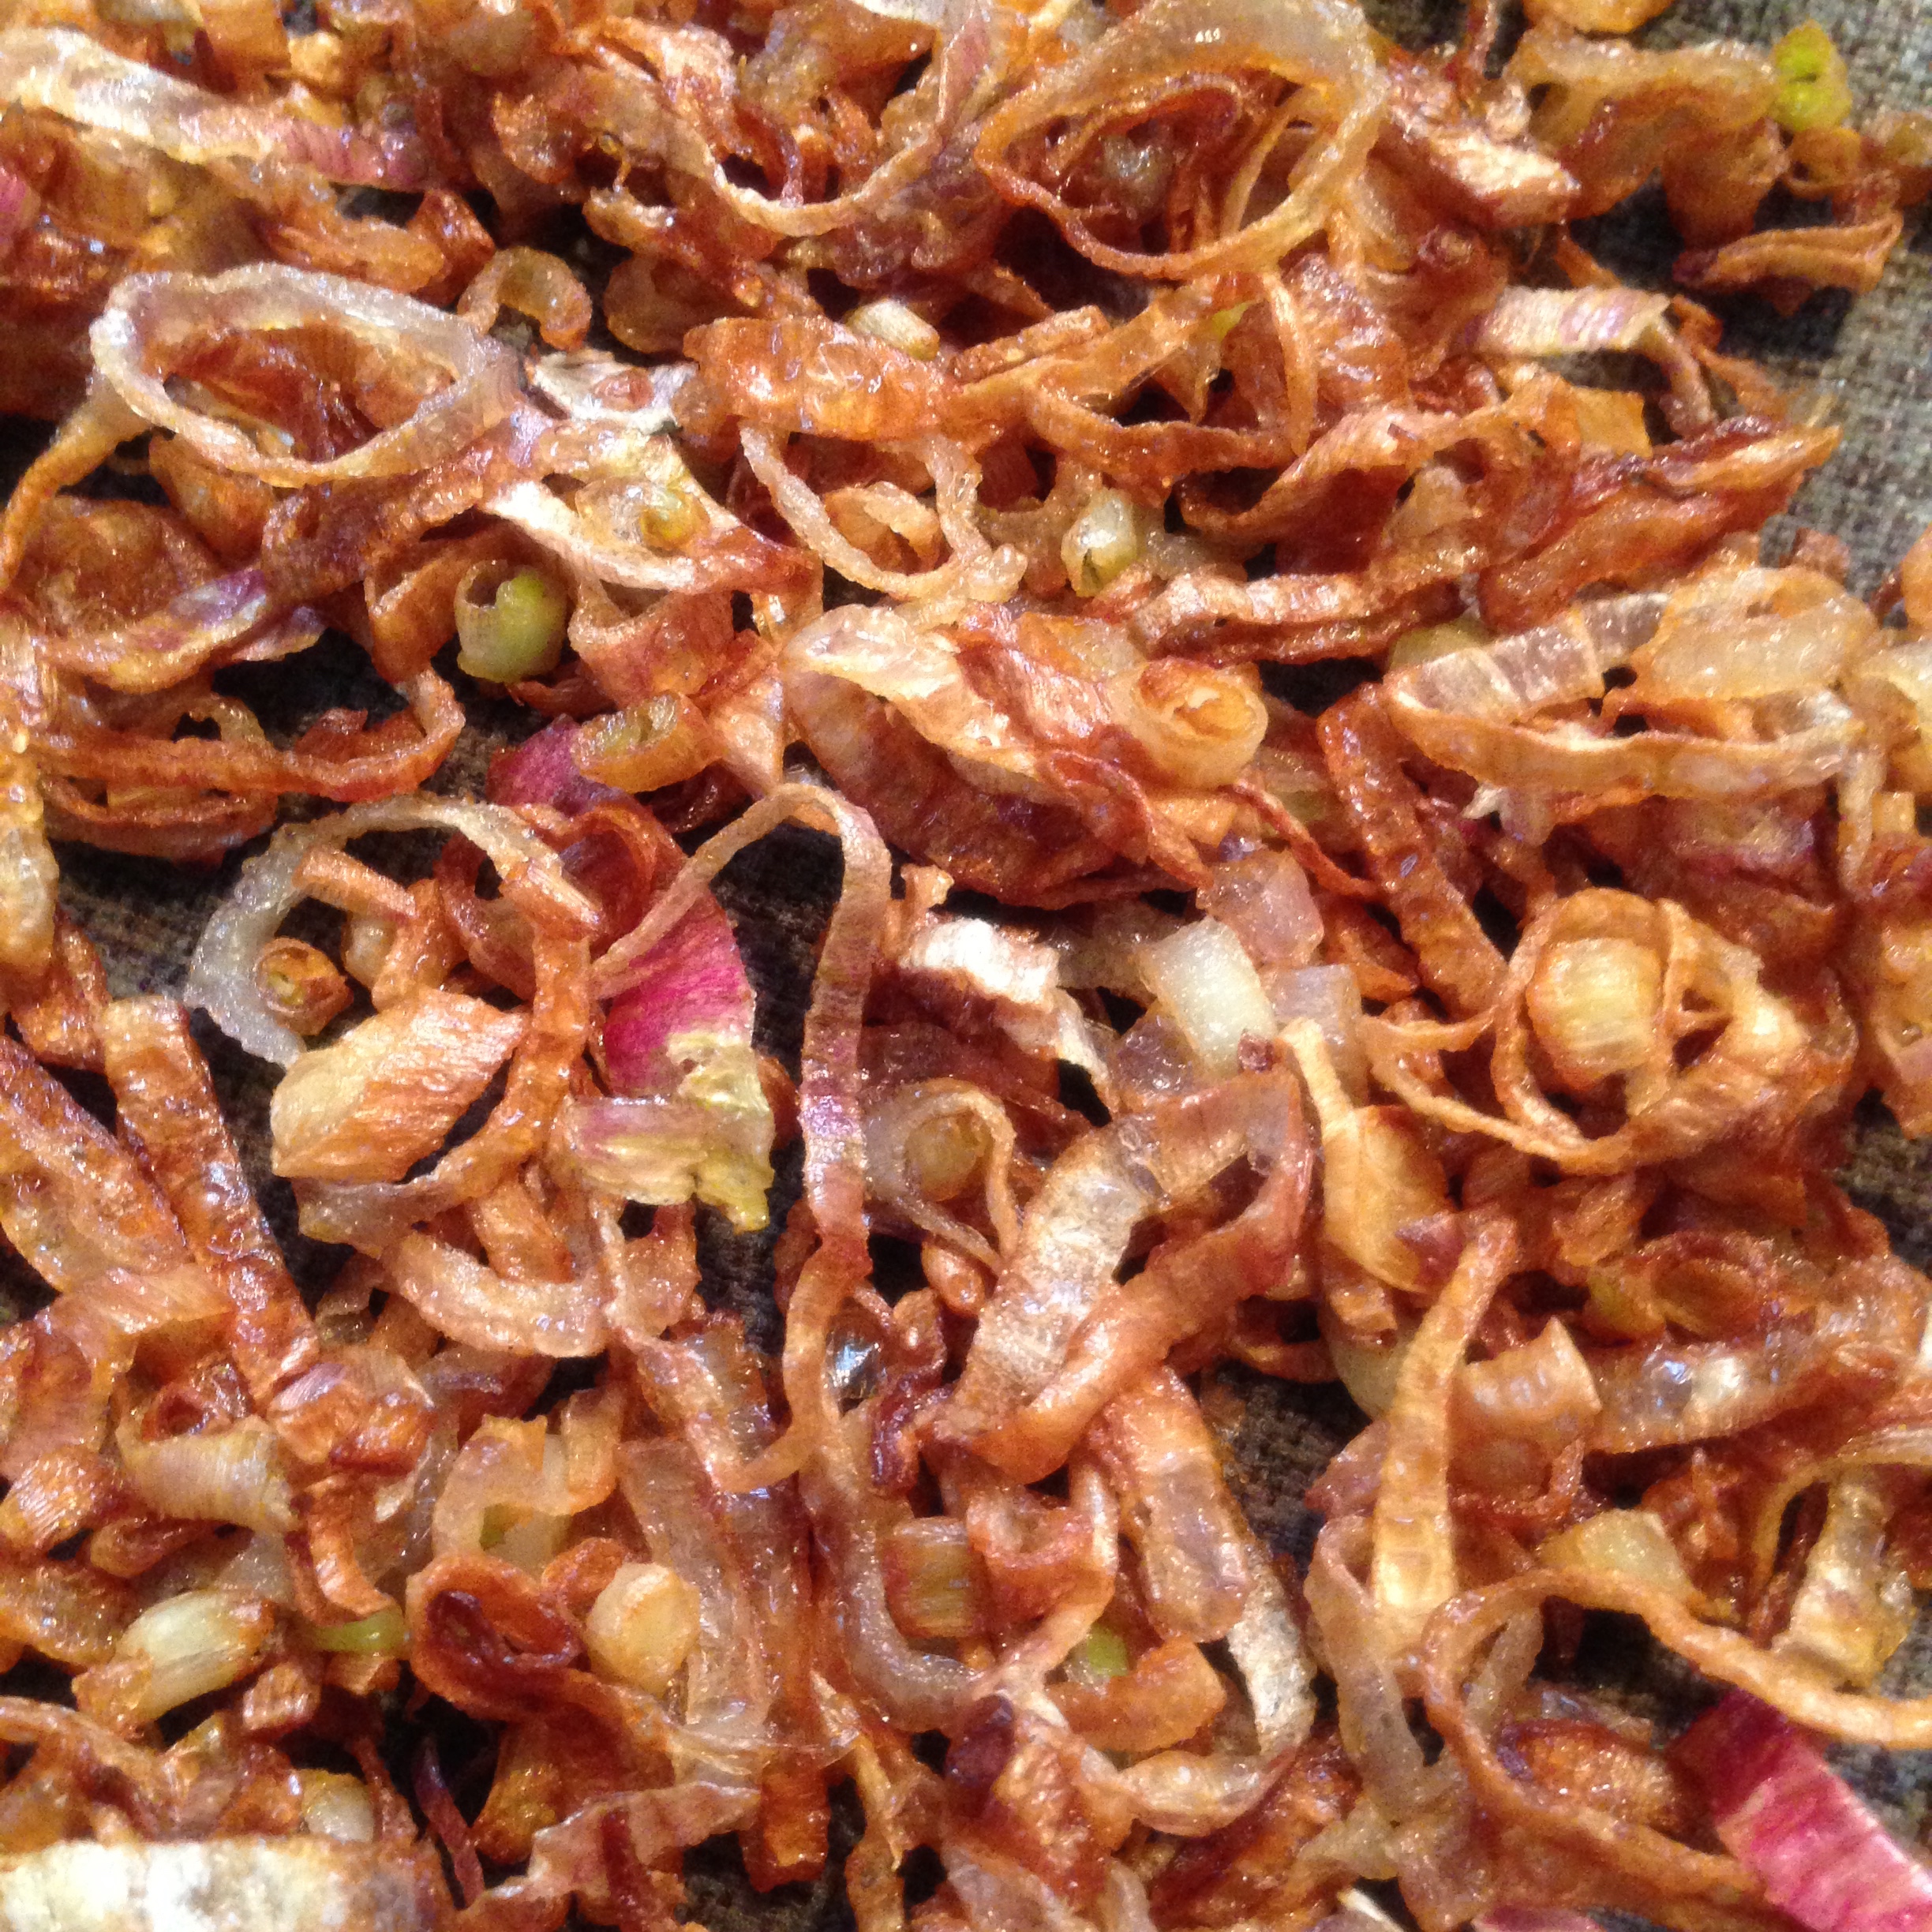
Heat the oil over medium-high heat until it is quite hot. Test the heat by dropping a cube of stale bread in–if it sizzles up right away your oil is ready. Add the shallots and fry for a minute or two. Then reduce the heat to medium-low. There is no pre-set or perfect time for frying the shallots. They are done when they are nicely browned but not burned. A good rule is to remove them from the oil before you think they are finished. They will cook a bit more after being removed from the oil, and a little bit undercooked is far preferable to burnt. Overcooked shallots have a strong, bitter flavor that is unpleasant. They will also impart a bitterness to the oil if burned.

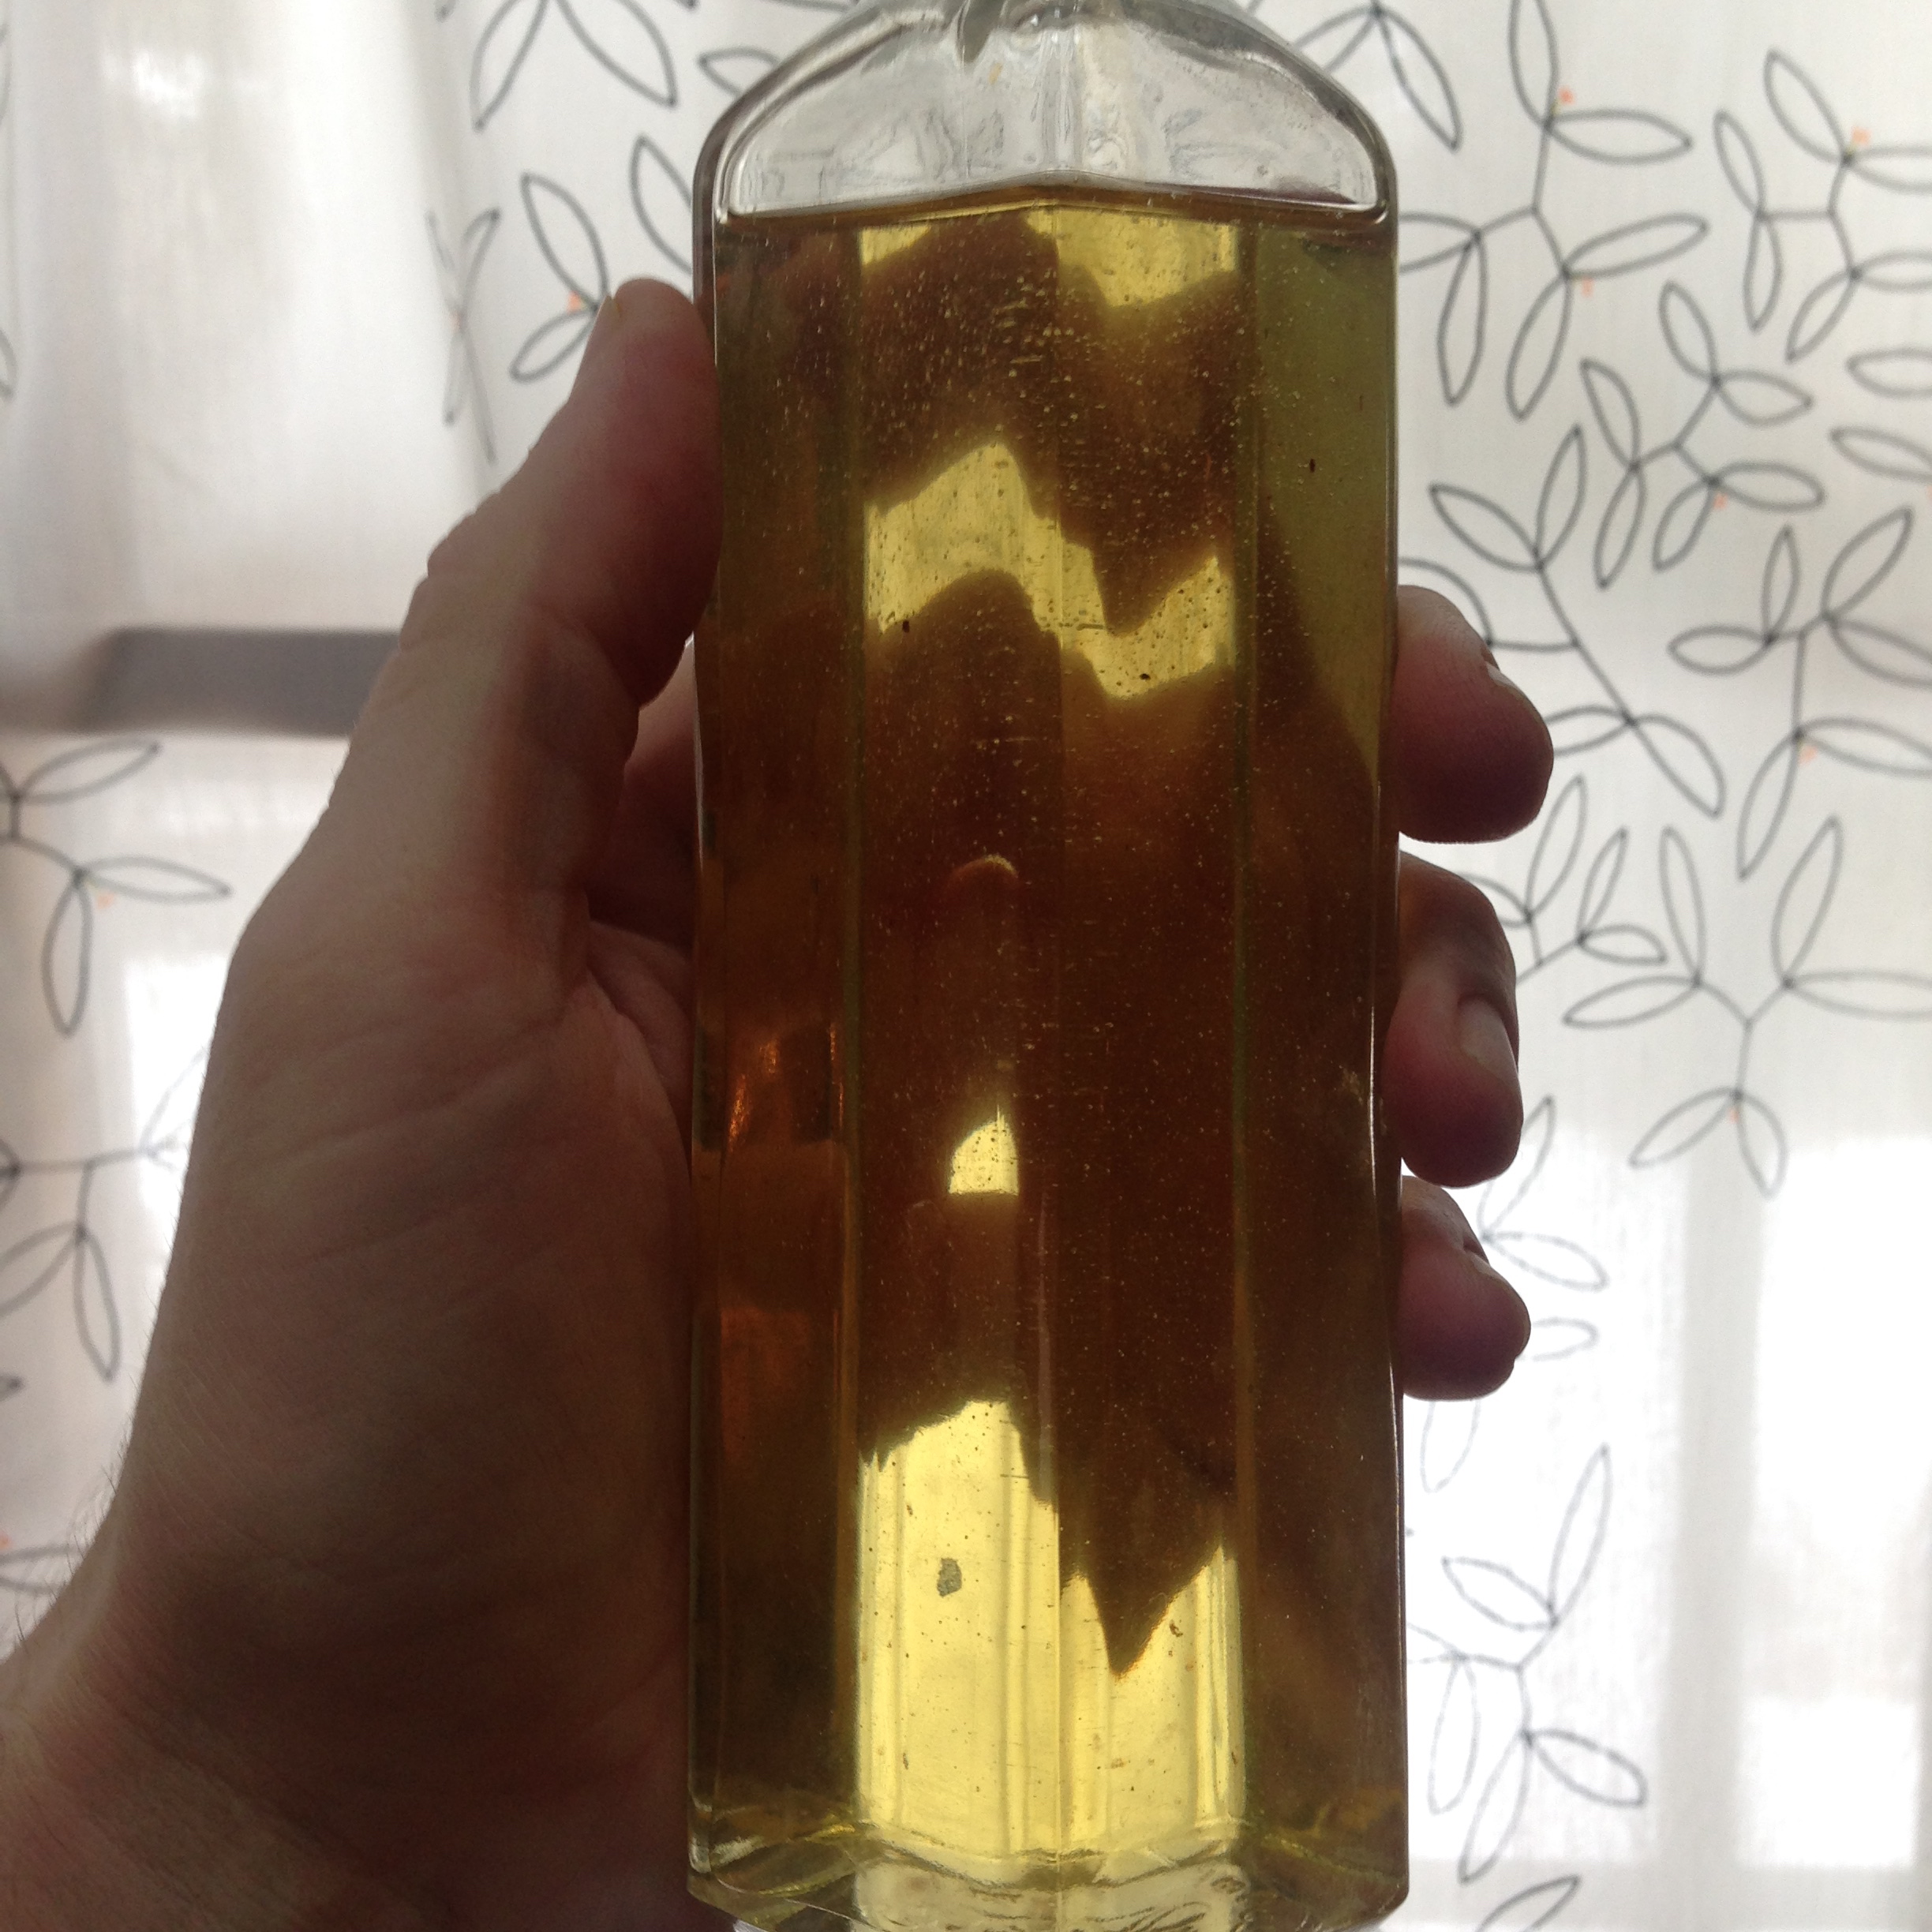
To remove the shallots, I use a spider or metal spatula with drainage holes. Tongs will also work, but may damage the crispy texture of the shallots. Place the fried shallots on a paper or kitchen towel placed on top of a plate. Allow to cool, and store at room temperature in plastic or ceramic with a plastic wrap covering. Allow the oil to cool and strain through wire mesh or cheesecloth into a jar. This can also be kept at room temperature, but will eventually become rancid. You may of course refrigerate it, but of course allow for some time to sit out at room temperature before using. The fried shallots may be refrigerated but I find this destroys their texture. They usually don’t last long enough in my house to spoil, even when stored at room temperature. They should last at least a week if covered loosely with plastic wrap.

This procedure can also be used to create other fried garnishes and flavored oils. A very good one is made of spring onions, perhaps with ginger or garlic added. Thin slivers of garlic are also popular, and traditionally used as a garnish for fish and seafood soups as well as salads and noodle dishes.

A final word of caution : the oil will become rancid over time, so always make sure to taste it before bringing it to the table.

Cream of Roasted Cauliflower Soup

IMG_9718
Cream of roasted cauliflower soup, garnished with roasted cauliflower florets, cilantro and scallion greens.

This is relatively complicated soup to prepare, but well worth the effort. It basically consists of three separate procedures : roasting the cauliflower, toasting and grinding the spices, and composing and pureeing the soup. You could just as well serve this soup rustic-style (without pureeing), but I think its’ worth the extra time and energy to puree for a more elegant soup, one that would happily grace the most sophisticated table. The fact that it is so simple, rich and creamy and also vegan may come as a surprise to some–it’s a great dish to introduce to people who may be skeptical about how deep a flavor one can get from healthy, vegetable-based cuisine.

First, prepare Roasted Cauliflower & Cauliflower Greens using a 2 pound head of cauliflower. This can be done ahead of time, as far in advance as a couple of days. You may try that, I usually can’t resist gobbling up the roast cauliflower as is, so I have to move quickly if I’m making the soup!

Second, make the spice mix.

IMG_9708
Spice mix for cream of roasted cauliflower soup : coriander, fennel, cumin, urad dal.

Place in a small skillet over medium-low heat :

1 tsp whole fennel seed

2 tsp whole cumin seed

1 tsp whole coriander seed

1 tsp urad dal (white gram bean) (optional)

Toast the spices until slightly colored and aromatic. Whole spice seeds burn easily, so keep a close eye on them and shake the pan occasionally. Allow to cool and then grind in a mortar and pestle or spice grinder.

Thirdly, assemble the soup.

In a large saucepan or deep sautée pan with raised sides, bring to heat over medium heat :

2-3 tbs olive oil

Add :

5 oz celery, chopped fine

6 oz onion, chopped fine

2 oz scallions (white parts only), chopped fine

(You could just as easily use another mix of onions here, providing they come out to about the same weight. A good option would be a mix of shallots and spanish onions, or mix of leeks and onions, or ramps and scallions, etc. Look for a total of 8-10 oz. for best flavor)

Sautée, stirring occasionally, for 5 minutes or so, then add :

2 oz chiles, chopped fine

Sautée, stirring occasionally, for another ten minutes or so, or until all the vegetables are tender.

Add and quickly stir in :

2 tbs flour

Cook for one or two minutes to remove the raw flour taste.

Add, slowly, one half cup at a time, stirring all the while :

8 cups of vegetable stock (or whatever stock is handy/preferred)

Bring the soup to a simmer.

Add the ground spice mix to the soup. Add salt and freshly ground black pepper (optional) to taste.

Chop the roasted cauliflower and greens into small pieces, reserving any if desired to use as a garnish. Add to the soup.

Simmer at a low to medium simmer for 30 minutes or so, until all the vegetables are nicely tender and the liquid has reduced a bit.

Allow to cool.

Puree the soup in small batches. If a completely emulsified soup is desired, pass the soup through a metal strainer or cheesecloth.

Return the pureed soup to heat before serving. Adjust for seasonings. If the soup is too thin, cook to reduce to the desired consistency.

IMG_9715

Serve this soup as hot as possible. It can be prepared in advance and served days later if desired.

The spices used give this soup a mellow, complex flavor that accentuates the natural taste of the cauliflower. When serving, choose garnishes that add an element of sharpness or freshness to the soup. Of course, if you have reserved any small florets of roasted cauliflower, you can add those. I usually heap them in the center of the bowl and then add greenery around them. Thinly-sliced scallion greens or field garlic, cilantro or another fresh green herb, raw or prepared chiles are all excellent choices. A dusting of paprika or fresh ground chile powder will show up nicely against the creamy beige of the soup, as will black sesame or nigella seeds.

Though it seems deceptively simple (if somewhat elaborate in preparation) in terms of ingredients, this is really a very rich and hearty soup perfect for the end of winter. One can prepare many delicious “cream of” vegetable soups in a similar fashion, choosing spices and seasonings most appropriate to the vegetables involved, without ever desiring to add actual cream to the dish.

Pickled Kohlrabi

IMG_9836

Assemble in a clean glass quart jar :

1 lb kohlrabi bulbs, peeled and cut into batons (as pictured below) or shreds

4 oz onion, peeled and cut into thick slices

1 star anise, whole

2-3 hot chinese dried chiles or 2 tsp red pepper flakes

1 tsp whole mustard seed

1/2 tsp whole sichuan peppercorns

Heat in a small saucepan until sugar and salt are dissolved :

2 cups vinegar (see notes below, a mix of vinegars is best)

1/4 cup sugar

1/2 tsp salt

While still hot, pour the vinegar-sugar-salt solution into the glass jar. Allow to sit until cool, then cover with a cap and refrigerate. Ready to eat in 24 hours, best after three or more days.

IMG_9014

Roasted Cauliflower and Cauliflower Greens

IMG_9707_2

Cauliflower is a delicious vegetable that is too often ill-served by the the one preparing it. The major culprits are boiling (which accentuates its’ heaviness and high water content) and pairing with cream and/or cheese (which accentuate its’ blandness). Prepared with some attention to its’ particular nature, cauliflower need be neither heavy nor bland. The high water content is a problem best handled with high heat and a bit of special attention.

This simple dish is one of my favorites to make, one I could happily eat any day. It can be endlessly improvised upon in terms of seasoning, but an even better idea is to prepare it and turn it into something else. Chop some up with olives and pickled onions and peppers and add more oil for a tapenade. Puree it with cooked onions and celery to make a delicious, creamy soup. Add large chunks of pickled vegetables and cooked potatoes and spices and make a potato salad version of aloo gobi. Or simply chop up the cauliflower and greens and use in a flatbread or omelette.

IMG_9700

Preheat oven to 450°

Remove the greens of the cauliflower. Chop these into pieces no larger than an inch and a half. Wash and pat dry.

Core the cauliflower. Cut away the base of the stem and any dirty bits. Chop the core into cubes of about one inch square.

Separate the cauliflower into florets. If the florets are large, slice them in half. If the florets are exceptionally large, cut them into thirds. You want large, flat-ish pieces for this recipe, so cut lengthwise and try to maximize surface area. Very small florets should be avoided, they will just burn up.

Toss the florets, greens and stem pieces together with olive oil to cover. Make sure that the cauliflower is well-coated but don’t worry about getting every inch. Resist the urge to use too much oil, it will impeded the roasting process.

Lay the coated cauliflower and greens in a large, heavy, deep roasting pan. Allow for space between each piece (as pictured above). If you feel like you are overcrowding the pan, roast in multiple batches.

Place the pan in the oven.

After five minutes, remove the pan and shake it a few times, tossing the cauliflower as much as possible but making sure that it is all still flat in one layer. Return to oven.

After five minutes (ten minutes total), remove the pan and place it on a trivet. Using tongs or careful fingers, turn the florets. Sprinkle with kosher salt, taking care not to use too much. Return to oven.

After five minutes (fifteen minutes total), remove the pan and place it on a trivet. Turn pieces if necessary. Add freshly ground black pepper to taste. Adjust for salt if necessary. Return to oven.

After five minutes (twenty minutes total), remove the pan and place it on a trivet. Test for doneness by cutting into one of the thickest florets. Taste if necessary. If it seems thick and stodgy, return to the oven for another few minutes.

At this stage you may add oil, if you feel that the cauliflower is too dry. I haven’t found it to be necessary. The cauliflower usually emerges tender inside from the combination of high water content and high heat, while the surface areas have a fine crispness that would be blunted if extra oil were added.

Serve this immediately or at room temperature. Hell, it’s good cold. Four ingredients, people.

As previously mentioned, this can be endlessly varied in terms of seasoning. One of my favorite things to add is paprika, especially a strong characterful Spanish or Hungarian paprika, hot or sweet, smoked or not. I would add any powdered spice ingredient with the salt, and make sure to give a more vigorous shake. One could also add powdered spices or dry herbs to the oil that the cauliflower is tossed with. I would add dry herbs in the last five minutes of cooking, fresh herbs only when the cooking was finished.

This is a dish exceptionally suited to buffets, meals of many small dishes, or meze / tapas / antipasto type spreads. Since it is still excellent at room temperature, it’s perfect for longer parties and more relaxed occasions. It also pairs well with a hearty, complex main course, and can stand up to many a sauce. It is also a great alternative to starchier sides such as roast potatoes, and makes an excellent second vegetable alongside anything green.

You will notice that the greens and stem of the cauliflower are used in this recipe. Don’t discard them, they are quite tasty and mild. All Brassica plants (cabbage, kale, mustards, broccoli, etc.) are edible from root to seed. Some parts of some plants are too bitter to be palatable, but most simply require the proper preparation.

Tomato Sauce with Winter Vegetables

IMG_9330

Another extremely simple winter tomato sauce recipe, in which you can use whatever winter vegetables you might have around and canned tomatoes to make a sauce that can be served either thick and chunky or pureed.

The first thing to do is strain the tomatoes, reserving the liquid. You will want to use about 2 cups / 1 L. of tomatoes and juice, or the contents of a 35 oz can. I usually also squeeze or cut open the tomatoes to let the juice inside them out, but this isn’t strictly necessary. Keep the juice and drained tomatoes separate until needed.

Next, prepare your vegetables. I use between 4 and 5 ounces each of three different vegetables. You should shoot for roughly equal amounts of each vegetable. First I use either celery or onion, chopped into medium size dice. Then I peel and cut into medium dice either carrots or parsnips. Lastly I prepare either kohlrabi, turnip, long radish or celery root in pieces of the same size as the other ingredients. If you like garlic in this, add an ounce or so chopped very fine. Remember to keep all your vegetables separated, as they require different cooking times.

Add two to three tablespoons of olive oil to a wide sautée pan, preferably one with deep sides. Bring the oil to heat over medium heat. Add the vegetables one at a time and cook each until softened. The best order is onions or celery to start, then carrot or parsnip, then the last. Cook each vegetable just until softened, about 5-10 minutes for each. Add the garlic last of all, and cook for only a few minutes before proceeding. You may also wish to add bay or bayberry leaf or whole sprigs of thyme or rosemary at this point, taking care to remove them before pureeing or serving the sauce.

Once the garlic has been cooked, add the whole tomatoes to the pan, breaking them into chunks with a flat-ended wooden or plastic spatula. You may chop them prior to adding to the pan, but I always find that such a mess and prefer to simply break them into pieces while they sautée. Cook the tomatoes for at least five minutes, keeping the heat around medium.

IMG_9325

Add the reserved tomato juices to the sautée pan. At this point, you may wish to add stock or water to thin the sauce out. I would only recommend this if it is your intent to puree the sauce. With about 5 oz of each vegetable, this makes a substantial quantity of sauce, enough for more than one pound of pasta. I will often serve the sauce thick with some pasta, then puree whatever is leftover with added stock to make a sauce that I can put on eggs or a half-pound of spaghetti. One could also add chiles or cream or another ingredient to this newly-pureed sauce for the sake of variety.

Whether you add tomato juice with stock or water or nothing else, the liquids must be cooked down slightly. I usually leave the pan at a slow, steady simmer for about 45 minutes to an hour, stirring occasionally. Less can be fine, but the flavor will not be as rich. In any event, make sure before serving that all the vegetables are cooked through and as tender as you would like them. Finally, add salt, freshly ground black pepper, and dried or fresh herbs to taste. With a winter sauce like this I will often add a quick crumble of marjoram or oregano or sage, depending on what herbs I’ve added during the cooking stage.

Serve as-is or puree and serve over pasta, with or without cheese.

Tender Cabbage with Black Mustard & Turmeric

IMG_9290

In a very large skillet which you are able to cover, heat 3 tbs of neutral oil or ghee over medium-high heat.

When hot add :

1 tbs black mustard seed

Cover dish and allow black mustard seed to pop. When the seeds begin to settle, add:

8 oz onion, very thinly slice.

Reduce heat to medium and cook until softened, stirring occasionally.

Add :

1 lb 4 oz cabbage, thinly sliced

Salt to taste

Cook until wilted, stirring occasionally.

Add :

1 tbs sherry, white wine or shao xing wine

2-4 oz fresh chile, small dice

1 oz garlic, minced

1 tsp turmeric powder

Allow the alcohol to cook off, then reduce the heat to low and cover the pan.

Cook, covered, until the cabbage is tender and soft, usually 45 minutes or so.

Taste and adjust seasonings. Serve hot or keep warm, garnish with cilantro or parsely, chives or field garlic snips, fresh chiles or grated ginger.

An excellent side dish which highlights the tenderness of properly-cooked cabbage and the subtle flavors of black mustard seed and turmeric root. This dish can also be made with grated fresh turmeric, which can be added at the same point in cooking. Many people who claim not to like cabbage enjoy a tender cabbage dish like this, which brings out the natural sweetness in cabbage through slow cooking. The spices used are mild and complementary, rather than overwhelming. I would vary the level of chiles depending on what else I was serving this with–usual just a little chile for flavor, this dish is unassuming enough to be used as a side dish in a meal of almost any cuisine, vegetarian or not. More chiles can be added if the dish is to be served as accompaniment to a strong-flavored main course such as meat or oily fish.

Key : The key to this recipe is to cook the cabbage thoroughly until tender, for as long a time as it takes. This is a good dish to make a day ahead or earlier in your cooking, and will be just fine reheated or kept warm.

Banana Bread with Black Walnuts, Vietnamese Cinnamon & Nutmeg

IMG_9301

Preheat oven to 350° F.

Whisk together in a large bowl :

1 1/3 cup all-purpose flour

1/4 tsp baking powder

1/2 tsp baking soda

1/2 tsp salt

Whisk together in a small bowl :

1/2 cup neutral oil (sunflower or vegetable is best, 1/4 cup can be replaced with walnut oil)

1/2 cup soy or rice yogurt (or regular yogurt)

Add wet ingredients to dry ingredients, along with :

1/2 cup black walnuts, chopped (or 1/4 cup almonds and 1/4 cup English walnuts)

1 1/4 cup banana, mashed or chopped with :

1/4 cup sugar or palm sugar (optional)

1 tsp vanilla

Fold all ingredients together, without overmixing.

Place in a lightly oiled loaf pan.

Dust top of bread with nutmeg and vietnamese cinnamon, freshly grated and ground if possible.

Bake until a toothpick inserted into the loaf comes out clean, usually an hour.

Allow to rest in pan for ten minutes before removing from pan to cool on a rack.

This makes a soft, delicious dairy-free, vegan banana bread. If desired, you can use a dairy-based yogurt. There doesn’t seem to be much of a difference in flavor between the two, the yogurt is mostly added for consistency. The bread is soft and cakey, make sure that the pan is oiled before baking and that you allow the bread to cool a bit before removing from the pan or cutting into it.

I think this is easily the equal of any banana bread made with milk and butter, in fact I would argue that omitting those ingredients makes for a less “bready” treat, tasting mostly of bananas, nuts and spices.

Serve warm or cool for breakfast with an herbal or forage tea or coffee. For a decadent dessert, toast lightly in an oven and top with a spoonful of vanilla or caramel ice cream.

Winter Lentil Salad with Warm Spices

IMG_9270_2

Boil as you would pasta (in a large, boiling salted kettle) :

1 cup green or brown lentils

The lentils are done when they are al dente like pasta, still firm to the tooth but not troublesome to bite through.

Drain lentils thoroughly and quickly toss with :

2 tbs extra virgin olive oil

1 tbs vinegar of fairly light character (i.e. sherry, cider, malt, white wine, rice rather than red wine, balsamic or black)

Salt to taste

Add to lentils :

3 oz. celery and celery leaf, chopped fine

4 oz mild or sweet onion, sliced thin or same amount sharp onion soaked and squeezed in several changes of water

2 oz freshly chopped medium-heat green chile such as jalapeno, or mix of hotter and milder peppers

2 tsp ground cumin

1-2 tsp hot paprika or hot chile powder such as chile de arbol

1 tsp dry mustard

Stir thoroughly, allow a few minutes to settle, then taste and adjust seasonings. At this point add more olive oil and vinegar if necessary, it likely will be. This is very much an “add to taste” recipe, especially in terms of the dressing. I always add a bit at a time, let it settle, taste again. If it seems underwhelming when I am serving it, more can always be added. In particular, lentils will take a lot of both ingredients, much like the similarly mealy potato.

This can be served still warm as a side dish or a room temperature as part of a meal of mixed plates. It can be used as part of a meal of small plates or tapas, or as a side dish served with a more substantial meal. It is best as an accompaniment, rather than its’ own course. It fits well into meals of North African, Mediterranean, Indian, or non-denominational Vegetarian slant. It is also excellent served with a hearty winter roast and root vegetables.

I call it ‘warm’ rather than spicy in terms of the balance represented in this recipe. It can be freely made “spicy,” by simply adding more chiles and dry spices. This is a very adjustable recipe, and will often be altered or added to based on what I am serving it with. Garnish it with something complementary to the meal that it accompanies : fresh cilantro for Indian or Southeast Asian fare, an extra splash of olive oil and sprigs of parsley for Greek or Italian, etc.

Just as any experimentation in garnishing will likely work with such a simple, adaptable recipe, one could go further and incorporate all kinds of ingredients at hand to the salad itself : Some wild mushrooms, quickly sautéed with oil and thyme. A couple of small cucumbers, deseeded and neatly chopped. Some tahini or miso paste. A squeeze of lemon and a pair of minced anchovies. Crispy fried slices of garlic. Black walnuts and a splash of walnut oil. And so on…

In a similar vein, this is a recipe meant for constant tasting and adjusting by the cook. I never measure any of these ingredients when I make this kind of salad except when testing a recipe. I am always tasting, adjusting, tasting. So should you, when making a dish like this. Taste each time you add a new ingredient or three, taste and adjust accordingly. Trust your judgement. Trust your taste. You’re the one who decides what’s best.

Warm Kale Salad

IMG_8074

Combine and whisk together in a large bowl :

2 tsp toasted sesame oil

2 tsp prepared mustard, preferably of high quality

1/8-1/4 tsp tamari

1/4 tsp vinegar (sherry, rice wine or black vinegar are best)

Dash of Maggi or Golden Mountain Seasoning (optional)

pinch or so of salt

1/8 tsp sichuan peppercorns (or black peppercorns), freshly ground or crushed

Take :

10-12 oz kale leaves, de-stemmed but not chopped

Place in a large pot of boiling, salted water for 2-3 minutes, pushing the kale down and covering the pot with a lid.

Drain kale immediately. Then quickly wrap kale in a thick kitchen towel and squeeze as much liquid from the kale as desired. I usually don’t fuss over this too much, just making sure that the larger portion of the water absorbed by the kale has been squeezed out.

Place the kale on a chopping board and roughly or finely chop it depending on your tastes. Toss immediately with the dressing, turn out into a bowl and serve with fork or chopsticks. Garnish with sesame seeds or–even better, a Japanese seaweed-sesame seasoning combo like Nori Komi Furikake.

IMG_9071

This is one of the simplest ways to serve kale, accompanied only by seasonings selected to bring out its’ naturally complex and hearty flavors. This feeds two people as a starter and one person as a hearty lunch, accompanied perhaps by a piece of fruit or hunk of bread.

Kale salad is as ubiquitous as bad driving in the Northeast, too often it is either matched with incongruous ingredients (radish? blueberry?) or just not properly cooked. I find kale best lightly boiled like this (or even steamed if you can muster the energy) ideal for a salad, served either warm or cool. Now, if I was to serve this particular salad cool I would add perhaps a bit more of the liquid ingredients, but warm these proportions are just perfect.

Key – The key to this recipe is to proceed as quickly as possible once draining the kale, as maximum heat in the greens will cause the flavors of the dressing to blend better and come out more.

Kohlrabi With Apple and Herb Dressing

kohlrabiandapple

Combine :
1 lb. kohlrabi, cut into large dice
1/2 tsp kosher salt

Let sit for 1/2 hour or longer

Combine :
1/2 cup strained or greek-style yogurt (or thick soy yogurt)
2 tbs walnut or olive oil or a mix of the two
1 tbs chopped chives
2 tbs fresh mint, chopped fine
2 tbs fresh italian parsley, chopped fine
1 tbs (or more) garlic, minced
ground white pepper to taste
1 or 2 small chiles, chopped fine
4 oz. firm-fleshed apple, large dice

Toss with kohlrabi and serve.


A lot of people react negatively to kohlrabi. I love it, and eat raw slices of it. But then I eat raw radishes, too, so… for those who don’t care as much for it, this preparation softens its’ intensity with apple and fresh mint. The yogurt should be thick, but even if it is, this can be a somewhat “loose” salad. Keeps well, tastes better on the second day.